Email filters allow you to automate how your server handles incoming mail. You can use them to automatically sort newsletters into specific folders, block emails from annoying senders, or redirect important invoices to your accounting team.
This guide explains how to set up a "User Level" filter, which applies to a single email address.
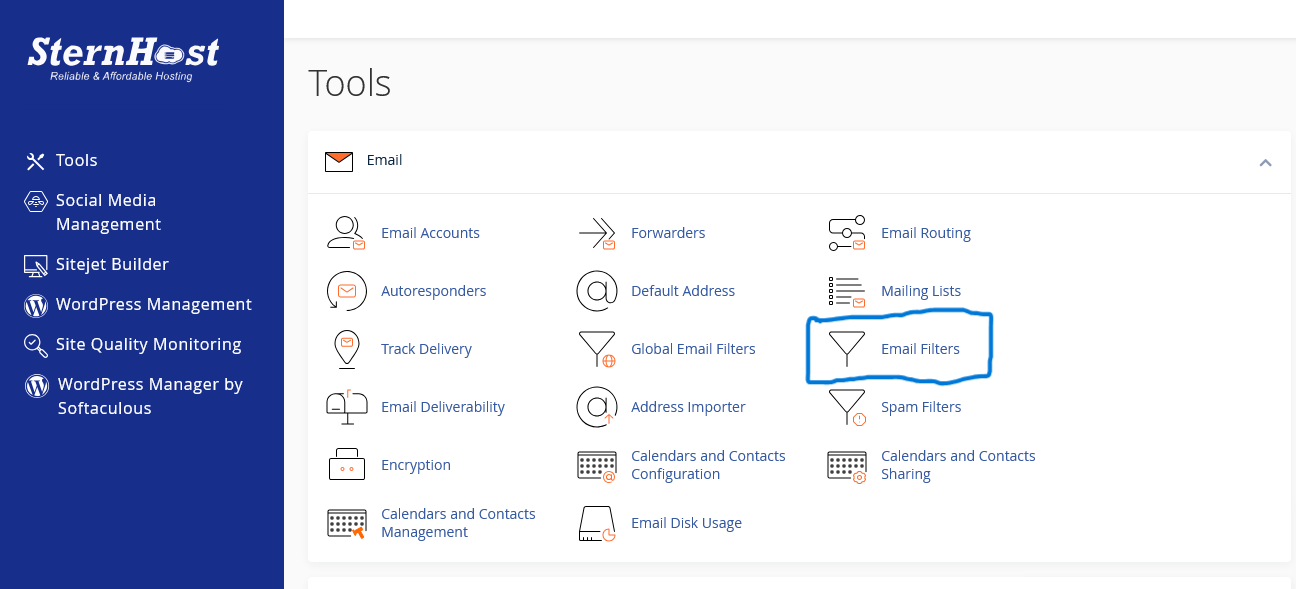
Step 1: Access the Email Filters Menu
-
Log in to your cPanel dashboard.
-
Locate the Email section.
-
Click on Email Filters.
-
Note: Do not confuse this with "Global Email Filters," which applies rules to every email account on your domain. We generally recommend "Email Filters" for safer, account-specific control.
-
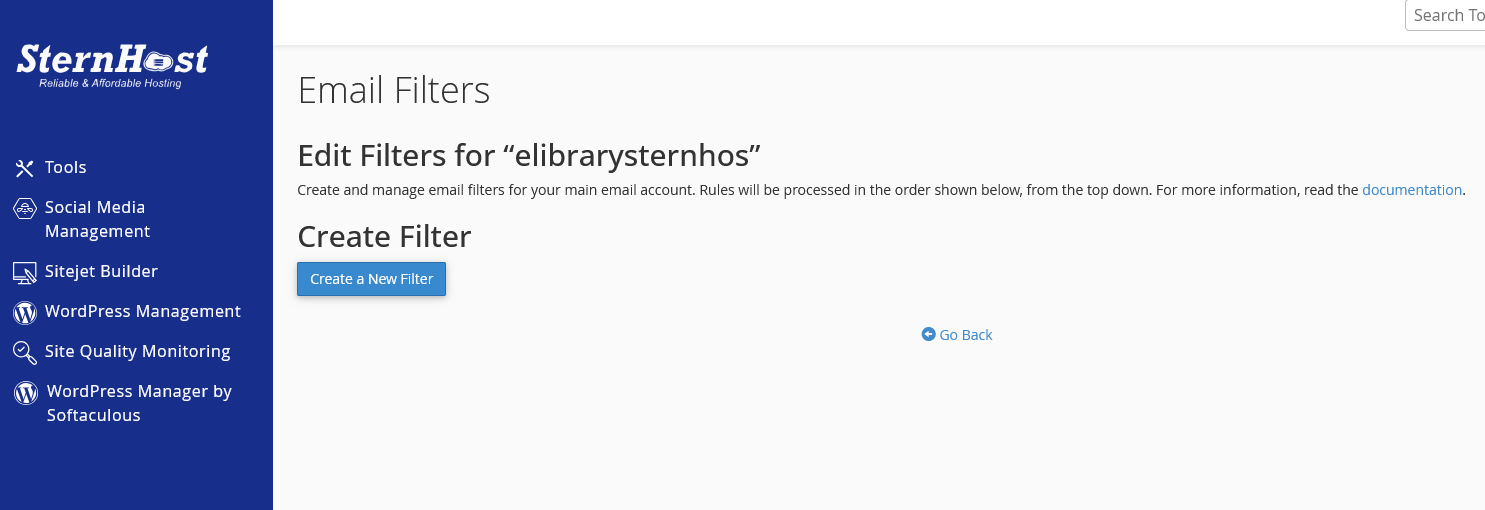
Step 2: Create a New Filter
-
Find the email address you want to manage (e.g.,
info@yourdomain.com) and click Manage Filters. -
Click the Create a New Filter button.
-
Filter Name: Give it a clear name (e.g., "Block Spam Words" or "Move Invoices").
Step 3: Set the Rules (The "If")
This tells the server what to look for.
-
First Box: Choose what part of the email to check (e.g., Subject, From, or Body).
-
Second Box: Choose the condition (e.g., Contains, Equals, or Begins With).
-
Third Box: Type the keyword.
-
Example:
Subject...Contains...Invoice
-
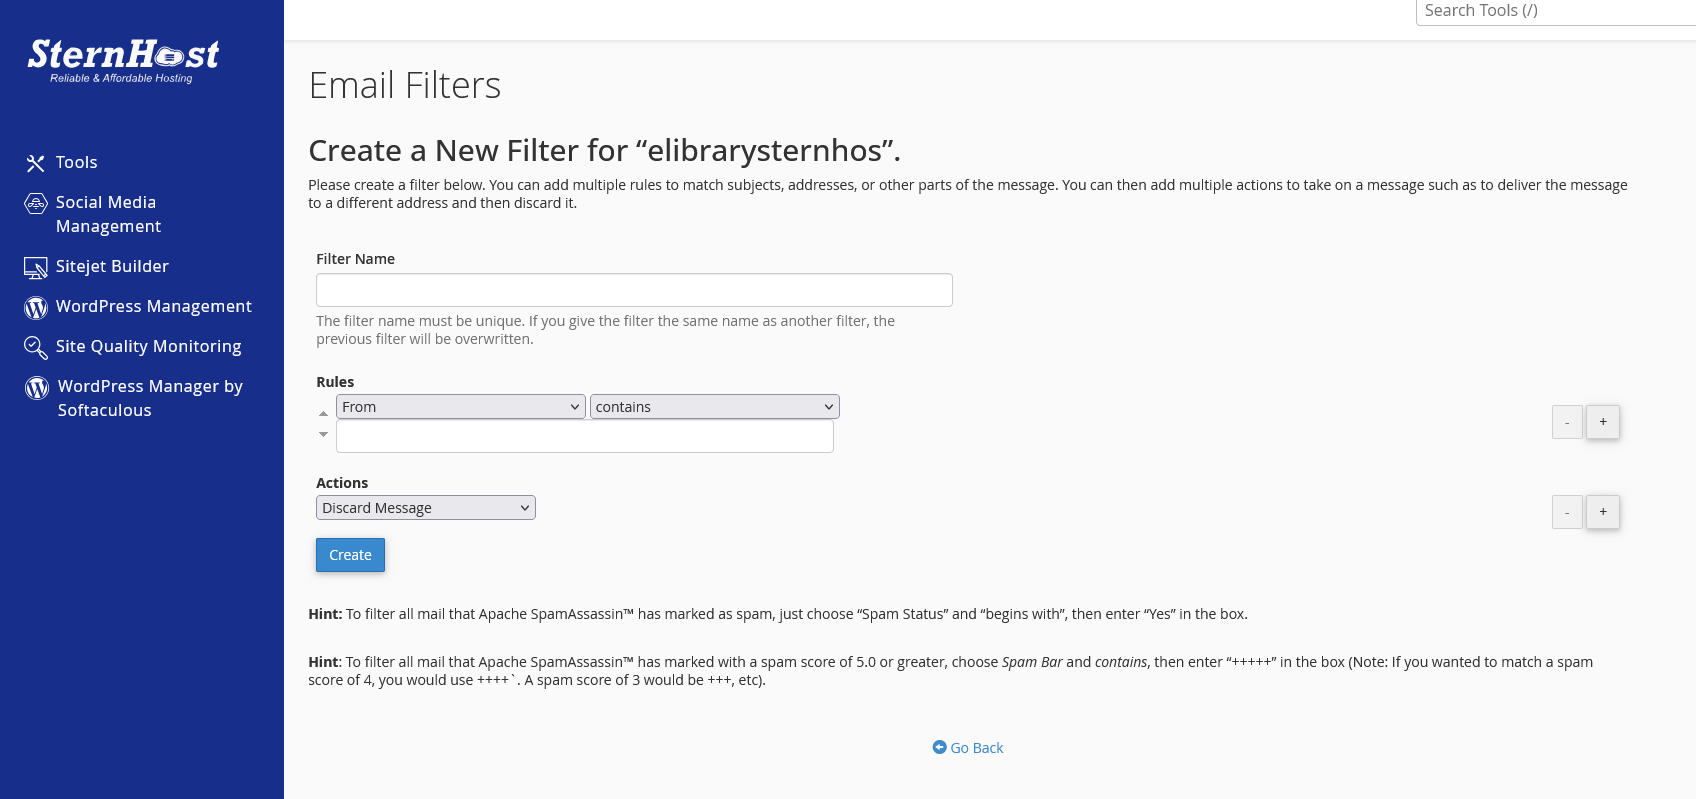
Step 4: Set the Actions (The "Then")
This tells the server what to do when the rule is met.
-
Discard Message: Deletes the email immediately (good for spam).
-
Redirect to Email: Forwards it to another person.
-
Deliver to Folder: Moves it out of your Inbox and into a specific folder (e.g., create a folder called "Bills").
Step 5: Activate
Click the Create button. The filter is now active and will process all new incoming mail immediately.


