Implementing Object Caching with Redis for WordPress in cPanel
Object caching is a server-side technology that stores database query results in the system's RAM. Instead of WordPress asking the MySQL database for the same information every time a page loads (like "What is the site title?" or "List the last 5 posts"), it retrieves that data instantly from the cache. This significantly reduces Time to First Byte (TTFB) and prevents your CPU usage from spiking during high traffic.
Phase 1: Enabling the Redis Extension in cPanel
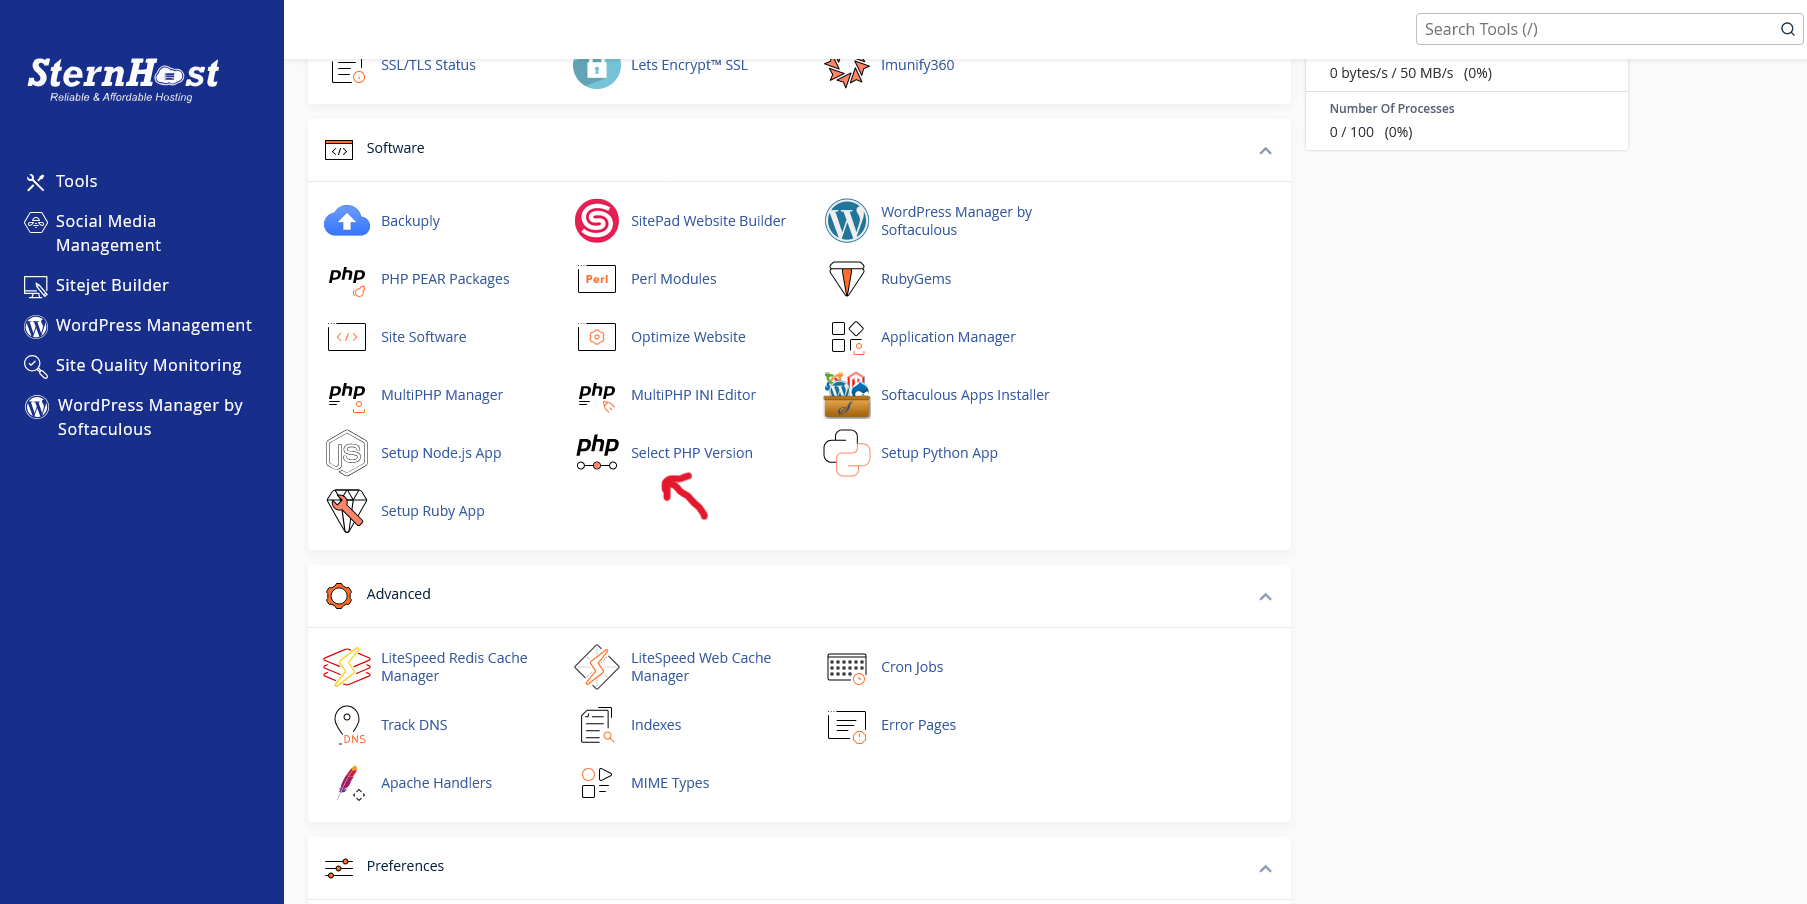
Before WordPress can use Object Caching, the server environment must support it. Most Sternhost plans allow you to enable this via the PHP selector.
-
Log in to your cPanel dashboard.
-
Navigate to the Software section and click on Select PHP Version.
-
Click on the Extensions tab.
-
Scroll through the list to find redis.

-
Check the box to enable it. (You may also see memcached; while similar, Redis is generally recommended for modern WordPress environments due to its advanced data handling).
Phase 2: Configuring WordPress to Use Redis
Once the server-side "engine" is on, you need to tell WordPress how to talk to it. The most reliable way to do this is using a dedicated plugin.
-
Log in to your WordPress Admin Dashboard.
-
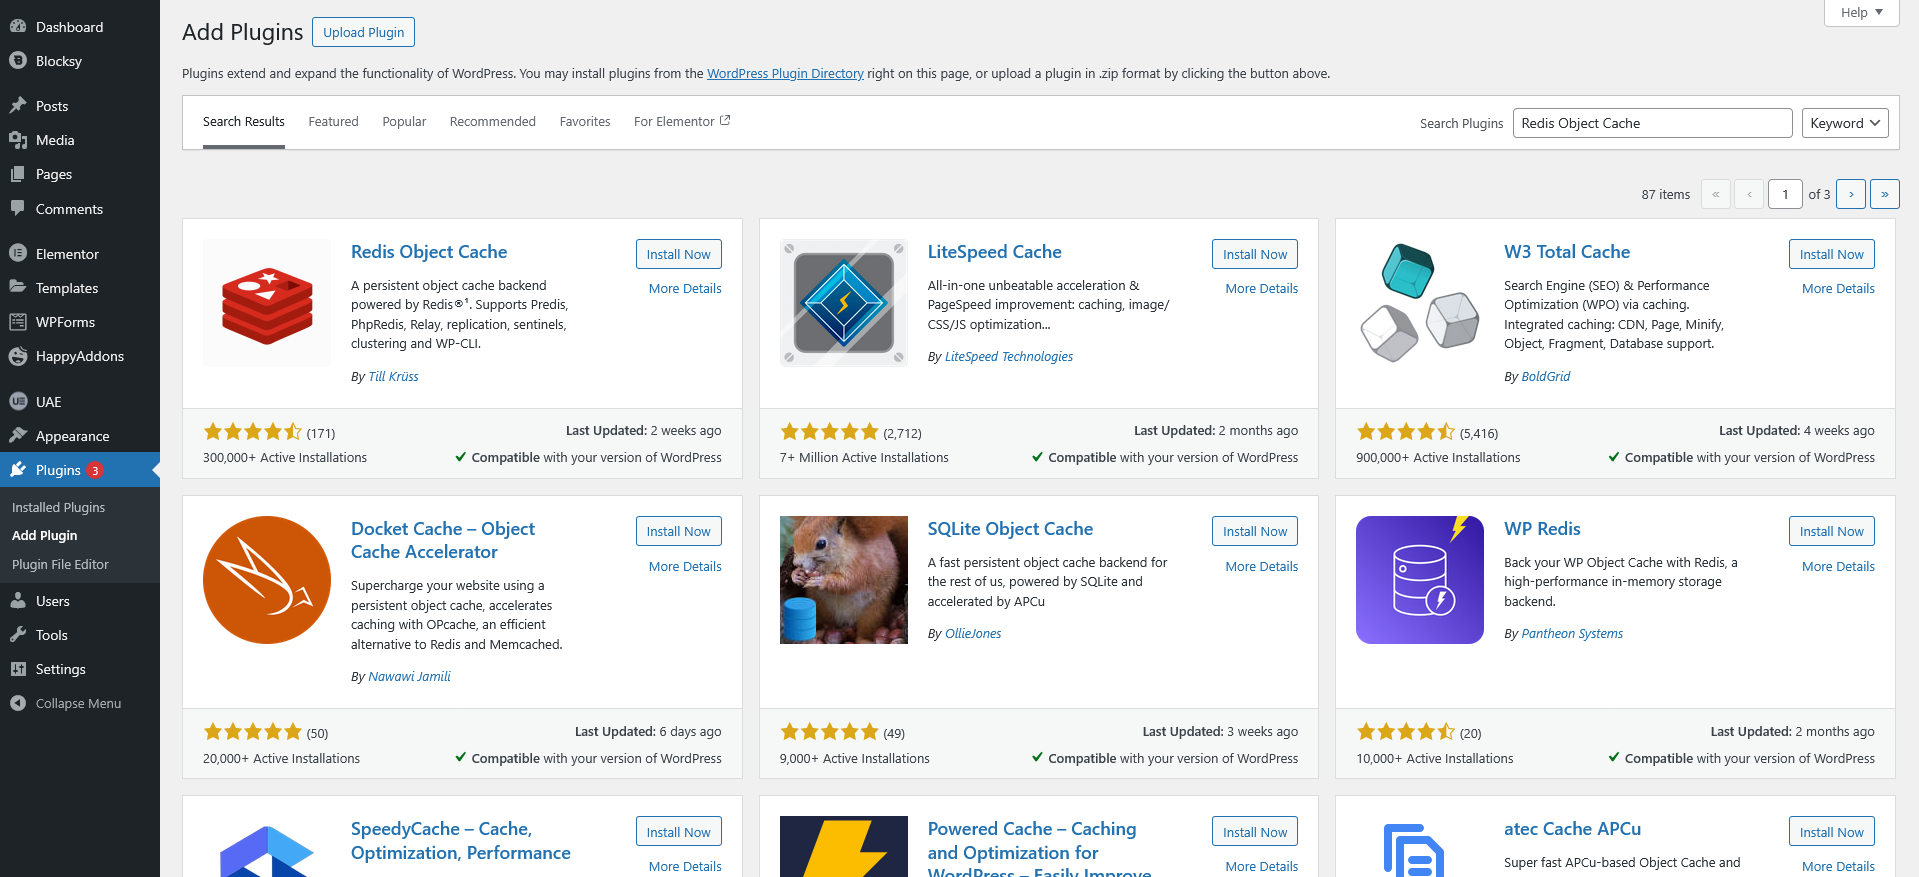
Go to Plugins > Add New and search for "Redis Object Cache".
-
Install and Activate the plugin by Till Krüss.
-
Navigate to Settings > Redis.
-
Click the "Enable Object Cache" button.
If the connection is successful, you will see a status indicator saying "Connected" with details about the Redis host (usually 127.0.0.1) and port (6379).
Phase 3: Troubleshooting Common Connection Issues
Sometimes, the plugin might show a "Reachable: No" status. Here is how to fix the two most common hurdles:
-
Missing
WP_CACHEconstant: Open yourwp-config.phpfile via the cPanel File Manager and ensure this line exists near the top:define( 'WP_CACHE', true ); -
Port Conflicts: If your specific hosting environment uses a Unix Socket instead of a Port, you may need to add specific defined constants to your
wp-config.phpprovided by Sternhost support to point the plugin to the correct path.
Phase 4: Measuring the Performance Boost
To confirm the guide worked, your users should look for these two improvements:
-
Reduced Database Queries: Use a plugin like Query Monitor. You should see a significant portion of your queries now labeled as "Value found in cache."
-
Faster Admin Dashboard: Object caching doesn't just help visitors; it makes the WordPress backend much snappier, especially when saving posts or loading the "All Posts" screen.
Pro Tip: If you are using an "all-in-one" caching plugin like LiteSpeed Cache or W3 Total Cache, you don't need a separate Redis plugin. Simply go to the "Object Cache" settings within those plugins and toggle "Redis" to ON.


