Archive

Automating Daily Backups with CodeGuard: Protect Your Website the Smart Way

When running a website, data loss is one of the biggest risks you can face. From accidental file deletion to malware attacks, losing your website files and databases can cause downtime, lost revenue, and damage to your brand reputation. The best defense against these risks is a reliable backup solution—and that’s where CodeGuard comes in.

In this post, we’ll explain how automating daily backups with CodeGuard ensures your website is safe, secure, and easily restorable.

🔎 Why Daily Backups Are Essential

  • Protection from Hacking – If your site is hacked, you can restore it to a clean version.

  • Defense Against Human Error – Mistakenly deleted files can be recovered in seconds.

  • Database Security – Protects against corrupted or missing databases.

  • Business Continuity – Ensures your site stays online and your business keeps running.

👉 At Sternhost, we recommend CodeGuard as part of your hosting plan so your site data is automatically backed up daily.

What is CodeGuard?

CodeGuard is a cloud-based backup solution that automatically saves copies of your website and database files every day. If something goes wrong, you can restore your site with just one click.

Key Features of CodeGuard:

  • Automatic Daily Backups

  • One-Click Restore

  • Malware Detection

  • Website Change Monitoring

  • Secure Cloud Storage

Learn more at the official CodeGuard website.

🛠️ How to Automate Daily Backups with CodeGuard

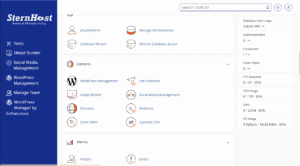
Step 1: Activate CodeGuard

Log into your Sternhost client portal and purchase or activate a CodeGuard plan.

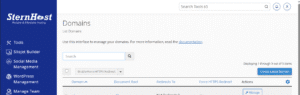
Step 2: Connect Your Website

Enter your FTP/SFTP credentials or connect through cPanel.

Step 3: Choose Backup Settings

  • Select daily automatic backups.

  • Pick what to back up (files, databases, or both).

Step 4: Monitor and Restore

CodeGuard will take care of daily backups in the background. If you need to restore your website, simply click the Restore button in your CodeGuard dashboard.

🔐 Best Practices for Backups

  • Always schedule daily backups instead of weekly or monthly.

  • Test restore functionality regularly.

  • Store backups in multiple locations (CodeGuard + local).

  • Combine with SSL and WAF for full security.


🌍 Conclusion

Automating daily backups with CodeGuard gives you peace of mind, knowing your site is always safe from unexpected issues. With one-click restore and continuous monitoring, you can run your website with confidence.

👉 Ready to protect your website? Get started with Sternhost hosting + CodeGuard backups today and secure your online presence.

Embedding Live Streams into Your Website: A Complete Guide

Live streaming has become one of the most powerful ways to engage with audiences online. Whether you’re hosting a virtual event, church service, online class, concert, or business webinar, embedding a live stream directly into your website ensures your viewers can tune in without distractions from third-party platforms.

In this guide, we’ll walk you through the benefits, methods, and step-by-step process of embedding live streams into your website.

🔎 Why Embed Live Streams into Your Website?

Instead of sending users to platforms like YouTube or Facebook, embedding live streams gives you:

  • Professional Branding – Keep viewers on your domain with your own logo and colors.

  • More Engagement – Drive interaction through chat, comments, or Q&A features.

  • Monetization Options – Add subscriptions, donations, or paywalls directly on your site.

  • Better Control – Avoid ads, recommendations, and distractions from other platforms.

👉 At Sternhost, we provide reliable web hosting solutions that support video streaming, giving you the power to host your content seamlessly.

Methods to Embed a Live Stream

There are multiple ways to integrate live video into your site:

1. Embed from Streaming Platforms

Most major platforms like YouTube Live, Facebook Live, Vimeo, and Twitch allow you to generate an embed code (iframe). Simply copy and paste it into your website’s HTML.

Example:

<iframe width="560" height="315" src="https://www.youtube.com/embed/live_stream?channel=CHANNEL_ID" frameborder="0" allowfullscreen></iframe>

2. Use Streaming Software + Hosting

With software like OBS Studio or Wirecast, you can broadcast live streams using protocols such as RTMP and connect them to your hosting server or CDN.

3. Dedicated Video Hosting Providers

Platforms like Vimeo Premium, Dacast, and Wowza provide professional embedding options with more control, analytics, and monetization features.

🛠️ Step-by-Step: Embedding a YouTube Live Stream

  1. Start a Live Stream on your YouTube channel.

  2. Go to the live stream page and click Share → Embed.

  3. Copy the generated iframe code.

  4. Paste it into your website’s HTML or CMS (WordPress, Joomla, etc.).

  5. Save and publish your page.

That’s it—your viewers can now watch directly from your site.

🔐 Best Practices for Live Stream Embedding

  • Use a reliable host – Streaming requires stable bandwidth (see Sternhost Hosting Plans).

  • Optimize video size – Choose the right resolution for your audience.

  • Enable SSL/HTTPS – Prevent “Not Secure” warnings when embedding video.

  • Test before going live – Always check audio, video, and player functionality.


🌍 Conclusion

Embedding live streams into your website gives you full control, brand visibility, and a direct connection with your audience. Whether you’re using YouTube, Vimeo, or a custom streaming server, the process is straightforward and powerful.

With Sternhost hosting solutions, you can build a fast, secure, and professional website that integrates live streaming smoothly.

👉 Ready to start? Check out Sternhost’s hosting services and bring your live events directly to your audience.


How to Create an Addon Domain in cPanel

An addon domain allows you to host an additional website on your existing Sternhost hosting account, each with its own content and domain name.

Step-by-Step Instructions

  1. Log in to cPanel
    Access your cPanel dashboard through your Sternhost account.
  2. Navigate to the Domains Section
    In the cPanel dashboard, locate and click on the “Domains” icon under the “Domains” section.Cpanel
  3. Create a New Domain
    Click the “Create A New Domain” button.
  4. Enter Domain Details
    • Domain: Input the domain name you wish to add (e.g., yournewdomain.com).
    • Subdomain: This will auto-fill; you can leave it as is.
    • Document Root: This specifies the directory where the files for the new domain will be stored. It typically auto-fills based on the domain name.Domain
  5. Finalize the Setup
    Click the “Submit” button to complete the process.

Managing Your Addon Domain

After creation, you can upload your website files to the specified document root directory using the File Manager or an FTP client.

Important Notes

  • DNS Settings: Ensure that your new domain’s DNS settings are correctly pointed to Sternhost’s nameservers to make the website accessible.
  • Propagation Time: DNS changes may take up to 24–48 hours to propagate globally.


If you encounter any issues or need further assistance, feel free to contact Sternhost’s support team.

Setting Up a Web Application Firewall (WAF): A Complete Guide

When running a website or application, security is not optional—it’s essential. One of the most effective ways to protect your web applications from cyber threats is by using a Web Application Firewall (WAF). A WAF filters, monitors, and blocks malicious HTTP traffic before it reaches your server, ensuring that your site remains secure from common attacks such as SQL injection, cross-site scripting (XSS), and DDoS attacks.

In this guide, we’ll explain what a WAF is, why you need it, and how to set it up step by step.

🔐 What is a Web Application Firewall (WAF)?

A Web Application Firewall is a security layer between your web application and incoming traffic. Unlike a traditional firewall that monitors network-level traffic, a WAF specifically analyzes and filters HTTP and HTTPS traffic.

It helps to:

  • Block malicious requests before they reach your site.

  • Prevent data breaches and theft of sensitive information.

  • Protect against OWASP Top 10 vulnerabilities.

  • Ensure business continuity during large-scale attacks.

For more details, you can read Cloudflare’s explanation of WAFs.

Benefits of Using a WAF

  • Stronger Website Security – Shields against SQL injection, cross-site scripting, and more.

  • DDoS Protection – Filters bad traffic while allowing legitimate visitors.

  • Compliance – Helps with PCI DSS compliance for e-commerce websites.

  • Better Performance – Some WAFs optimize traffic and reduce load on your server.

If you’re hosting with Sternhost, you can combine WAF with other security features like SSL Certificates and DDoS protection to strengthen your site. Learn more at Sternhost Hosting Services.

🛠️ How to Set Up a WAF

There are two main types of WAF deployment:

  1. Cloud-Based WAF (e.g., Cloudflare, Sucuri, AWS WAF)

    • Simple setup, no hardware required.

    • Protection at the DNS level.

    • Best for most websites.

  2. On-Premise or Host-Based WAF

    • Installed on your server.

    • Requires technical expertise.

    • More customizable but resource-heavy.

✅ Steps to Configure a Cloud-Based WAF (Example: Cloudflare)

  1. Sign Up with a WAF provider like Cloudflare or Sucuri.

  2. Update DNS Settings to route traffic through the WAF.

  3. Enable WAF Rules – Activate pre-configured security rules (e.g., OWASP Top 10).

  4. Customize Firewall Settings – Whitelist trusted IPs, block suspicious ones.

  5. Test Your Site – Make sure legitimate users can still access it without issues.


🔎 Best Practices for WAF Configuration

  • Keep WAF rules updated regularly.

  • Enable logging and reporting for suspicious activity.

  • Use WAF in combination with SSL/TLS.

  • Test your WAF setup with penetration testing tools.


🌍 Conclusion

A Web Application Firewall (WAF) is a must-have tool for securing your website or application. Whether you run an e-commerce site, a business portal, or a personal blog, implementing a WAF will help you stay protected from hackers, data breaches, and downtime.

With providers like Cloudflare, AWS, or Sucuri, setting up a WAF is straightforward and highly effective. Combine this with secure hosting from Sternhost for maximum protection.

👉 Ready to secure your website? Explore Sternhost Hosting Plans and take your site’s security to the next level.

How to Restore Specific Files from CodeGuard

Keeping your website safe from data loss is critical, and CodeGuard is one of the most reliable backup solutions available. While it’s common to restore an entire website, sometimes you only need to recover a specific file or folder — maybe a theme file, a plugin, or a configuration script. Thankfully, CodeGuard makes this process straightforward.

In this guide, we’ll walk you through how to restore specific files from CodeGuard and why it’s a must-have for your hosting setup.

Why Restore Specific Files Instead of a Full Backup?

There are scenarios where a full restore isn’t necessary:

  • You accidentally deleted or modified a single file (e.g., wp-config.php).

  • A theme or plugin update broke your site.

  • You want to roll back one file without overwriting other changes.

  • Saves time compared to restoring the entire site.

This flexibility ensures minimal downtime and preserves other updates on your site.

Steps to Restore Specific Files from CodeGuard

1. Log in to Your CodeGuard Dashboard

Head over to your CodeGuard login page and access your account.

2. Choose the Website or Database

Select the website or database you want to restore files from.

3. Access the Backup History

Click on “View Backup History” to see the snapshots CodeGuard has taken.

4. Browse Your Files

Open the specific backup date and navigate through the file manager. This works just like browsing files on your computer.

5. Select the File(s) You Want to Restore

Check the box next to the file(s) or folder(s) you want to recover.

6. Restore or Download

  • Restore – CodeGuard will automatically place the selected file(s) back on your server.

  • Download – You can download the file to your local machine and manually upload it via cPanel or FTP.

7. Verify the Restore

After restoring, refresh your website or check via FTP/cPanel File Manager to confirm the file is back in place.

Best Practices When Restoring with CodeGuard

  • Always back up before restoring – Create a fresh snapshot in case you need to undo the change.

  • Restore only what you need – Avoid overwriting files unnecessarily.

  • Use staging if possible – Test the restored file in a staging environment before going live.


Why Use CodeGuard with Sternhost?

If you’re hosting your website with Sternhost, you can easily integrate CodeGuard to enjoy daily automated backups, one-click restores, and full peace of mind. Sternhost ensures your business stays online even when unexpected issues occur.

Other hosts may offer limited or manual backup options, but Sternhost combines cPanel hosting, SSL, email, and CodeGuard backups in one reliable package.

Final Thoughts

Restoring specific files from CodeGuard is one of the easiest ways to fix small issues without affecting your entire site. Whether you’re running WordPress, Joomla, or a custom-built site, this feature gives you granular control over your backups and restores.

If you’re not using CodeGuard yet, now is the perfect time to add it to your hosting plan with Sternhost. It’s the ultimate safeguard for your website’s security and reliability.

Automating Client Hosting Setup via API: A Complete Guide

In today’s fast-paced digital world, hosting providers need to offer speed, efficiency, and automation. Manually setting up client hosting accounts is no longer scalable. That’s where APIs (Application Programming Interfaces) come in — allowing hosting companies to automate client onboarding, domain provisioning, email setups, and billing.

If you’re running a hosting business or managing multiple clients, learning how to automate hosting setup via API will save you time, reduce errors, and boost client satisfaction.

🔹 Why Automate Hosting Setup with APIs?

Automation ensures:

  • Instant provisioning – No waiting time for clients.

  • Error-free setup – Eliminates manual mistakes.

  • 💼 Scalability – Handle thousands of accounts with ease.

  • Time-saving – Free up your team for core business tasks.

For example, when a client purchases hosting from your website, the system can auto-generate their cPanel account, configure email accounts, and assign resources — all without manual input.

🔹 Popular Hosting APIs You Can Use

  1. cPanel & WHM API – Automate account creation, database setup, DNS updates, and more.

  2. WHMCS API – Automates billing, client accounts, and hosting setup.

  3. DirectAdmin API – Lightweight and efficient for VPS & shared hosting automation.

  4. Plesk API – Great for Windows hosting automation.

  5. Sternhost API Integration (recommended) – If you’re using Sternhost, you can integrate its hosting and domain automation seamlessly into your client management system.


🔹 Example: Automating cPanel Account Creation

Here’s a sample API workflow:

  1. Client signs up & purchases hosting

    • System collects domain name, plan, and user details.

  2. Trigger API call to WHM

    {
    "cpanel_jsonapi_user": "newuser",
    "cpanel_jsonapi_module": "createacct",
    "domain": "example.com",
    "plan": "basic",
    "password": "securePass123"
    }
  3. System auto-creates account

    • DNS, MySQL, and email accounts are instantly provisioned.

  4. Confirmation email sent to client

    • Containing login details and welcome message.


🔹 Benefits for Hosting Resellers & Agencies

If you’re a reseller or agency, automation allows you to:

  • Quickly white-label hosting services for your brand.

  • Provide a self-service portal for clients.

  • Integrate with payment gateways for smooth billing.

👉 See our guide on Setting Up White-Label cPanel for Your Clients for more reseller tips.

🔹 SEO Best Practices for API Automation

To attract the right audience, focus on these keywords:

  • Hosting automation API

  • cPanel API setup

  • Automating WHMCS hosting

  • White-label hosting automation

  • VPS API provisioning

Make sure your hosting business site uses structured content, FAQs, and internal links to boost SEO ranking.

🔹 Conclusion

Automating client hosting setup via API is the future of hosting management. Whether you’re running your own hosting company or managing multiple client accounts, API automation ensures speed, accuracy, and a better customer experience.

By leveraging tools like cPanel API, WHMCS API, or Sternhost integrations, you can scale effortlessly and stay competitive in today’s hosting market.

👉 Ready to automate your hosting business? Check out Sternhost for reliable hosting solutions with full API support.

Setting Up White-Label cPanel for Your Clients

If you run a web hosting business or resell hosting services, providing a professional and branded experience for your clients is crucial. One effective way to achieve this is by setting up a white-label cPanel. With a white-label setup, you can remove third-party branding and customize the cPanel interface to match your business identity.

In this guide, we’ll walk you through the steps to set up white-label cPanel for your clients.

🔑 What is White-Label cPanel?

White-labeling allows you to rebrand the cPanel control panel so your clients see your hosting brand instead of the default cPanel or hosting provider’s branding. This gives you:

  • A professional look and feel

  • Stronger brand recognition

  • Improved trust and credibility

  • A seamless experience for your hosting customers

If you are a reseller with Sternhost, this means you can offer hosting services under your brand name, while Sternhost manages the backend infrastructure.

👉 Learn more about our Sternhost Reseller Hosting plans that support white-label solutions.

⚙️ Steps to Set Up White-Label cPanel

1. Access Your WebHost Manager (WHM)

Log in to WHM (the admin panel for managing cPanel accounts). This is where you can configure branding, custom nameservers, and client accounts.

2. Customize cPanel Branding

Go to:
WHM > cPanel > Customization

Here you can:

  • Upload your company logo

  • Change the favicon

  • Add your company name

  • Modify the footer text

  • Adjust color schemes to align with your brand

This ensures your clients always see your branding instead of the default cPanel logo.

3. Set Up Custom Nameservers

Custom nameservers make your hosting look professional. For example:

  • ns1.yourdomain.com

  • ns2.yourdomain.com

Steps:

  1. Register ns1 and ns2 with your domain registrar.

  2. Point them to your hosting server’s IP address.

  3. Update WHM → Basic WebHost Manager Setup → Add your custom nameservers.

This ensures clients see your brand’s domain instead of Sternhost’s backend server details.

4. White-Label Your Webmail & Login URLs

Instead of sending clients to generic cPanel login pages, you can set up:

  • cpanel.yourdomain.com

  • webmail.yourdomain.com

  • whm.yourdomain.com

This makes your hosting service look fully independent.

5. Provide Client-Friendly Access

Once everything is set up, give your clients their cPanel login credentials with your custom domain links. This makes the entire experience branded and seamless.

📈 Benefits of White-Label cPanel for Your Business

  • Professional Image – Your brand is front and center.

  • Customer Loyalty – Clients feel they are dealing directly with your hosting company.

  • Scalability – Easily manage multiple clients under one dashboard.

  • Business Growth – Focus on building your hosting business while Sternhost handles the infrastructure.


🚀 Get Started with Sternhost Reseller Hosting

At Sternhost, we make it simple for you to launch your hosting brand with:

  • White-label cPanel & WHM

  • Affordable reseller hosting packages

  • 24/7 technical support

  • Free SSL and domain features

👉 Explore our Reseller Hosting Plans and start your white-label hosting business today.

Setting Up SSH Key Authentication for Better Security

When managing your server, security is paramount. One of the most effective ways to secure your Linux VPS or dedicated server is by replacing traditional password logins with SSH key authentication. Unlike passwords that can be brute-forced or stolen, SSH keys offer a more secure and convenient way to authenticate.

In this guide, we’ll walk you through what SSH keys are, how they work, and how to set them up on your server.

🔑 What is SSH Key Authentication?

SSH (Secure Shell) is a protocol used to securely connect to remote servers. Instead of typing a password every time, SSH key authentication uses a pair of cryptographic keys:

  • Private key → stays on your local computer (keep it safe).

  • Public key → placed on your server (in the ~/.ssh/authorized_keys file).

When you connect, the server verifies that the private key matches the stored public key. If it does, access is granted—no password needed.

Benefit: This makes your server far less vulnerable to brute-force attacks.

⚙️ How to Generate SSH Keys (Local Machine)

First, generate your SSH key pair on your local machine.

On Linux/macOS:

ssh-keygen -t rsa -b 4096 -C "your_email@example.com"

This will:

  • Create a 4096-bit RSA key pair.

  • Save it to ~/.ssh/id_rsa (by default).

  • Prompt you to set a passphrase for extra protection.

On Windows:

If you’re using PuTTYgen:

  1. Download and open PuTTYgen.

  2. Choose RSA and 4096 bits.

  3. Click Generate and move your mouse for randomness.

  4. Save the private key (.ppk) and copy the public key.


📥 Adding the Public Key to Your Server

Now, copy your public key to the server.

Using ssh-copy-id (Linux/macOS):

ssh-copy-id -i ~/.ssh/id_rsa.pub user@your-server-ip

Manually:

  1. SSH into your server:

    ssh user@your-server-ip
  2. Create a .ssh directory (if it doesn’t exist):

    mkdir -p ~/.ssh
    chmod 700 ~/.ssh
  3. Add your public key:

    nano ~/.ssh/authorized_keys

    Paste your public key inside.

  4. Set permissions:

    chmod 600 ~/.ssh/authorized_keys

🔒 Disabling Password Authentication

Once SSH key login works, disable password-based login for extra protection.

  1. Open SSH config file:

    sudo nano /etc/ssh/sshd_config
  2. Find and change:

    PasswordAuthentication no
  3. Restart SSH:

    sudo systemctl restart ssh

Now, only SSH keys can be used to log in.

Advantages of SSH Key Authentication

  • Stronger security than passwords.

  • Protects against brute-force login attempts.

  • More convenient (no need to type password every time).

  • Can be combined with passphrases + 2FA for maximum security.


🌍 Related Resources


📌 Conclusion

SSH key authentication is one of the simplest yet most powerful security measures you can take for your server. By setting it up, you significantly reduce the risk of unauthorized access and make managing your VPS more convenient.

If you’re running your server with Sternhost VPS Hosting, you already have the tools needed to implement SSH key authentication in minutes. Secure your server today—because safety should never be optional.

Configuring UFW Firewall on Ubuntu VPS: A Step-by-Step Guide

When running a VPS (Virtual Private Server), security should always be your top priority. One of the easiest and most effective ways to secure your server is by configuring a firewall. Ubuntu comes with UFW (Uncomplicated Firewall), a user-friendly tool for managing firewall rules without the complexity of iptables.

In this guide, we’ll walk you through the process of configuring UFW firewall on Ubuntu VPS. Whether you are hosting a website, running applications, or managing sensitive data, this setup will help keep your server safe.

👉 At Sternhost VPS Hosting, all our VPS servers support UFW, making it easy for you to secure your hosting environment.

Step 1: Update Your System

Before making any changes, ensure your Ubuntu server is up-to-date:

sudo apt update && sudo apt upgrade -y

Step 2: Check if UFW is Installed

Most Ubuntu distributions come with UFW pre-installed. Check its status with:

sudo ufw status

If it’s not installed, run:

sudo apt install ufw -y

Step 3: Allow SSH Connections

Since you’ll be managing your VPS remotely, you must allow SSH before enabling UFW. Otherwise, you risk locking yourself out.

sudo ufw allow ssh

For custom SSH ports (e.g., 2222):

sudo ufw allow 2222/tcp

Step 4: Enable Common Services

Allow other necessary services depending on your VPS usage:

  • For HTTP (websites):

    sudo ufw allow http
  • For HTTPS (secure websites):

    sudo ufw allow https
  • For DNS (if running a DNS server):

    sudo ufw allow 53

Step 5: Enable UFW

Now, enable UFW with:

sudo ufw enable

Check the status:

sudo ufw status verbose

Step 6: Deny Unwanted Traffic

By default, UFW blocks all incoming connections except the ones you explicitly allow. You can also deny specific ports:

sudo ufw deny 23 # Blocks Telnet (insecure protocol)

Step 7: Advanced Rules (Optional)

For added security, you can allow connections only from specific IPs. For example, to allow SSH only from your office IP:

sudo ufw allow from 192.168.1.100 to any port 22

Conclusion

By following these steps, you have successfully configured the UFW firewall on your Ubuntu VPS. This ensures that only essential services are accessible, reducing the risk of cyber-attacks and unauthorized access.

At Sternhost, our VPS hosting plans are optimized for performance and security, giving you a reliable environment to run your projects with peace of mind.

For more security tips, check out Ubuntu’s UFW Documentation.

✅ With UFW configured, your Ubuntu VPS is now significantly more secure.

Viewing Visitor Stats via cPanel Metrics

Running a website is more than just publishing content—it’s also about understanding who visits your site, how they find you, and what they do when they get there. If you’re using cPanel hosting, one of the most valuable tools at your disposal is cPanel Metrics, which helps you monitor visitor stats and optimize your website’s performance.

In this guide, we’ll walk you through how to view your visitor stats in cPanel, why they’re important, and how to use the data to grow your online presence.

Why Visitor Stats Matter

Knowing how many people visit your site and what they do is crucial for:

  • Improving content strategy – Identify which pages get the most traffic.

  • Enhancing SEO performance – Track the impact of your optimization.

  • Monitoring server resources – Spot unusual spikes in traffic.

  • Business growth – Understand customer behavior to refine your services.

If you’re a small business owner or blogger, analyzing visitor stats can help you stay competitive and improve conversions.

Accessing Visitor Stats in cPanel

Here’s a step-by-step process:

  1. Login to cPanel – Head over to your hosting account (if you’re using SternHost, login here).

  2. Locate the Metrics Section – Scroll to the “Metrics” section in your cPanel dashboard.

  3. Choose a Tool – cPanel offers multiple tools for tracking:

    • Awstats – Detailed reports on visitors, browsers, and traffic.

    • Analog Stats – Simple overview of traffic activity.

    • Webalizer – Visual graphs of usage statistics.

    • Visitors – View IPs of the last 1,000 visitors.

    • Errors – Track broken links and server errors.

  4. Analyze the Reports – Look at data like:

    • Unique visitors vs returning visitors

    • Top pages and referrers

    • Geographical locations

    • Search engine traffic


Best Practices for Using Visitor Stats

  • Identify top-performing pages and create similar content.

  • Fix broken links spotted in the error logs.

  • Improve slow-loading pages to reduce bounce rates.

  • Compare data monthly to track growth.


SternHost and Website Growth

If you’re using SternHost’s reliable cPanel hosting, you already have access to these tools to monitor and grow your website traffic. With affordable hosting plans, strong uptime, and a user-friendly client portal, SternHost makes managing websites stress-free.

Explore SternHost’s web hosting plans and start growing your website with ease.

✅ With cPanel Metrics, you don’t need third-party software to get started. Whether you’re running a business site or a blog, your hosting dashboard already has the insights you need.