Partners        Payment Options        My Account       Cart

Archive

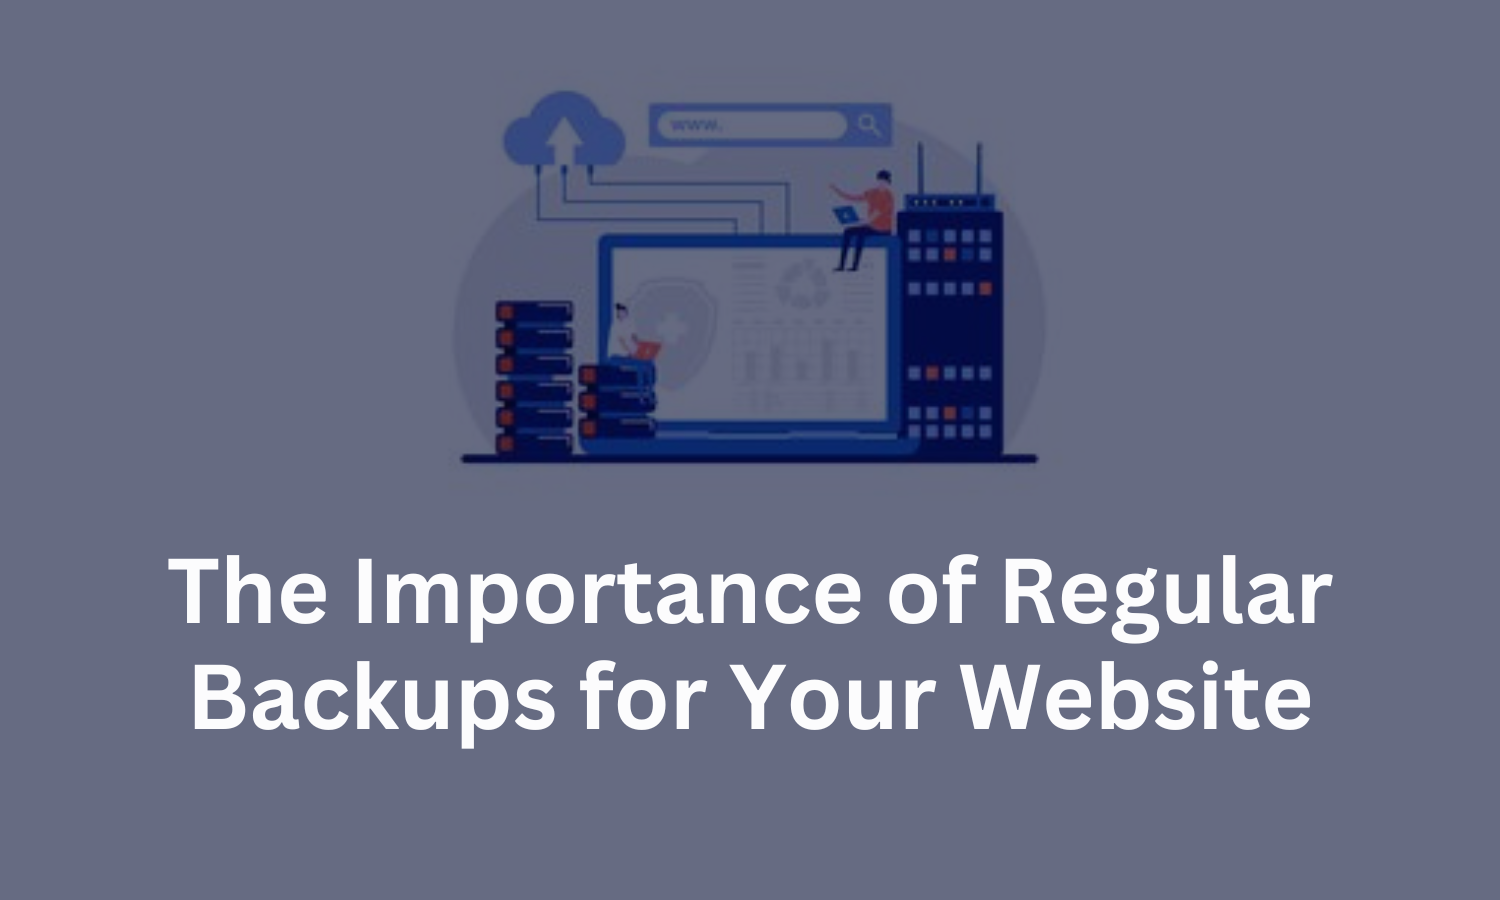
The Importance of Regular Backups for Your Website

Imagine losing all the content, data, and files on your website due to a sudden error, hack, or server crash. Without a backup, restoring your website to its original state can be incredibly challenging or even impossible.

A website backup is a copy of all your website’s files and data, including:

  • Core files: WordPress installation files, themes, and plugins.
  • Database: Stores your content, user information, and site settings.
  • Media files: Images, videos, and other uploaded content.

Backups allow you to restore your website to a previous state in case of a problem.

Why Are Regular Backups Important?

1. Protect Against Data Loss

Data loss can happen for many reasons, such as:

  • Server crashes.
  • Human error.
  • Malware or hacking attempts.

A backup ensures you can recover lost data quickly.

2. Recover from Hacks and Malware

If your website is compromised by hackers or infected with malware, restoring a clean backup is often the fastest way to regain control and eliminate malicious code.

3. Fix Website Errors

Major updates or faulty plugins can sometimes break your website. A backup allows you to revert to a working version if things go wrong.

4. Avoid Prolonged Downtime

Downtime can damage your reputation and cost you visitors or customers. Backups enable you to get your site back online quickly.

How Often Should You Back Up Your Website?

The frequency of backups depends on how often you update your website.

  • Daily backups: Ideal for sites with frequent updates, like blogs, e-commerce stores, or news platforms.
  • Weekly backups: Suitable for static websites or portfolios updated occasionally.
  • On-demand backups: Before major updates, such as changing themes, installing plugins, or upgrading WordPress.

How to Back Up Your Website

1. Use a Backup Plugin

Plugins make backups simple and automated. Popular options include:

  • UpdraftPlus: Free and premium versions with cloud storage integration.
  • BackupBuddy: Comprehensive paid tool with automatic backups and malware scanning.
  • Duplicator: Useful for creating backups and migrating websites.

To set up a backup with UpdraftPlus:

  1. Install and activate the plugin.
  2. Go to Settings > UpdraftPlus Backups.
  3. Configure automatic backups and choose storage options (e.g., Google Drive, Dropbox).

2. Use Your Hosting Provider’s Backup Tool

Many hosting providers offer built-in backup solutions.

  • Check your hosting control panel for a Backup or File Manager option.
  • Schedule automatic backups or download manual backups regularly.

3. Perform Manual Backups

For added control, you can manually back up your site by:

  • Downloading Files: Use an FTP client like FileZilla to download your WordPress files.
  • Exporting the Database: Use phpMyAdmin in your hosting control panel to export your site’s database.

4. Use Cloud Backup Services

Services like Jetpack Backup or CodeGuard provide automated backups and secure cloud storage.

Best Practices for Website Backups

  1. Automate the Process: Set up automatic backups to ensure consistency.
  2. Verify Backup Integrity: Periodically test backups to confirm they’re working.
  3. Keep Multiple Copies: Retain several backup versions to guard against corrupted files.
  4. Secure Your Backups: Use encryption and strong passwords to protect stored backups.
  5. Update Backup Settings: Adjust settings as your website grows or changes.

Conclusion

Regular backups are a critical part of website maintenance. They provide peace of mind and a reliable recovery option in case of data loss, hacks, or errors. Whether you use plugins, hosting tools, or manual methods, the key is consistency.

By prioritizing backups, you can safeguard your website, protect your hard work, and ensure business continuity.

SternHost’s scalable and secure hosting plans ensure that your website remains online, even during unexpected issues. Looking for a reliable hosting partner? Try SternHost for superior hosting, domain registration, and WordPress hosting solutions tailored to your needs.

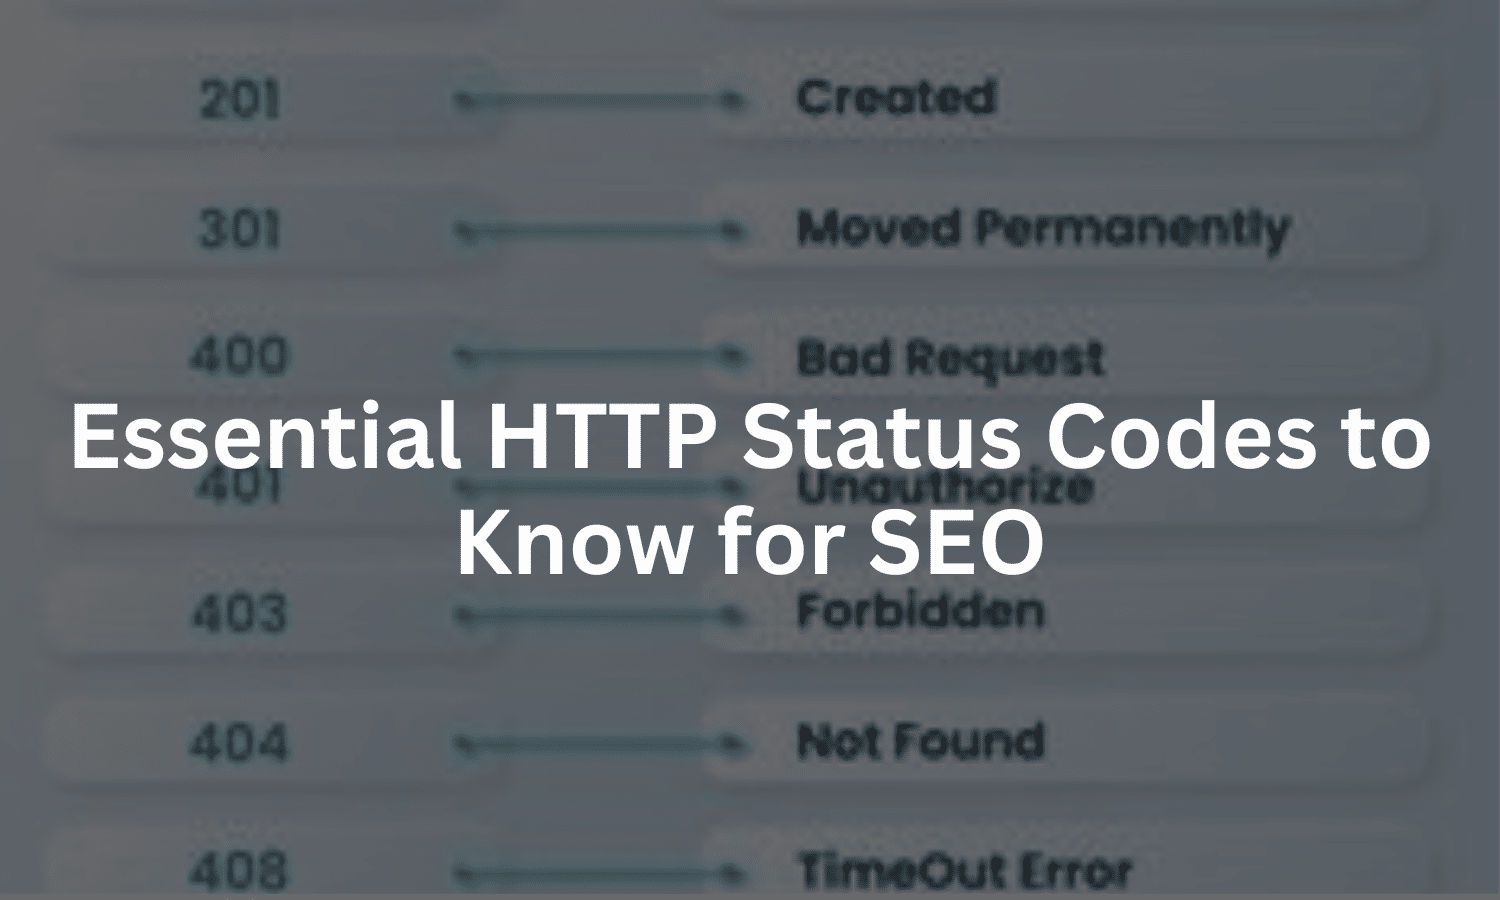
Essential HTTP Status Codes to Know for SEO

HTTP status codes are three-digit numbers sent by a web server in response to a request from a client (like a browser or search engine bot). These codes communicate the status of the request, indicating whether it was successful, encountered an error, or requires redirection. For SEO, certain status codes can directly impact your site’s ranking, as they affect user experience and the way search engines index your pages.

HTTP status codes play a crucial role in determining how search engines interact with and rank your website. From indicating successful page loads to flagging errors, these codes guide search engines in indexing your site and help you maintain a smooth user experience. Understanding which HTTP status codes matter most for SEO can improve your site’s visibility and performance. In this guide, we’ll cover the most important HTTP status codes for SEO and explain why they matter.


Why HTTP Status Codes Are Important for SEO

The right HTTP status codes help search engines understand your website’s structure, handle redirects effectively, and avoid indexing errors. Misconfigured status codes can lead to:

  • Poor User Experience: Broken links and inaccessible pages can frustrate users.
  • SEO Penalties: Persistent errors, like 404 or 500 codes, may signal to search engines that your site has issues, which could impact rankings.
  • Indexing Problems: Search engines may not properly index your site if there are errors or redirects that aren’t configured correctly.

By monitoring and managing these codes, you can ensure a healthy website for both users and search engines.


Essential HTTP Status Codes for SEO

Here’s a breakdown of key HTTP status codes that impact SEO and how they affect your site’s performance.

  1. 200 OK
  • Meaning: This status code indicates that the request was successful and the page is available.
  • SEO Impact: A 200 OK status code is ideal for SEO, as it signifies a stable and accessible page that can be indexed by search engines. It’s what you want for all primary pages on your site.
  1. 301 Moved Permanently
  • Meaning: The resource has been permanently moved to a new URL, and all future requests should be directed to the new location.
  • SEO Impact: A 301 redirect passes the majority of SEO value (or “link juice”) from the old URL to the new one. It’s crucial for SEO when restructuring a site, changing URLs, or consolidating content. Properly configured 301 redirects prevent link equity loss and help maintain rankings.
  1. 302 Found (Temporary Redirect)
  • Meaning: The resource is temporarily located at a different URL, but it will eventually be accessible at the original location.
  • SEO Impact: 302 redirects are not ideal for SEO when used for permanent changes, as search engines may continue to index the old URL instead of transferring ranking signals to the new URL. Use 302 redirects only for temporary changes or testing, not for permanent redirection.
  1. 404 Not Found
  • Meaning: The server cannot find the requested resource, usually because it was deleted or the URL is incorrect.
  • SEO Impact: 404 errors can harm SEO if they are common across your site, as they indicate broken links or missing content. A few 404s are normal, but monitoring and resolving them is important to maintain a healthy site structure. Redirecting 404 pages with valuable backlinks to relevant pages can help retain link equity.
  1. 410 Gone
  • Meaning: The resource has been permanently removed and will no longer be available at the requested URL.
  • SEO Impact: The 410 Gone status tells search engines that a page has been intentionally removed. While 404 errors may eventually drop from search engine indexes, 410 status codes prompt quicker removal. Use 410 for permanently removed content that you do not intend to replace or redirect.
  1. 500 Internal Server Error
  • Meaning: The server encountered an unexpected condition that prevented it from fulfilling the request.
  • SEO Impact: 500 errors can negatively impact SEO, as they indicate server issues that prevent pages from loading. Persistent 500 errors could lead to de-indexing of pages, so it’s crucial to monitor and fix server issues promptly.
  1. 503 Service Unavailable
  • Meaning: The server is currently unable to handle the request due to maintenance or overload but should be available again soon.
  • SEO Impact: A 503 Service Unavailable status tells search engines that the site is temporarily down. It’s useful for planned maintenance, as it prevents search engines from de-indexing the page. Be sure to set the Retry-After header to indicate when the server will be back online.
  1. 429 Too Many Requests
  • Meaning: The client has sent too many requests in a given time frame, and the server is temporarily blocking further requests.
  • SEO Impact: Frequent 429 errors may prevent search engines from crawling your site effectively, especially if their crawlers are being rate-limited. To prevent this, configure your server to handle the search engine’s crawl rate, or set up crawl-delay in your robots.txt file.


How to Monitor and Manage HTTP Status Codes for SEO

Here are some methods to track and manage HTTP status codes effectively:

  1. Use Google Search Console: Google Search Console is a free tool that provides insights into any crawling or indexing errors on your site, including HTTP status codes. Regularly check it to address issues like 404s and 500 errors.
  2. Try SEO Audit Tools: Tools like Ahrefs, SEMrush, and Screaming Frog provide comprehensive website audits and identify status codes across your site. These tools can help you locate broken links, misconfigured redirects, and server issues.
  3. Set Up Server Logs: Analyzing server logs can provide insights into status codes for every request made to your site. This can be especially helpful for identifying frequent errors or patterns over time.
  4. Use Plugins for WordPress Sites: Plugins like Redirection and Yoast SEO allow you to manage redirects and track errors, helping you handle 301 redirects, 404 errors, and other issues that impact SEO.
  5. Regular Site Audits: Conducting regular audits of your website is key to staying on top of status codes and ensuring a healthy SEO structure.


Conclusion

HTTP status codes play an integral role in how search engines crawl, index, and rank your site. By understanding key status codes like 200 OK, 301 Moved Permanently, 404 Not Found, and 503 Service Unavailable, you can manage your website’s SEO effectively. Regular monitoring and proactive management of these codes help maintain a smooth user experience and improve your search engine rankings.

SternHost’s scalable and secure hosting plans ensure that your website remains online, even during unexpected issues. Looking for a reliable hosting partner? Try SternHost for superior hosting, domain registration, and WordPress hosting solutions tailored to your needs.

Step-by-Step Guide to Resolving the WordPress Memory Exhausted Error

The “Memory Exhausted” error is a common issue many WordPress users face, especially when running resource-intensive plugins or themes. This error typically appears as:

“Fatal error: Allowed memory size of X bytes exhausted (tried to allocate Y bytes) in /path/to/php/file.php.” . WordPress uses a certain amount of memory allocated by your server to execute PHP scripts. When the required memory exceeds the limit set by your hosting provider, the error occurs.

Common reasons include:

  • Using a poorly coded plugin or theme.
  • Running too many resource-heavy plugins.
  • Large media files or a growing database.

How to Fix the WordPress Memory Exhausted Error

Step 1: Check Your Current PHP Memory Limit

Before increasing memory, check your current limit:

  1. Go to your WordPress admin dashboard.
  2. Navigate to Tools > Site Health > Info.
  3. Expand the Server section to view the memory limit.

If the limit is low (e.g., 32MB or 64MB), proceed to increase it.

Step 2: Increase the PHP Memory Limit in wp-config.php

The easiest way to fix the error is by increasing the memory limit in WordPress configuration.

  1. Access Your Website Files:
    • Use an FTP client (e.g., FileZilla) or your hosting control panel’s File Manager.
  2. Locate the wp-config.php File:
    • This file is in your WordPress root directory.
  3. Edit wp-config.php: Open the file and add the following line before */ That’s all, stop editing! Happy publishing. */**:
    define('WP_MEMORY_LIMIT', '256M');
  4. Save the changes and upload the file back to the server.

Step 3: Adjust the Server’s PHP Configuration

If Step 2 doesn’t work, your hosting provider might have a server-level memory cap. You can try updating the PHP configuration file.

  1. Locate the php.ini File:
    • This file is usually in your server’s root or a PHP directory. If it’s missing, create a new file named php.ini.
  2. Edit the File: Add or update this line:
    memory_limit = 256M
  3. Save the file and upload it back.

Step 4: Modify the .htaccess File

If the above methods don’t work, update the .htaccess file.

  1. Access the .htaccess File:
    • It’s in your WordPress root directory.
  2. Edit the File: Add this line at the end:
    php_value memory_limit 256M
  3. Save and upload the file back.

Step 5: Disable Resource-Heavy Plugins or Themes

Sometimes, a specific plugin or theme causes excessive memory usage.

  1. Deactivate Plugins:
    • Go to Plugins > Installed Plugins and deactivate all plugins.
    • Reactivate them one by one to identify the culprit.
  2. Switch Themes:
    • Go to Appearance > Themes and temporarily activate a default WordPress theme (e.g., Twenty Twenty-One).

Step 6: Contact Your Hosting Provider

If the error persists after trying all the steps, your hosting plan might not support higher memory limits. Contact your hosting provider and request an increase in PHP memory.

Conclusion

The WordPress memory exhausted error can be frustrating, but it’s relatively easy to fix with the steps outlined above. By increasing your PHP memory limit and optimizing your website, you can ensure your WordPress site runs smoothly without interruptions.

By choosing SternHost, you’re opting for premium domain registration, secure web hosting, and optimized WordPress hosting solutions designed for high performance and reliability. Let SternHost handle the backend, so you can focus on delivering a flawless experience to your audience. Get started today and empower your website with SternHost

Why You Should Never Skip WordPress Theme and Plugin Updates

Keeping your WordPress website in good shape requires more than just publishing content or monitoring traffic. Regularly updating your themes and plugins is important to maintain security, performance, and functionality. Ignoring updates can leave your website vulnerable to attacks or cause it to lag in performance.

This guide will explain why updating WordPress themes and plugins is essential and how to handle updates effectively.

Why Are Updates Necessary for Themes and Plugins?

1. Enhanced Security

Outdated themes and plugins are a common target for hackers. Developers regularly release updates to patch security vulnerabilities and protect your website from attacks.

Fact: A study revealed that 61% of WordPress hacks happen due to outdated software.

By updating your themes and plugins, you ensure your site is protected against the latest threats.

2. Improved Functionality

Updates often include new features and improvements that enhance the usability and functionality of your website. Staying updated ensures you’re making the most of what your tools have to offer.

3. Bug Fixes

No software is perfect, and bugs can sometimes interfere with your website’s performance. Developers address these issues in updates, ensuring smoother operation.

4. Compatibility with WordPress Core

The WordPress platform itself receives regular updates. Outdated themes or plugins may become incompatible with the latest version of WordPress, causing errors or even breaking your website.

5. Performance Optimization

Updates often include performance tweaks that make your site faster and more efficient. This can improve your website’s load time and overall user experience.

How to Update Themes and Plugins Safely

1. Backup Your Website First

Before updating anything, always create a backup of your site. This ensures you can restore your website if an update causes problems.

2. Review the Update Details

Check the changelog provided by the developer to understand what the update includes. Look out for:

  • Bug fixes.
  • New features.
  • Security patches.

3. Test Updates on a Staging Site

If you have a staging environment, test updates there first. This prevents potential issues from affecting your live website.

4. Update One at a Time

Avoid updating multiple themes or plugins simultaneously. This makes it easier to identify the source of any issues that arise.

5. Use Reliable Plugins and Themes

Choose plugins and themes from reputable developers with a history of regular updates.

6. Enable Automatic Updates (Where Appropriate)

For essential plugins and themes, consider enabling automatic updates to ensure you never miss critical security patches.

How to Update Plugins and Themes in WordPress

Updating plugins:

  1. Log in to your WordPress admin dashboard.
  2. Navigate to Plugins > Installed Plugins.
  3. Click Update Now next to the plugin that needs updating.

Updating themes:

  1. Go to Appearance > Themes.
  2. Look for the theme requiring an update and click Update Now.

You can also manage updates from the Dashboard > Updates section.

Best Practices for Managing Updates

  1. Set a Regular Update Schedule: Check for updates at least once a week.
  2. Monitor Your Site After Updates: Ensure everything functions as expected after applying updates.
  3. Use a Maintenance Plugin: Use plugins like WP Maintenance Mode to alert visitors if updates temporarily disrupt your site.

Conclusion

Regularly updating your WordPress themes and plugins is very important for keeping your website secure, fast, and functional. By staying on top of updates and following best practices, you can avoid downtime, enhance your site’s performance, and provide a better experience for your visitors.

SternHost’s scalable and secure hosting plans ensure that your website remains online, even during unexpected issues. Looking for a reliable hosting partner? Try SternHost for superior hosting, domain registration, and WordPress hosting solutions tailored to your needs.

How to Fix Maximum Execution Time Exceeded Errors on WordPress: Step-by-Step Guide

The Maximum Execution Time Exceeded error appears when a script on your WordPress site runs for too long. Hosting providers set a maximum execution time to prevent resource-hungry scripts from overloading servers, and when a task surpasses this limit, WordPress halts it to preserve server resources. The error message typically reads something like:

  • “Fatal error: Maximum execution time of X seconds exceeded”
  • “Error: Maximum execution time exceeded”

This error often appears during actions that involve a lot of processing, like updating plugins, themes, or WordPress core, especially on shared hosting environments.

Causes of the Maximum Execution Time Exceeded Error

The Maximum Execution Time Exceeded error may result from:

  1. Resource-Intensive Plugins or Themes: Some plugins or themes require more processing time, particularly during updates.
  2. Large File Uploads: Uploading large files can surpass the set execution time.
  3. Server Limitations: Hosting providers set a cap on execution time, usually at 30 or 60 seconds, to prevent server overload.
  4. Complex Scripts: Tasks with extensive scripts or complex database operations may require more time than allowed.

Step-by-Step Guide to Fix the Maximum Execution Time Exceeded Error in WordPress

Here are some practical methods to increase the execution time and resolve this error on your WordPress site.

1. Edit the .htaccess File

The .htaccess file is a core WordPress file that can control server settings, including execution time. Here’s how to increase the execution time using .htaccess:

  1. Access .htaccess: Connect to your site via an FTP client or navigate to the File Manager in your hosting control panel.
  2. Locate the .htaccess File: Find the .htaccess file in the root directory of your WordPress installation.
  3. Edit the File: Add the following line of code at the end of the .htaccess filephp_value max_execution_time 300
  4. Save the File: Save and upload the edited file back to your server.
    This code increases the execution time limit to 300 seconds (5 minutes), which is usually sufficient for most tasks. If the error persists, try a higher value.

2. Increase Execution Time in wp-config.php

Another way to resolve this error is by modifying the wp-config.php file, which is the main configuration file for WordPress:

  1. Access wp-config.php: Use an FTP client or File Manager to open the wp-config.php file located in your WordPress root directory.
  2. Add Code to Increase Time Limit: Add the following line of code just above the line that reads /* That’s all, stop editing! Happy blogging. */: set_time_limit(300);

3. Save and Upload: Save the wp-config.php file and upload it to your server.

This approach allows WordPress to allocate 300 seconds (or whatever time limit you specify) to each process, which should prevent the error.

3. Modify the php.ini File

If you have access to the php.ini file, which controls PHP settings on your server, you can increase the maximum execution time there:

  1. Locate php.ini: Connect to your server via FTP or File Manager and locate the php.ini file, often found in the root or public_html directory.
  2. Edit the Execution Time: Look for the line: max_execution_time = 30
    Change it to: max_execution_time = 300
  3. Save Changes: Save and upload the updated php.ini file back to your server.

This method sets a higher execution time globally for PHP, which applies to all scripts on your website.

Note: Some shared hosting providers may restrict access to php.ini. If you can’t locate it, consider the other methods or contact your hosting provider for assistance.

4. Use a WordPress Plugin to Increase Execution Time

For a user-friendly option, you can install a plugin that adjusts the maximum execution time without manually editing files. Plugins like WP Maximum Execution Time Exceeded can help:

  1. Install the Plugin: Go to Plugins > Add New in your WordPress dashboard, search for WP Maximum Execution Time Exceeded, and install it.
  2. Activate and Configure: After activation, go to the plugin’s settings page, where you can set a custom execution time, such as 300 seconds.

Using a plugin is an easy way to manage the execution time, especially if you’re not comfortable editing core files.

5. Contact Your Hosting Provider

If none of the above solutions work, your hosting provider might have placed strict limits on execution time for security or performance reasons. Reach out to their support team and request an increase in the maximum execution time.

Important Tips When Increasing Maximum Execution Time

While increasing execution time can resolve timeout errors, here are a few things to keep in mind:

  • Avoid Setting Execution Time Too High: An excessively high limit could strain server resources, affecting site performance.
  • Monitor Server Resource Usage: Check your server’s resource usage regularly, particularly if you run resource-intensive plugins or themes.
  • Use Trusted Plugins and Themes: Poorly optimized plugins and themes can increase server load, potentially causing timeout errors. Choose trusted, regularly updated options to reduce the risk.

Increasing execution time is a useful short-term solution, but if you encounter this error frequently, consider upgrading your hosting plan or consulting a developer.

Conclusion

The Maximum Execution Time Exceeded error on WordPress is a common issue, but it can be easily fixed by increasing the execution time in the .htaccess or wp-config.php file, modifying php.ini, using a plugin, or contacting your hosting provider. By following these step-by-step methods, you can keep your WordPress site running smoothly and avoid timeout interruptions.

SternHost’s scalable and secure hosting plans ensure that your website remains online, even during unexpected issues. Looking for a reliable hosting partner? Try SternHost for superior hosting, domain registration, and WordPress hosting solutions tailored to your needs.

Quick and Easy Ways to Fix Broken Links on Your WordPress Site

A broken link is a hyperlink that no longer leads to its intended destination. Instead, it results in an error page, such as a “404 Not Found” error. These links can occur for various reasons, including:

  • The linked page has been deleted or moved.
  • The URL was entered incorrectly.
  • External websites you link to have changed or removed content.

Broken links are one of the most common and frustrating issues for website owners and visitors alike. They not only disrupt user experience but also hurt your SEO rankings by signaling poor website maintenance to search engines. Fixing broken links on your WordPress site is essential to keep your visitors happy and your website ranking high.

Why Fixing Broken Links Is Crucial

  1. Improves User Experience: Visitors are frustrated by broken links, which can cause them to leave your site.
  2. Boosts SEO: Search engines penalize websites with many broken links, as it reflects poor site maintenance.
  3. Preserves Site Authority: Linking to non-existent or irrelevant pages reduces your website’s credibility.

Step-by-Step Guide to Fixing Broken Links on WordPress

Step 1: Identify Broken Links

Use one of the following tools to find broken links on your website:

  • Google Search Console: Navigate to the “Coverage” section to see errors.
  • Broken Link Checker: A WordPress plugin that scans your site for broken links and displays them in your dashboard.
  • Online Tools: Use tools like Screaming Frog SEO Spider or Dead Link Checker to audit your site.

Step 2: Verify the Links

For each broken link identified, verify whether:

  • The page still exists with a new URL.
  • The external site is temporarily down or permanently removed.

Step 3: Update or Replace Broken Links

  • Internal Links: If the content still exists but has moved, update the link to point to the correct page.
  • External Links: If the external website has removed the content, replace the link with a relevant alternative or remove it altogether.

Step 4: Redirect Removed Pages

If you’ve deleted pages from your site, set up 301 redirects to guide users and search engines to the most relevant active page.

  • Use plugins like Redirection or Yoast SEO Premium for an easy setup.
  • Redirect old URLs to new, related content to retain SEO value.

Step 5: Use Tools for Automated Monitoring

Install tools or plugins to regularly monitor your site for broken links:

  • Broken Link Checker Plugin: Automatically checks for broken links and notifies you in your WordPress dashboard.
  • Google Analytics: Track pages with high exit rates that may indicate broken links.

Step 6: Test Changes

After fixing or redirecting links, test them manually to ensure they now lead to the correct destination.

How to Prevent Broken Links

  1. Regularly Audit Links: Use plugins or external tools to check your site periodically.
  2. Use Permalinks Correctly: Avoid changing URLs unnecessarily; if you must, set up proper redirects.
  3. Update External Links: Check the validity of external links when revising older content.
  4. Maintain a Backup: Always back up your site before making changes, especially when fixing multiple links at once.

Conclusion

Broken links are unavoidable but manageable. By regularly auditing your website and taking the time to fix broken links, you can maintain a professional, user-friendly site that ranks well on search engines.

By choosing SternHost, you’re opting for premium domain registration, secure web hosting, and optimized WordPress hosting solutions designed for high performance and reliability. Let SternHost handle the backend, so you can focus on delivering a flawless experience to your audience. Get started today and empower your website with SternHost

How to Fix the ‘Missing Stylesheet’ Error in WordPress Theme Installation

Encountering the “Missing Stylesheet” error when installing a WordPress theme can be confusing, especially for beginners. This issue usually happens due to uploading the wrong file. In this guide, we’ll explain why it happens and provide easy fixes to resolve it.

Why Does the ‘Missing Stylesheet’ Error Occur?

  • You uploaded the entire theme package instead of the actual theme file.
  • The theme is missing the style.css stylesheet, which WordPress requires.

Step-by-Step Guide to Fix the Missing Stylesheet Error

  1. Check the Theme File You’re Uploading
  • Download the theme file from the source (e.g., ThemeForest or WordPress repository).
  • Unzip the downloaded file on your computer.
  • Look for a folder containing the actual theme file (e.g., theme-name.zip).
  1. Upload the Correct Theme File
  • Go to WordPress Dashboard → Appearance → Themes → Add New.
  • Upload the correct .zip file containing the theme.
  1. Verify the style.css File Exists
  • If you manually upload the theme, ensure the theme folder includes the style.css file in its root directory.
  1. Re-Download the Theme
  • If the issue persists, re-download the theme from the source to ensure the file isn’t corrupted.
  1. Install via FTP (Alternative Method)
  • Access your website files via FTP.
  • Upload the unzipped theme folder directly to the wp-content/themes directory.
  • Activate the theme via your WordPress dashboard.

Conclusion

The “Missing Stylesheet” error is common when installing a theme but is easy to fix by uploading the correct theme file. Always double-check your download, verify the style.css file, and follow the proper installation process to avoid this issue.

SternHost’s scalable and secure hosting plans ensure that your website remains online, even during unexpected issues. Looking for a reliable hosting partner? Try SternHost for superior hosting, domain registration, and WordPress hosting solutions tailored to your needs.


How to Fix the ‘Too Many Redirects’ Error in WordPress – Step-by-Step Guide

The “Too Many Redirects” error in WordPress can frustrate both site owners and visitors. Often caused by misconfigured settings or plugin conflicts, this error results in a redirect loop that prevents access to your site. Here’s how to troubleshoot and fix it effectively.

What Causes the ‘Too Many Redirects’ Error?

  • Incorrect URL settings in WordPress.
  • Conflicts with caching plugins.
  • Misconfigured .htaccess files.
  • Plugin or theme issues causing redirect loops.

Step-by-Step Guide to Fix the ‘Too Many Redirects’ Error

  1. Check WordPress URL Settings
  • Go to your WordPress Admin Dashboard → Settings → General.
  • Verify that your WordPress Address (URL) and Site Address (URL) are correct.
    • Example: Ensure both URLs use either http:// or https:// consistently.
  1. Disable Caching Plugins
  • Sometimes caching plugins create redirect conflicts.
  • Temporarily deactivate all caching plugins and clear the cache.
  1. Delete or Reset the .htaccess File
  • Access your website’s root directory via FTP or File Manager.
  • Rename the existing .htaccess file to something like htaccess_old.
  • Go to your WordPress Dashboard → Settings → Permalinks → Save Changes.
  • WordPress will generate a new .htaccess file.
  1. Deactivate All Plugins
  • If the issue persists, deactivate all plugins and reactivate them one by one to identify the problematic plugin.
  1. Clear Browser and Server Cache
  • Clear your browser cache and any server-side cache from your hosting provider.

Conclusion

The “Too Many Redirects” error can seem overwhelming, but it’s often easy to fix by checking your URLs, resetting .htaccess, or managing plugins. Following these steps will ensure your website is back up and running quickly.

SternHost’s scalable and secure hosting plans ensure that your website remains online, even during unexpected issues. Looking for a reliable hosting partner? Try SternHost for superior hosting, domain registration, and WordPress hosting solutions tailored to your needs.


How to Fix WordPress Stuck in Maintenance Mode After Updates – Easy Steps

If your WordPress site gets stuck in maintenance mode after an update, don’t panic. It’s a common issue that happens when an update is interrupted. In this guide, we’ll walk you through simple steps to fix it quickly and ensure your website runs smoothly again.

Step-by-Step Guide to Fix WordPress Maintenance Mode

  1. Access Your Website Files via FTP or File Manager
  • Use an FTP client like FileZilla or your hosting’s File Manager to access your site files.
  1. Locate the .maintenance File in Your Root Directory
  • Find the file named .maintenance in the root folder of your website (usually under public_html).
  1. Delete the .maintenance File
  • Right-click on the .maintenance file and delete it.
  • This action will remove the maintenance mode status from your site.
  1. Clear Your Browser and WordPress Cache
  • If the maintenance mode persists, clear your browser cache and any caching plugins installed on your site.

How to Prevent WordPress Maintenance Mode Issues

  • Update Plugins/Themes One at a Time: Avoid bulk updates to prevent overload.
  • Use Reliable Hosting: Ensure your hosting provider can handle your website’s traffic.
  • Backup Before Updates: Always back up your website before running updates.

Conclusion

WordPress stuck in maintenance mode is easy to fix if you know where to look. By following these steps, you can resolve the issue in minutes and get your website back online. Regular backups and cautious updates will prevent this problem in the future.

SternHost’s scalable and secure hosting plans ensure that your website remains online, even during unexpected issues. Looking for a reliable hosting partner? Try SternHost for superior hosting, domain registration, and WordPress hosting solutions tailored to your needs.

What Is DNS and How Does It Impact Your Website?

The Domain Name System (DNS) plays a crucial role in the functionality of every website on the internet. Whether you’re launching a new website or managing an existing one, understanding DNS is essential for ensuring smooth operations and a seamless experience for your visitors.

In this blog, we’ll explain what DNS is, how it works, and why it’s important for your website’s performance, security, and user experience.

What Is DNS?

DNS, or Domain Name System, is like the internet’s phonebook. It translates human-readable domain names (e.g., www.example.com) into IP addresses (e.g., 192.0.2.1) that computers use to identify each other on the internet.

Without DNS, users would have to remember numerical IP addresses to visit websites, making the internet far less user-friendly.

How Does DNS Work?

When someone types your website’s URL into a browser, here’s how DNS works behind the scenes:

  1. User Query: The user enters a domain name (e.g., www.example.com) into their browser.
  2. DNS Resolver: The query is sent to a DNS resolver, often provided by the user’s internet service provider (ISP).
  3. Root Server Check: The resolver contacts a root server to locate the top-level domain (TLD) servers (e.g., .com, .org).
  4. TLD Server Check: The resolver asks the TLD server for the authoritative DNS server of the specific domain.
  5. Authoritative DNS Server: The authoritative server provides the IP address of the domain.
  6. Website Loads: The browser uses the IP address to load the website.

This process happens in milliseconds, ensuring a seamless experience for users.

Types of DNS Records

DNS records store essential information about your domain. Common types include:

  • A Record: Maps a domain to an IPv4 address.
  • AAAA Record: Maps a domain to an IPv6 address.
  • CNAME Record: Points one domain to another domain.
  • MX Record: Directs emails to your domain’s mail server.
  • TXT Record: Holds text information, often for verification purposes (e.g., SPF or DKIM records).

How Does DNS Impact Your Website?

1. Website Accessibility

DNS ensures that users can access your website by resolving the domain name to the correct IP address. Without it, your website wouldn’t be reachable.

2. Speed and Performance

Efficient DNS resolution is critical for website speed. Slow DNS lookups can delay page loading times, negatively impacting user experience and SEO rankings.

3. Security

DNS vulnerabilities, like DNS spoofing or cache poisoning, can lead to cyberattacks. Using secure DNS practices, such as DNSSEC (DNS Security Extensions), can protect your site and its visitors.

4. Email Deliverability

Properly configured DNS records, like MX and SPF, ensure reliable email delivery and prevent emails from being flagged as spam.

5. Scalability

DNS allows you to manage traffic effectively, especially during high-traffic periods, by distributing load through techniques like DNS load balancing.

Free and Paid DNS Management Tools

Free Options

  1. Google Cloud DNS: Reliable, fast DNS resolution for small to medium websites.
  2. Cloudflare: Offers free DNS management with added security and performance benefits.

Paid Options

  1. Amazon Route 53: A scalable and highly available DNS service with advanced routing options.
  2. Dyn Managed DNS: Offers premium DNS management for enterprise-level websites.

Best Practices for Managing DNS

  1. Use a Reliable DNS Provider: Choose providers known for speed, uptime, and security.
  2. Enable DNSSEC: Protect your website from DNS-related attacks with DNSSEC.
  3. Monitor DNS Performance: Regularly check DNS speed and ensure records are updated.
  4. Configure Backup DNS Servers: Use multiple DNS servers to ensure availability in case of failure.
  5. Optimize TTL (Time-to-Live): Adjust TTL values to balance performance and flexibility in DNS propagation.

Common DNS Issues and How to Fix Them

1. Propagation Delays

  • Problem: Changes to DNS records take time to propagate worldwide.
  • Fix: Reduce TTL before making changes to speed up propagation.

2. Incorrect DNS Records

  • Problem: Misconfigured records can prevent your website from loading.
  • Fix: Double-check all records in your DNS management tool.

3. DNS Server Downtime

  • Problem: Downtime at your DNS provider can make your website inaccessible.
  • Fix: Use a backup DNS provider or a high-availability DNS service.

4. DNS Spoofing

  • Problem: Attackers redirect users to malicious sites by altering DNS data.
  • Fix: Enable DNSSEC and monitor your DNS settings regularly.

Conclusion

DNS is the backbone of your website’s accessibility, performance, and security. By understanding how it works and managing it effectively, you can ensure your website runs smoothly, loads quickly, and remains secure.

SternHost’s scalable and secure hosting plans ensure that your website remains online, even during unexpected issues. Looking for a reliable hosting partner? Try SternHost for superior hosting, domain registration, and WordPress hosting solutions tailored to your needs.