Archive

How to Fix the ‘Too Many Redirects’ Error in WordPress – Step-by-Step Guide

The “Too Many Redirects” error in WordPress can frustrate both site owners and visitors. Often caused by misconfigured settings or plugin conflicts, this error results in a redirect loop that prevents access to your site. Here’s how to troubleshoot and fix it effectively.

What Causes the ‘Too Many Redirects’ Error?

  • Incorrect URL settings in WordPress.
  • Conflicts with caching plugins.
  • Misconfigured .htaccess files.
  • Plugin or theme issues causing redirect loops.

Step-by-Step Guide to Fix the ‘Too Many Redirects’ Error

  1. Check WordPress URL Settings
  • Go to your WordPress Admin Dashboard → Settings → General.
  • Verify that your WordPress Address (URL) and Site Address (URL) are correct.
    • Example: Ensure both URLs use either http:// or https:// consistently.
  1. Disable Caching Plugins
  • Sometimes caching plugins create redirect conflicts.
  • Temporarily deactivate all caching plugins and clear the cache.
  1. Delete or Reset the .htaccess File
  • Access your website’s root directory via FTP or File Manager.
  • Rename the existing .htaccess file to something like htaccess_old.
  • Go to your WordPress Dashboard → Settings → Permalinks → Save Changes.
  • WordPress will generate a new .htaccess file.
  1. Deactivate All Plugins
  • If the issue persists, deactivate all plugins and reactivate them one by one to identify the problematic plugin.
  1. Clear Browser and Server Cache
  • Clear your browser cache and any server-side cache from your hosting provider.

Conclusion

The “Too Many Redirects” error can seem overwhelming, but it’s often easy to fix by checking your URLs, resetting .htaccess, or managing plugins. Following these steps will ensure your website is back up and running quickly.

SternHost’s scalable and secure hosting plans ensure that your website remains online, even during unexpected issues. Looking for a reliable hosting partner? Try SternHost for superior hosting, domain registration, and WordPress hosting solutions tailored to your needs.


How to Fix WordPress Stuck in Maintenance Mode After Updates – Easy Steps

If your WordPress site gets stuck in maintenance mode after an update, don’t panic. It’s a common issue that happens when an update is interrupted. In this guide, we’ll walk you through simple steps to fix it quickly and ensure your website runs smoothly again.

Step-by-Step Guide to Fix WordPress Maintenance Mode

  1. Access Your Website Files via FTP or File Manager
  • Use an FTP client like FileZilla or your hosting’s File Manager to access your site files.
  1. Locate the .maintenance File in Your Root Directory
  • Find the file named .maintenance in the root folder of your website (usually under public_html).
  1. Delete the .maintenance File
  • Right-click on the .maintenance file and delete it.
  • This action will remove the maintenance mode status from your site.
  1. Clear Your Browser and WordPress Cache
  • If the maintenance mode persists, clear your browser cache and any caching plugins installed on your site.

How to Prevent WordPress Maintenance Mode Issues

  • Update Plugins/Themes One at a Time: Avoid bulk updates to prevent overload.
  • Use Reliable Hosting: Ensure your hosting provider can handle your website’s traffic.
  • Backup Before Updates: Always back up your website before running updates.

Conclusion

WordPress stuck in maintenance mode is easy to fix if you know where to look. By following these steps, you can resolve the issue in minutes and get your website back online. Regular backups and cautious updates will prevent this problem in the future.

SternHost’s scalable and secure hosting plans ensure that your website remains online, even during unexpected issues. Looking for a reliable hosting partner? Try SternHost for superior hosting, domain registration, and WordPress hosting solutions tailored to your needs.

What Is DNS and How Does It Impact Your Website?

The Domain Name System (DNS) plays a crucial role in the functionality of every website on the internet. Whether you’re launching a new website or managing an existing one, understanding DNS is essential for ensuring smooth operations and a seamless experience for your visitors.

In this blog, we’ll explain what DNS is, how it works, and why it’s important for your website’s performance, security, and user experience.

What Is DNS?

DNS, or Domain Name System, is like the internet’s phonebook. It translates human-readable domain names (e.g., www.example.com) into IP addresses (e.g., 192.0.2.1) that computers use to identify each other on the internet.

Without DNS, users would have to remember numerical IP addresses to visit websites, making the internet far less user-friendly.

How Does DNS Work?

When someone types your website’s URL into a browser, here’s how DNS works behind the scenes:

  1. User Query: The user enters a domain name (e.g., www.example.com) into their browser.
  2. DNS Resolver: The query is sent to a DNS resolver, often provided by the user’s internet service provider (ISP).
  3. Root Server Check: The resolver contacts a root server to locate the top-level domain (TLD) servers (e.g., .com, .org).
  4. TLD Server Check: The resolver asks the TLD server for the authoritative DNS server of the specific domain.
  5. Authoritative DNS Server: The authoritative server provides the IP address of the domain.
  6. Website Loads: The browser uses the IP address to load the website.

This process happens in milliseconds, ensuring a seamless experience for users.

Types of DNS Records

DNS records store essential information about your domain. Common types include:

  • A Record: Maps a domain to an IPv4 address.
  • AAAA Record: Maps a domain to an IPv6 address.
  • CNAME Record: Points one domain to another domain.
  • MX Record: Directs emails to your domain’s mail server.
  • TXT Record: Holds text information, often for verification purposes (e.g., SPF or DKIM records).

How Does DNS Impact Your Website?

1. Website Accessibility

DNS ensures that users can access your website by resolving the domain name to the correct IP address. Without it, your website wouldn’t be reachable.

2. Speed and Performance

Efficient DNS resolution is critical for website speed. Slow DNS lookups can delay page loading times, negatively impacting user experience and SEO rankings.

3. Security

DNS vulnerabilities, like DNS spoofing or cache poisoning, can lead to cyberattacks. Using secure DNS practices, such as DNSSEC (DNS Security Extensions), can protect your site and its visitors.

4. Email Deliverability

Properly configured DNS records, like MX and SPF, ensure reliable email delivery and prevent emails from being flagged as spam.

5. Scalability

DNS allows you to manage traffic effectively, especially during high-traffic periods, by distributing load through techniques like DNS load balancing.

Free and Paid DNS Management Tools

Free Options

  1. Google Cloud DNS: Reliable, fast DNS resolution for small to medium websites.
  2. Cloudflare: Offers free DNS management with added security and performance benefits.

Paid Options

  1. Amazon Route 53: A scalable and highly available DNS service with advanced routing options.
  2. Dyn Managed DNS: Offers premium DNS management for enterprise-level websites.

Best Practices for Managing DNS

  1. Use a Reliable DNS Provider: Choose providers known for speed, uptime, and security.
  2. Enable DNSSEC: Protect your website from DNS-related attacks with DNSSEC.
  3. Monitor DNS Performance: Regularly check DNS speed and ensure records are updated.
  4. Configure Backup DNS Servers: Use multiple DNS servers to ensure availability in case of failure.
  5. Optimize TTL (Time-to-Live): Adjust TTL values to balance performance and flexibility in DNS propagation.

Common DNS Issues and How to Fix Them

1. Propagation Delays

  • Problem: Changes to DNS records take time to propagate worldwide.
  • Fix: Reduce TTL before making changes to speed up propagation.

2. Incorrect DNS Records

  • Problem: Misconfigured records can prevent your website from loading.
  • Fix: Double-check all records in your DNS management tool.

3. DNS Server Downtime

  • Problem: Downtime at your DNS provider can make your website inaccessible.
  • Fix: Use a backup DNS provider or a high-availability DNS service.

4. DNS Spoofing

  • Problem: Attackers redirect users to malicious sites by altering DNS data.
  • Fix: Enable DNSSEC and monitor your DNS settings regularly.

Conclusion

DNS is the backbone of your website’s accessibility, performance, and security. By understanding how it works and managing it effectively, you can ensure your website runs smoothly, loads quickly, and remains secure.

SternHost’s scalable and secure hosting plans ensure that your website remains online, even during unexpected issues. Looking for a reliable hosting partner? Try SternHost for superior hosting, domain registration, and WordPress hosting solutions tailored to your needs.

How to Monitor and Analyze Website Performance with Free and Paid Tools

Monitoring and analyzing your website’s performance is essential to ensuring a seamless user experience, improving search engine rankings, and boosting overall efficiency. Without proper performance tracking, you could miss critical issues affecting your site’s speed, uptime, or user engagement.

This guide will show you how to monitor and analyze website performance effectively using a mix of free and paid tools.

Why Monitor Website Performance?

1. Enhance User Experience

A fast, responsive website ensures visitors stay longer, engage more, and return frequently.

2. Boost SEO Rankings

Search engines like Google prioritize fast-loading websites. Monitoring performance helps you stay competitive.

3. Identify and Fix Issues Quickly

Regular analysis allows you to detect problems like slow loading times, broken links, or server downtime before they affect users.

4. Optimize Resource Usage

Understand which elements of your site consume the most resources and optimize them for better performance.

Key Metrics to Monitor

To get a complete picture of your website’s performance, focus on these metrics:

  1. Page Load Time: The time it takes for a page to fully load.
  2. Uptime: The percentage of time your website is available to users.
  3. Bounce Rate: The percentage of users who leave your site after visiting only one page.
  4. Core Web Vitals: Google’s key metrics for user experience, including Largest Contentful Paint (LCP), First Input Delay (FID), and Cumulative Layout Shift (CLS).
  5. Server Response Time: How long it takes for your server to respond to a request.

Top Tools for Monitoring Website Performance

Free Tools

  1. Google PageSpeed Insights
    • Provides insights into page loading speed and offers optimization suggestions.
    • Best for: Measuring Core Web Vitals and improving speed.
  2. GTmetrix
    • Analyzes website performance and provides a detailed breakdown of speed bottlenecks.
    • Best for: Visualizing loading speed and resource usage.
  3. Pingdom
    • Monitors uptime and performance from multiple global locations.
    • Best for: Tracking uptime and overall performance.
  4. Google Search Console
    • Tracks search performance, crawl errors, and mobile usability.
    • Best for: SEO-focused performance monitoring.
  5. WebPageTest
    • Offers advanced testing for speed and performance with detailed reports.
    • Best for: Technical insights into loading times.

Paid Tools

  1. Semrush Site Audit
    • Provides an in-depth performance audit and tracks Core Web Vitals.
    • Best for: Comprehensive performance and SEO analysis.
  2. New Relic
    • Monitors server performance, database queries, and application response times.
    • Best for: Backend performance monitoring.
  3. Datadog
    • Tracks website uptime, performance metrics, and server health.
    • Best for: High-traffic or enterprise-level sites.
  4. Ahrefs Site Audit
    • Offers insights into performance, broken links, and site health.
    • Best for: Combining SEO and performance optimization.
  5. UptimeRobot
    • Tracks uptime and alerts you when your website is down.
    • Best for: Simple uptime monitoring.

How to Use These Tools to Monitor Performance

Step 1: Measure Your Baseline

Start by analyzing your current website performance using tools like Google PageSpeed Insights or GTmetrix. Note key metrics like load time and Core Web Vitals.

Step 2: Set Performance Goals

Define what you want to achieve, such as reducing load time to under 3 seconds or achieving 99.9% uptime.

Step 3: Monitor Regularly

Schedule regular checks (weekly or monthly) to identify trends and detect issues early. Use uptime monitoring tools like UptimeRobot for real-time alerts.

Step 4: Address Identified Issues

Use optimization suggestions from tools like PageSpeed Insights or Pingdom to:

  • Compress images.
  • Minify CSS, JavaScript, and HTML.
  • Enable caching.
  • Optimize server performance.

Step 5: Test After Changes

After implementing fixes, re-test your website to ensure performance has improved.

Step 6: Track Long-Term Trends

Paid tools like New Relic or Semrush provide ongoing insights to help you track long-term improvements and address recurring issues.

Tips for Effective Website Performance Monitoring

  1. Focus on Mobile Performance: With mobile users dominating web traffic, ensure your site performs well on smaller screens.
  2. Enable Alerts: Use tools with notification features to stay informed about downtime or critical issues.
  3. Optimize Hosting: Choose a reliable hosting provider with high-speed servers to boost overall performance.
  4. Keep Plugins and Themes Updated: Outdated plugins or themes can slow down your website or cause errors.
  5. Monitor During Peak Traffic: Analyze performance during high-traffic periods to ensure your site can handle the load.

Conclusion

Monitoring and analyzing your website’s performance is a continuous process that ensures your site remains fast, secure, and user-friendly. With the right mix of free and paid tools, you can identify and fix issues before they impact visitors. By regularly assessing performance metrics and implementing improvements, you’ll not only enhance user experience but also achieve better search engine rankings and higher conversions.

SternHost’s scalable and secure hosting plans ensure that your website remains online, even during unexpected issues. Looking for a reliable hosting partner? Try SternHost for superior hosting, domain registration, and WordPress hosting solutions tailored to your needs.

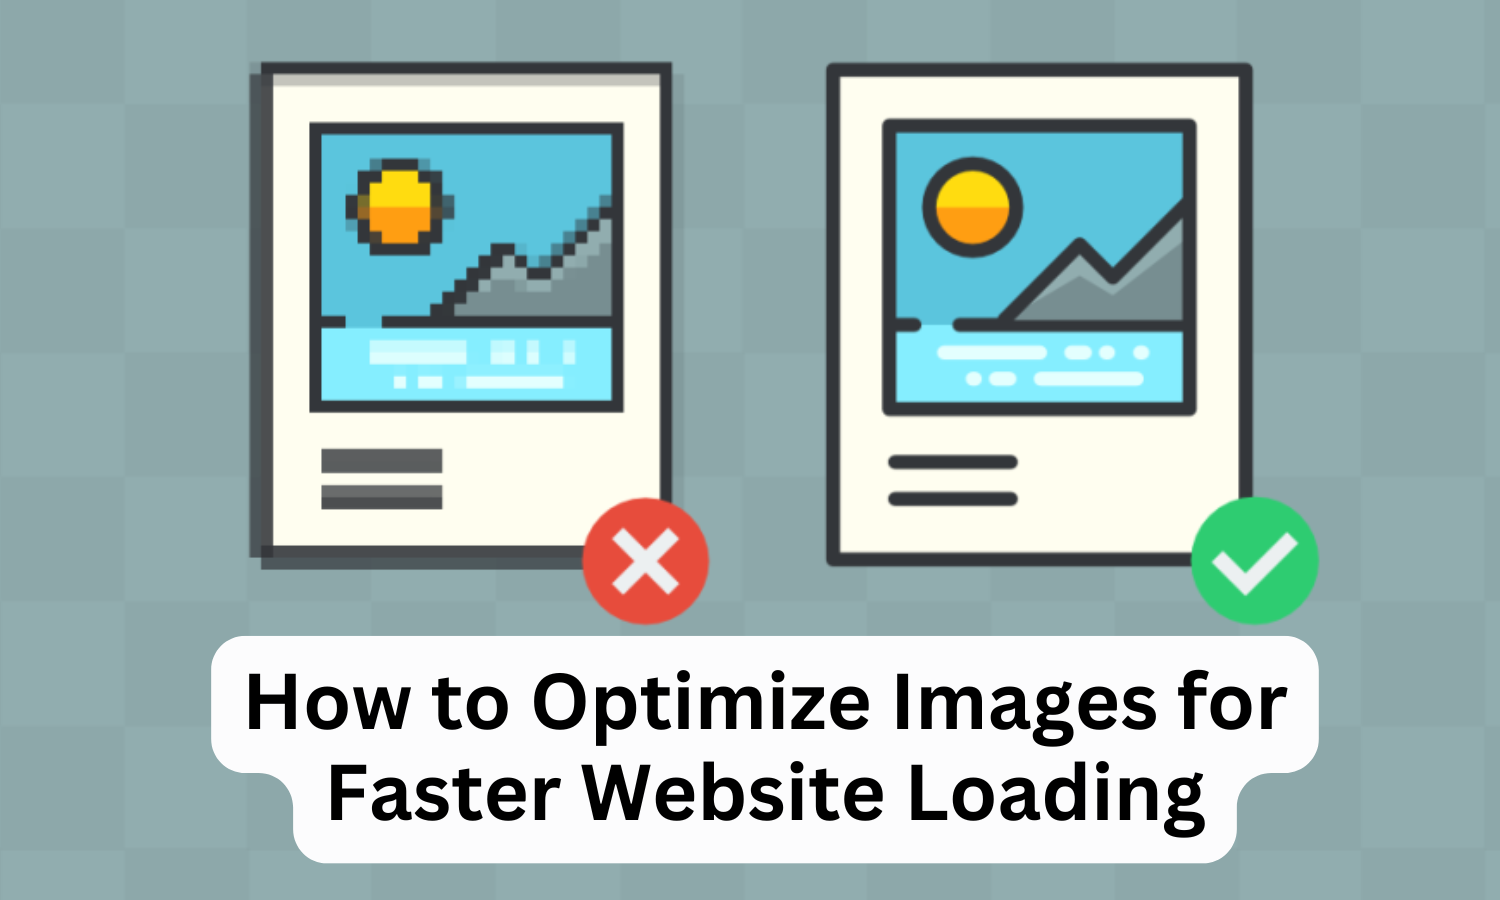
How to Optimize Images for Faster Website Loading

Images are an essential part of any website. They enhance user experience, break up text, and help convey your message visually. However, unoptimized images can slow down your website, leading to higher bounce rates and lower search engine rankings. This guide will walk you through the best practices to optimize images for faster website loading without compromising quality.

Why Image Optimization Matters

  1. Improves Website Speed: Large image files slow down your site, affecting user experience and SEO.
  2. Enhances User Experience: Faster load times keep visitors engaged and reduce bounce rates.
  3. Boosts SEO Rankings: Google prioritizes websites with quick load times, giving optimized sites an edge.
  4. Saves Hosting Resources: Smaller image files consume less bandwidth and storage, helping you stay within hosting limits.

Step-by-Step Guide to Optimizing Images for Your Website

1. Choose the Right File Format

  • JPEG: Ideal for photos and complex images because it balances quality and file size.
  • PNG: Best for images that require transparency, like logos.
  • WebP: A modern format offering high-quality images with smaller file sizes.

2. Resize Your Images

  • Ensure your images are no larger than the maximum dimensions required for your website.
  • Use tools like Adobe Photoshop, Canva, or GIMP to resize your images.
  • For WordPress, plugins like Smush or EWWW Image Optimizer can automatically resize images during upload.

3. Compress Your Images

  • Compression reduces file size without a noticeable loss of quality.
  • Use tools like:
    • TinyPNG or JPEGmini for manual compression.
    • ShortPixel or Imagify for automated compression on WordPress.

4. Implement Lazy Loading

  • Lazy loading delays the loading of images until they appear in the user’s viewport.
  • This reduces the number of resources loaded initially, speeding up the page.
  • Use WordPress plugins like Lazy Load by WP Rocket or enable native lazy loading with HTML attributes.

5. Use a Content Delivery Network (CDN)

  • CDNs like Cloudflare, StackPath, or KeyCDN cache your images and deliver them from servers closer to your visitors.
  • This reduces load times, especially for global audiences.

6. Optimize Image File Names

  • Use descriptive, keyword-rich file names (e.g., blue-widget-example.jpg instead of IMG123.jpg).
  • This improves SEO and makes your images more discoverable.

7. Add Alt Text to Images

  • Alt text improves accessibility and helps search engines understand the content of your images.
  • Write concise, descriptive alt text with relevant keywords.

8. Use Browser-Compatible Formats

  • Ensure your images are compatible with all major browsers.
  • Convert images to WebP or AVIF formats using tools like Squoosh to ensure compatibility.

9. Leverage Caching for Images

  • Configure your server or hosting provider to cache images for returning visitors.
  • Use caching plugins like WP Rocket or W3 Total Cache to make this process seamless.

10. Test Your Website Speed Regularly

  • Use tools like Google PageSpeed Insights, GTmetrix, or Pingdom to measure the impact of your optimization efforts.

Common Mistakes to Avoid When Optimizing Images

  • Uploading images directly from your camera without resizing or compressing them.
  • Ignoring alt text, which can hurt SEO and accessibility.
  • Using outdated or unsupported image formats.

Conclusion

Optimizing images is one of the easiest and most effective ways to improve your website’s performance. By following these steps, you can create a fast-loading, user-friendly website that ranks well on search engines and keeps visitors engaged.

SternHost’s scalable and secure hosting plans ensure that your website remains online, even during unexpected issues. Looking for a reliable hosting partner? Try SternHost for superior hosting, domain registration, and WordPress hosting solutions tailored to your needs.


What Is Bandwidth, and How Does It Impact Your Hosting Needs?

When choosing a hosting plan for your website, bandwidth is one of the key factors you need to consider. It plays a crucial role in determining how well your site performs, especially as traffic grows. But what exactly is bandwidth, and how does it impact your hosting needs?

This guide explains bandwidth in simple terms, its importance, and how to select the right bandwidth for your website.

What Is Bandwidth?

In the context of web hosting, bandwidth refers to the amount of data your website can transfer to and from visitors within a specific time frame, typically measured in gigabytes (GB) per month.

Every time someone visits your site, data such as images, videos, and text is downloaded from your server to their device. The more visitors your site has or the larger the files on your website, the more bandwidth you’ll need.

How Does Bandwidth Work?

Think of bandwidth as a highway:

  • The width of the highway represents the amount of bandwidth available.
  • The vehicles on the highway represent the data being transferred.

If your highway (bandwidth) is too narrow for the traffic (data), it can cause congestion (slow loading speeds) or even block access (site downtime).

How Bandwidth Impacts Your Hosting Needs

1. Handles Website Traffic

Higher bandwidth allows your website to accommodate more visitors simultaneously. If your site experiences spikes in traffic, sufficient bandwidth ensures it can handle the load without crashing.

2. Supports Content-Rich Websites

Websites with high-quality images, videos, and downloadable content require more bandwidth. A low-bandwidth hosting plan may lead to slow load times or inability to deliver content effectively.

3. Affects User Experience

Insufficient bandwidth can result in slow loading speeds or site downtime, which frustrates visitors and increases bounce rates.

4. Influences SEO

Search engines like Google prioritize websites that load quickly and offer a seamless user experience. Having adequate bandwidth supports these goals.

How Much Bandwidth Does Your Website Need?

Your bandwidth requirements depend on several factors:

  1. Website Traffic: Estimate the number of visitors you expect monthly.
  2. Average Page Size: Larger pages with images and videos consume more bandwidth.
  3. User Behavior: If visitors browse multiple pages or download files, it increases bandwidth usage.

Use the formula:
Bandwidth = Monthly Visitors x Average Page Size x Average Pages Per Visit

For example:

  • 10,000 monthly visitors
  • 2 MB average page size
  • 3 pages per visit
    Bandwidth needed = 10,000 x 2 MB x 3 = 60 GB/month

Choosing the Right Hosting Plan for Your Bandwidth Needs

1. Shared Hosting

  • Ideal for small websites with low to moderate traffic.
  • Bandwidth is shared with other websites on the same server.
  • May not handle high traffic spikes effectively.

2. VPS Hosting

  • Offers dedicated bandwidth for your site.
  • Suitable for medium-sized websites with growing traffic.

3. Dedicated Hosting

  • Provides maximum bandwidth for large, content-heavy websites.
  • Best for sites with high traffic volumes or critical business applications.

4. Cloud Hosting

  • Scalable bandwidth that adjusts to traffic fluctuations.
  • Perfect for websites with unpredictable traffic patterns.

Tips to Optimize Bandwidth Usage

  1. Optimize Images: Compress images to reduce their size without compromising quality.
  2. Enable Browser Caching: Cache files locally on users’ devices to reduce repeat data transfers.
  3. Use a Content Delivery Network (CDN): CDNs distribute content across multiple servers, reducing bandwidth usage on your main server.
  4. Minify Code: Remove unnecessary spaces and characters from HTML, CSS, and JavaScript files.
  5. Monitor Traffic Regularly: Use analytics tools to track bandwidth usage and plan upgrades if needed.

Conclusion

Bandwidth is a critical aspect of your hosting plan that directly impacts your website’s performance and user experience. Whether you’re running a personal blog, an e-commerce site, or a media-rich platform, understanding your bandwidth needs ensures your website remains accessible and efficient.

By choosing SternHost, you’re opting for premium domain registration, secure web hosting, and optimized WordPress hosting solutions designed for high performance and reliability. Let SternHost handle the backend, so you can focus on delivering a flawless experience to your audience. Get started today and empower your website with SternHost

What Is Caching and How Does It Affect Your Web Hosting?

What Is Caching?

Caching is a technology that stores copies of files or data so that they can be accessed more quickly. When a visitor loads your website, their browser and the web server work together to display the content. Without caching, every time someone visits your site, the server has to fetch all the data from scratch, which can slow down the load time.

How It Works:

  • Initial Visit: When a user visits your website for the first time, their browser stores (caches) certain data like images, scripts, and HTML files.
  • Subsequent Visits: On return visits, the browser can quickly load this stored data without needing to retrieve it from the server, making the site load faster.

Types of Caching

Caching can happen at various levels, and each type can impact your website’s speed and performance differently:

  1. Browser Caching:
    • What It Does: Saves files like images and stylesheets in the user’s browser.
    • Impact: Reduces the amount of data that needs to be downloaded on repeat visits, speeding up load times.
  2. Server-Side Caching:
    • What It Does: Stores a version of the website’s content on the server itself.
    • Impact: Decreases the server’s workload, making it faster to respond to user requests.
  3. Content Delivery Network (CDN) Caching:
    • What It Does: Uses servers around the world to cache copies of your site and deliver them from a server closer to the visitor’s location.
    • Impact: Improves load times for users no matter where they are geographically.
  4. Database Caching:
    • What It Does: Stores frequently requested database queries.
    • Impact: Reduces the load on your database, speeding up data retrieval for your site.

Benefits of Caching

  1. Faster Website Loading:
    • Cached data loads faster because it doesn’t need to be fetched from the server each time. This improves the overall user experience.
  2. Reduced Server Load:
    • Caching helps reduce the strain on your web server by handling more requests without needing to constantly retrieve data.
  3. Better User Experience:
    • Faster load times keep visitors on your site longer and lower the chance of them leaving due to slow performance.
  4. Improved SEO:
    • Search engines like Google prioritize websites that load quickly. Caching can help boost your site’s SEO ranking.

How Caching Affects Your Web Hosting

Caching can greatly influence how your web hosting performs:

  • Reduces Bandwidth Usage: Cached content means fewer requests are sent to the server, leading to lower bandwidth use. This can be especially beneficial if your hosting plan has bandwidth limits.
  • Enhances Hosting Performance: With reduced server load, your hosting environment can handle more traffic without slowing down. This is crucial for high-traffic websites or e-commerce sites that need to maintain fast performance.
  • Compatibility with Hosting Plans: Many web hosting providers offer built-in caching solutions or integrate with popular caching plugins for platforms like WordPress. Make sure to check if your hosting plan supports server-side caching or if it’s compatible with CDN services for extra speed.

How to Implement Caching on Your Website

  1. Use a Caching Plugin: For WordPress users, plugins like W3 Total Cache, WP Super Cache, or LiteSpeed Cache can make setting up caching easy.
  2. Enable Browser Caching: Adjust your website’s settings or use your hosting provider’s control panel to enable browser caching.
  3. Consider a CDN: Services like Cloudflare and Amazon CloudFront offer caching capabilities that can improve site performance globally.
  4. Server-Side Caching: If your hosting provider offers it, enable server-side caching for better speed. This may include object caching or full-page caching.

Conclusion

Caching is an effective tool that helps your website load faster, reduces server load, and enhances user experience. By understanding and implementing different types of caching, you can make your web hosting more efficient and improve your site’s performance. Whether it’s browser caching, server-side caching, or using a CDN, taking advantage of caching technology can make a significant difference in how your website operates.

SternHost’s scalable and secure hosting plans ensure that your website remains online, even during unexpected issues. Looking for a reliable hosting partner? Try SternHost for superior hosting, domain registration, and WordPress hosting solutions tailored to your needs.

Understanding Domain Hosting and Web Hosting

When setting up a website, terms like “domain hosting” and “web hosting” can be confusing, especially if you’re new to the world of websites. Both are essential for getting your site online, but they serve different purposes. In this guide, we’ll break down what domain hosting and web hosting mean and how they work together to make your website accessible.

What is Domain Hosting?

Domain hosting is a service that manages your website’s domain name. A domain name is your website’s address on the internet, like www.example.com. It’s what users type in their browser to find your site.

  • Domain Registrar: Companies like Sternhost, Namecheap, or Google Domains provide domain registration services. They allow you to purchase and register your domain name.
  • Purpose of Domain Hosting: Ensures that your domain name is connected to your website so that users can access it.

Example: Think of a domain name as the address of your house. Domain hosting is like the phone book that lists your address so people can find it.

What is Web Hosting?

Web hosting is the service that provides the space where your website’s content lives. It’s where all the data, images, text, and code of your website are stored and made available to users.

  • Web Hosting Providers: Companies like Sternhost, SiteGround, and HostGator offer web hosting services that store your website on their servers.
  • Types of Web Hosting:
    • Shared Hosting: Multiple websites share the same server resources. It’s cost-effective but may slow down if traffic increases.
    • VPS Hosting: Offers more resources and better performance by virtually partitioning a single server.
    • Dedicated Hosting: A server dedicated to one website, providing maximum performance and control.
    • Cloud Hosting: Uses multiple servers for flexibility and high uptime.

Example: If your domain is your house’s address, web hosting is the actual house where all your belongings (your website’s content) are stored.

Key Differences Between Domain Hosting and Web Hosting

Understanding the differences between these services helps clarify why you need both:

  1. Function:
    • Domain Hosting: Registers and manages your website’s address (the domain name).
    • Web Hosting: Stores your website’s files and content and makes them accessible online.
  2. Service Providers:
    • Domain Hosting: Managed by domain registrars like Sternhost
    • Web Hosting: Provided by companies specializing in storing website data, like Sternhost or HostGator.
  3. Dependency:
    • Interdependent: A website needs both a domain name and hosting to be live. A domain without hosting points to nothing, and hosting without a domain has no clear address for users to find the site.

Can Domain Hosting and Web Hosting Be Bundled?

Yes, many service providers offer both domain hosting and web hosting as a package:

  • All-in-One Providers: Companies like Sternhost allow you to register a domain and host your website under one roof. This can make managing your website simpler and more convenient.
  • Separate Services: Some people prefer registering their domain with one company and hosting their site with another for better flexibility or security.

How Do Domain and Web Hosting Work Together?

To make your website accessible to users, you need to connect your domain hosting and web hosting:

  1. Register a Domain Name: First, purchase a domain name from a domain registrar.
  2. Choose a Web Host: Select a web hosting service to store your site’s content.
  3. Connect the Two: Update your domain’s DNS settings to point to your web host’s servers.

Once these steps are complete, users who type your domain name into their browser will be directed to your hosted website.

Conclusion

In summary, domain hosting and web hosting are two essential services needed to get your website online. Domain hosting manages your site’s address, while web hosting provides the space where your site’s content lives. Knowing the difference helps you make informed choices when setting up your website.

SternHost’s scalable and secure hosting plans ensure that your website remains online, even during unexpected issues. Looking for a reliable hosting partner? Try SternHost for superior hosting, domain registration, and WordPress hosting solutions tailored to your needs.

What is SSL? Why Your Website Needs It for Security and Trust

In today’s digital age, website security is critical. One essential step to protect your site and its visitors is implementing SSL. Ever noticed “https://” or a padlock icon next to a web address? That’s SSL at work. Let’s dive into what SSL means and why it’s a must-have for your website.

What is SSL?

SSL (Secure Sockets Layer) is a security protocol that encrypts data exchanged between a website and its users, ensuring it remains private. Although its updated version is technically called TLS (Transport Layer Security), the term SSL remains widely recognized.

How SSL Works

SSL operates behind the scenes to create a secure connection in just a few steps:

  1. Connection Request: When a visitor accesses your site, their browser requests a secure connection.
  2. Certificate Verification: Your server sends an SSL certificate to validate its authenticity.
  3. Encryption Initiation: Upon validation, an encrypted link is established.
  4. Secure Interaction: Data shared, like passwords or payment details, is safeguarded against interception.

This process is seamless and ensures visitors can browse your site confidently.

Why SSL is Crucial for Your Website

1. Safeguards Sensitive Data

SSL shields sensitive information shared on your website, such as:

  • Payment Details: Ensures safe online transactions.
  • Login Credentials: Protects usernames and passwords.
  • Forms and Submissions: Encrypts data provided through contact forms or sign-ups.

Encryption makes it virtually impossible for hackers to intercept or misuse this data.

2. Inspires Visitor Confidence

A secure site signals trustworthiness. When users see “https://” or the padlock icon:

  • They feel more confident sharing information.
  • “Not Secure” warnings are avoided, reducing bounce rates.
  • Your site gains credibility, especially vital for e-commerce or data-driven platforms.

3. Enhances SEO Performance

Google and other search engines prioritize secure websites. SSL benefits your SEO strategy by:

  • Improving Rankings: Google has favored SSL-enabled sites since 2014.
  • Boosting Site Speed: Secure sites often load faster, another ranking factor.
  • Attracting More Traffic: Even small ranking improvements can significantly increase visibility.

4. Ensures Legal Compliance

For websites collecting user data, SSL may be legally required:

  • GDPR (EU): Emphasizes data protection and security.
  • PCI DSS: Mandates SSL for processing payment information in e-commerce.

Choosing the Right SSL Certificate

There are various SSL options tailored to different needs:

  • Domain Validated (DV): Ideal for basic sites with minimal data exchange.
  • Organization Validated (OV): Verifies business details, suitable for corporate websites.
  • Extended Validation (EV): Offers the highest security level, perfect for financial and e-commerce platforms.

How to Implement SSL on Your Website

  1. Obtain a Certificate: Purchase from providers like DigiCert or GlobalSign, or opt for free options like Let’s Encrypt.
  2. Install on Your Server: Many hosting providers make the installation process straightforward. At SternHost, our plans include an SSL certificate for seamless setup and enhanced security.
  3. Redirect Traffic: Set up 301 redirects to ensure all visitors access the secure “https://” version.

Conclusion

SSL is no longer optional, it’s essential for any website. It not only secures your visitors’ data but also boosts trust, improves search engine visibility, and aligns with legal standards. By enabling SSL, you enhance both your site’s security and its reputation, making it a key investment for online success.

SternHost’s scalable and secure hosting plans ensure that your website remains online, even during unexpected issues. Looking for a reliable hosting partner? Try SternHost for superior hosting, domain registration, and WordPress hosting solutions tailored to your needs.

Essential Strategies to Safeguard Your Website from Hackers in 2024

As cybersecurity threats grow increasingly sophisticated, keeping your website secure is essential to protect your data and users. This guide outlines the most effective strategies for securing your site against hackers in 2024.

Why Website Security is Crucial

Website security is vital for several key reasons:

  • Protecting Sensitive Information: Keeps user data, including personal and financial details, safe from breaches.
  • Building Trust and Preserving Reputation: A compromised website can erode user confidence and damage brand reputation.
  • Avoiding Financial Losses: Recovering from a security breach can be costly, involving lost revenue and potential fines.
  • Maintaining SEO Rankings: Search engines may penalize hacked sites, impacting visibility.

Top Website Security Practices for 2024

To defend your website against potential cyber threats, implement these recommended security practices:

  1. Use Strong, Unique Passwords Secure passwords are the first line of defense for your website’s admin access:
    • Character Variety: Include uppercase, lowercase letters, numbers, and special characters.
    • Avoid Common Phrases: Do not use easy-to-guess terms like “password123.”
    • Leverage a Password Manager: Use a secure tool to create and store complex passwords.
  2. Keep Software Updated Outdated software can expose vulnerabilities:
    • Update Your CMS: Keep platforms like WordPress, Joomla, and Drupal current.
    • Update Plugins and Themes: Only use trusted plugins and themes with regular updates.
    • Remove Unused Software: Delete any inactive plugins or themes to minimize risk.
  3. Implement SSL Certificates An SSL certificate ensures encrypted data transmission between your server and users:
    • Data Encryption: Protects information from interception.
    • SEO Advantage: Search engines favor HTTPS-enabled sites.
    • Trust Indicator: A padlock symbol shows users they are on a secure site.
      • Pro Tip: SternHost offers a quick and easy SSL installation with all its hosting packages, ensuring your website gains both SEO benefits and security.
  4. Install Security Plugins Security plugins can bolster your site’s defenses:
    • Wordfence Security: Provides real-time protection and malware scanning.
    • Sucuri Security: Monitors and safeguards against known threats.
    • iThemes Security: Adds security layers and tracks suspicious activity.
    • Regularly update these plugins for optimal effectiveness.
  5. Regularly Back Up Your Website Backups are essential to restore your website in case of a security incident:
    • Automatic Backup Tools: Use tools like UpdraftPlus, BackupBuddy, or Jetpack.
    • Multiple Storage Locations: Keep backups both locally and in the cloud for extra security.
  6. Enable Two-Factor Authentication (2FA) Two-Factor Authentication adds an extra security layer:
    • Process: Requires a password and a verification code sent to a user’s phone.
    • Advantage: Makes unauthorized access more difficult, even if the password is compromised.
    • Use plugins like Google Authenticator or Authy for easy setup.
  7. Limit Login Attempts Brute-force attacks involve repeated password attempts. Limiting login attempts helps:
    • Block Repeated Failures: Temporarily locks users after failed attempts.
    • Track Login Activity: Receive alerts for suspicious login attempts.
    • Many CMS platforms offer plugins, like Limit Login Attempts Reloaded, to manage this feature.
  8. Add a Web Application Firewall (WAF) A Web Application Firewall helps block harmful traffic:
    • Function: Filters incoming traffic and blocks known threats.
    • Protection: Shields against SQL injections, cross-site scripting (XSS), and other attacks.
    • Services like Cloudflare and Sucuri Firewall offer reliable WAF solutions.
  9. Choose Secure Hosting Your hosting provider plays a key role in security:
    • Select a Reliable Host: Look for providers with robust security, including firewalls, DDoS protection, and server monitoring.
    • Consider Managed Hosting: Managed hosting services often include advanced security management.
      • Recommendation: SternHost provides secure and reliable hosting options with built-in firewalls, DDoS protection, and 24/7 server monitoring. If security is a priority, their managed hosting services can offer peace of mind, as they handle advanced security measures for you.

Conclusion

Protecting your website against hackers is a proactive effort. By using strong passwords, SSL certificates, security plugins, and regular backups, you create a robust shield against cyber threats in 2024. Staying vigilant and informed will safeguard your website, enhance user trust, maintain SEO rankings, and help avoid costly data breaches.

Thinking of hosting or upgrading your website security? SternHost’s hosting plans come equipped with industry-leading security features, SSL installation, and 24/7 monitoring—everything you need to keep your site safe and running smoothly.