Archive

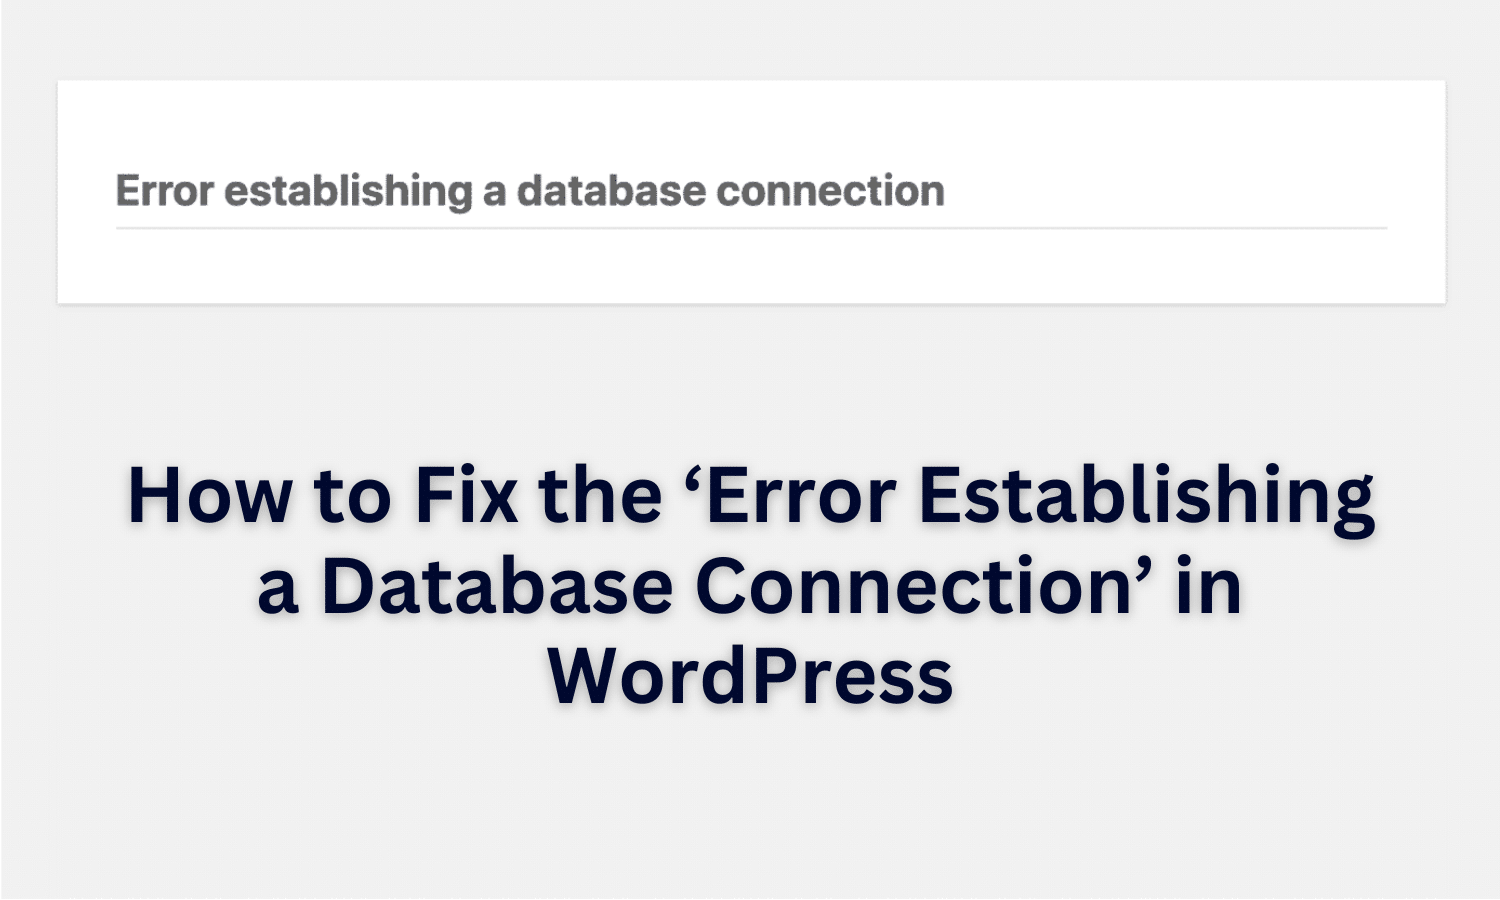
How to Fix the ‘Error Establishing a Database Connection’ in WordPress

The “Error Establishing a Database Connection” indicates WordPress cannot connect to the MySQL database, which stores all site content and settings. When this connection fails, WordPress is unable to display information, resulting in a complete site outage and a blank page with the error message displayed.

Typical Causes of Database Connection Errors

Here are the most frequent reasons for this error:

  • Incorrect Database Credentials: An incorrect database name, username, or password in your configuration file can block access.
  • Database Corruption: Plugins, server issues, or unexpected shutdowns can corrupt your database.
  • Server Downtime: Hosting server issues, like traffic surges or server malfunctions, can temporarily prevent a database connection.
  • Database Usage Limit Reached: Shared hosting plans may restrict database usage, which can cause issues under heavy traffic.

Step-by-Step Solutions for Fixing the Database Connection Error

1. Verify Database Credentials in wp-config.php

Your WordPress configuration file, wp-config.php, contains essential database credentials. Here’s how to check them:

  • Access wp-config.php: Use an FTP client or your hosting file manager to locate this file in your WordPress root directory.
  • Confirm Credentials: Open the file and check these lines:
define('DB_NAME', 'your_database_name'); 
define('DB_USER', 'your_database_username'); 
define('DB_PASSWORD', 'your_database_password'); 
define('DB_HOST', 'localhost');
Update If Necessary: Make sure these values match those in your hosting account. If they don’t, update them, save the file, and reload your site.

2. Repair a Corrupted Database

WordPress offers a built-in repair feature:

Enable Repair: Add this line to wp-config.php:
define('WP_ALLOW_REPAIR', true);
  • Run Database Repair: Visit http://yourwebsite.com/wp-admin/maint/repair.php and select “Repair Database.” Once complete, remove the repair line from wp-config.php for security.

3. Check Your Database Server (DB_HOST)

If issues persist, your database server may be down:

  • Contact Hosting Support: Your hosting provider can confirm if the server is experiencing issues.
  • Test Connection: Create a PHP file called testconnection.php with this code:
<?php
$link = mysqli_connect("localhost", "DB_USER", "DB_PASSWORD");
if (!$link) {
    die("Database connection error: " . mysqli_connect_error());
}
echo "Connected successfully!";
?>
Replace the placeholders with your database credentials and upload the file to your site’s root directory. Visit http://yourwebsite.com/testconnection.php to confirm connectivity.

4. Increase PHP Memory Limit

Low PHP memory can sometimes cause this error:

Increase Limit in wp-config.php: Add this line to your wp-config.php file:
define('WP_MEMORY_LIMIT', '256M');
  • Save and Upload: Upload the modified file to increase WordPress’s available resources.

5. Restore a Database Backup

If none of the steps above resolve the error:

  • Access Backups in Hosting Panel: Locate the latest database backup and restore it.
  • Backup Current Data: Ensure to create a backup of the current database for safekeeping.

6. Consult Your Hosting Provider

If all else fails, reach out to your hosting provider for additional support. They may need to review server configurations.

Preventing Future Database Connection Errors

To minimize the chance of this error recurring:

  • Use a Reliable Hosting Provider: Ensure your hosting provider is reputable with reliable support.
  • Schedule Regular Backups: Protect your data by making regular backups.
  • Limit Resource-Heavy Plugins: Too many plugins can strain resources, so use only necessary ones.
  • Ensure Compatibility: Keep your WordPress, plugins, and themes updated.

Conclusion

While the “Database Connection Error” can disrupt your site, these steps can help you restore functionality. Checking credentials, repairing the database, and seeking hosting support are effective ways to resolve the error. To prevent future issues, maintain regular backups, choose a reliable host, and monitor plugins for compatibility.

By choosing SternHost, you’re opting for premium domain registration, secure web hosting, and optimized WordPress hosting solutions designed for high performance and reliability.

Let SternHost handle the backend, so you can focus on delivering a flawless experience to your audience. Get started today and empower your website with SternHost

Here’s Why Your WordPress Changes Are Not Appearing and How to Fix It

Making updates to your WordPress website only to find that they don’t appear on your live site can be frustrating. Whether it’s a design tweak, content update, or new image, seeing these changes reflected on your site is essential for an engaging and reliable user experience. In this guide, we’ll explore common reasons why changes might not be visible on your live site and provide practical steps to resolve these issues.

Why Changes Aren’t Visible on Your Live WordPress Site

There are a few common reasons why changes might not appear right away:

  • Browser or Server Caching: Cached versions of your site may not show the latest updates.
  • CDN Caching: Content Delivery Networks (CDNs) store cached content, which can delay updates.
  • Plugin or Theme Conflicts: Certain plugins or themes can prevent updates from showing.
  • Delayed Propagation: In rare cases, DNS or server delays can prevent updates from appearing immediately.

How to Fix the Issue When Changes Aren’t Visible

Let’s go through several methods to ensure your changes are displayed correctly on your WordPress site.

1. Clear Your Browser Cache

Your browser may be displaying a cached version of your website, which doesn’t reflect recent changes. Clearing the browser cache is often the first step:

  1. Open your browser settings.
  2. Find the Clear Browsing Data or Clear Cache option.
  3. Select Cached Images and Files and clear it.

After clearing the cache, reload your website to see if the changes appear.

2. Clear WordPress Cache

If your site uses a caching plugin, it may be serving cached pages instead of the latest version. Clearing the cache on WordPress can ensure visitors see your updates:

  1. In your WordPress dashboard, go to Settings and find your caching plugin (e.g., W3 Total Cache, WP Super Cache, or LiteSpeed Cache).
  2. Locate the option to Clear Cache or Purge Cache and click it.
  3. Reload your site to check if the changes are now visible.

Caching plugins store temporary versions of your site to improve load speed, so clearing them regularly after updates is a good practice.

3. Clear CDN Cache

If you’re using a CDN (Content Delivery Network) like Cloudflare, your site’s cached content might be saved across multiple locations, which can delay updates. To clear your CDN cache:

  1. Log into your CDN provider’s dashboard (e.g., Cloudflare, KeyCDN).
  2. Find the Cache or Caching section and select Purge Cache.
  3. Choose to purge everything or just the specific files you’ve updated.

Clearing your CDN cache allows the latest version of your site to be served to users from all CDN locations.

4. Disable Caching Temporarily

If clearing the cache hasn’t worked, try disabling your caching plugin temporarily to ensure it’s not interfering with your updates:

  1. Go to Plugins > Installed Plugins in your WordPress dashboard.
  2. Find your caching plugin and click Deactivate.
  3. Reload your site and check if the changes are now visible.

If the changes appear after deactivating the plugin, the caching plugin may need reconfiguration or updating.

5. Check for Plugin or Theme Conflicts

Sometimes, conflicts between plugins or themes can prevent updates from showing. To troubleshoot:

  1. Deactivate All Plugins: Go to Plugins > Installed Plugins and deactivate all plugins. Then, check if your changes are visible.
  2. Reactivate Plugins One-by-One: Reactivate each plugin one-by-one, checking the live site after each activation to pinpoint the conflicting plugin.
  3. Switch to a Default Theme: Temporarily switch to a default WordPress theme (e.g., Twenty Twenty-One) by going to Appearance > Themes.

If a plugin or theme conflict is identified, consider reaching out to the plugin or theme developer for support, or look for an alternative.

6. Publish or Update Your Page

If you’re making edits to a page or post and don’t see the changes, ensure the updates were actually published:

  1. Open the page or post you edited.
  2. Click the Update or Publish button on the right side of the editor.
  3. View your page in a new browser tab to confirm that the changes are now visible.

It’s easy to forget to publish changes after editing, so double-checking this step is a good habit.

7. Clear Your Server Cache

Many hosting providers use server-level caching to speed up your site. If changes aren’t appearing, try clearing the server cache via your hosting dashboard:

  1. Log in to your hosting provider’s dashboard (e.g., SiteGround, Bluehost, WP Engine).
  2. Locate the Cache Management section and find options to clear or purge the cache.
  3. Clear the server cache, then refresh your site to see if the changes have updated.

If you’re not sure where to find the cache clearing option, consult your host’s support documentation or reach out to their support team.

8. Disable Object Caching in WordPress

Object caching stores database queries, which can sometimes prevent dynamic content updates from showing immediately. To disable object caching:

  1. Check if your caching plugin has an Object Cache setting and disable it temporarily.
  2. Alternatively, use the Query Monitor plugin to identify caching issues at the database level.

This step can be particularly helpful if you’re making changes to dynamic content like menus, widgets, or custom fields.

9. Force Reload or Hard Refresh Your Site

A hard refresh forces the browser to reload the page from the server instead of using the cached version. You can do this by:

  • On Windows: Press Ctrl + F5.
  • On Mac: Press Command + Shift + R.

This action can help display your most recent updates by forcing a fresh reload.

10. Check for Delayed Propagation (If You Recently Migrated Your Site)

If you recently changed hosting providers or moved to a new domain, DNS propagation could delay your updates from appearing worldwide. This process can take up to 48 hours. In the meantime:

  1. Use tools like WhatsMyDNS.net to check DNS status and verify propagation.
  2. Consider clearing your local DNS cache to speed up the process:
    • On Windows: Open Command Prompt and type ipconfig /flushdns.
    • On Mac: Open Terminal and type sudo dscacheutil -flushcache.

If DNS propagation is causing the delay, you may need to wait a few hours before the changes are fully visible.

Conclusion

When changes aren’t visible on your WordPress site, it’s often due to caching, plugin conflicts, or propagation delays. By following the steps above—clearing caches, checking for conflicts, and ensuring your changes are published—you can quickly troubleshoot and resolve the issue. Staying proactive about these potential obstacles will help keep your site updated and user-friendly.

By choosing SternHost, you’re opting for premium domain registration, secure web hosting, and optimized WordPress hosting solutions designed for high performance and reliability.

Let SternHost handle the backend, so you can focus on delivering a flawless experience to your audience. Get started today and empower your website with SternHost


How to Check the HTTP Status Code of a Website

In web development and SEO, monitoring your website’s HTTP status codes is essential to ensure smooth functionality and detect issues early. HTTP status codes are three-digit numbers that indicate the outcome of a client’s request to a server. HTTP status codes are numerical codes sent by a web server in response to a request from a client, such as a browser or a bot. These codes help indicate whether a request was successful, if it needs redirection, or if there was an error. Common status codes include 200 OK (successful), 404 Not Found (resource not found), and 500 Internal Server Error (server issue).

Why Are HTTP Status Codes Important?

Checking HTTP status codes is essential for:

  • Diagnosing Errors: Knowing the status codes of your web pages helps you identify and resolve issues like broken links (404 errors) or server-side problems (500 errors).
  • Improving User Experience: Addressing HTTP errors ensures users can access your content without issues.
  • SEO Benefits: Google and other search engines penalize websites with frequent errors. By monitoring and correcting status codes, you can maintain a healthy SEO ranking.

How to Check the HTTP Status Code of a Website

There are several ways to check HTTP status codes, including browser tools, online tools, command line methods, and WordPress plugins. Let’s look at each option in detail.

  1. Using Browser Developer Tools

Most modern browsers come with built-in developer tools that allow you to view HTTP status codes. Here’s how to check them using Google Chrome:

  1. Open Google Chrome and navigate to the webpage you want to check.
  2. Right-click on the page and select Inspect or press Ctrl+Shift+I.
  3. In the Developer Tools panel, go to the Network tab.
  4. Reload the page to capture all network requests.
  5. Check the Status column in the Network tab to see the HTTP status codes for each request.

This method is quick and provides a detailed view of each request made by the page, allowing you to identify any problematic status codes.

  1. Using Online HTTP Status Code Checkers

Several free online tools allow you to check the HTTP status code of a URL instantly. Some popular options include:

  • HTTP Status.io: Allows you to check status codes for multiple URLs at once.
  • CheckMyStatusCode.com: Simple and user-friendly, perfect for quick checks.
  • Online Status Code Checker by SEOptimer: Great for quick single URL checks and other SEO insights.

To use an online checker:

  • Go to the tool’s website.
  • Enter the URL you want to check.
  • Click on Check or Analyze.
  • The tool will display the HTTP status code along with other useful details about the response.
  1. Using Command Line Tools (cURL and HTTPie)

For developers or advanced users, command-line tools like cURL and HTTPie provide a fast and efficient way to check HTTP status codes.

Checking Status Code with cURL

cURL is a popular command-line tool that you can use to make HTTP requests and see the status code:

  1. Open your terminal or command prompt.Type the following command and replace URL with the URL you want to check:
curl -I URL

Press Enter. The output will show the HTTP headers, including the HTTP status code.

Checking Status Code with HTTPie

HTTPie is an alternative to cURL that’s more user-friendly:

Install HTTPie if you don’t already have it installed:

pip install httpie
  1. Type the following command in your terminal, replacing URL with your URL:
http URL

Press Enter. You’ll see the HTTP response, including the status code.

  1. Using WordPress Plugins

If you have a WordPress site, you can use plugins to check HTTP status codes across your site easily. Some popular plugins include:

  • Redirection: This plugin lets you monitor 404 errors and manage redirections, making it easy to detect and fix broken links.
  • Yoast SEO: Yoast SEO includes a feature to identify crawl errors on your website, such as 404 errors.

To check HTTP status codes with Redirection:

  1. Install and activate the Redirection plugin.
  2. Go to Tools > Redirection in your WordPress dashboard.
  3. Check the 404s tab for a list of broken links and their status codes.
  1. Using SEO Audit Tools

SEO audit tools can perform a complete analysis of your site’s HTTP status codes and provide a report of any errors or redirects. Some popular SEO audit tools include:

  • Google Search Console: Provides insights into crawl errors and page status codes.
  • Ahrefs Site Audit: Identifies 404 errors, redirects, and other status code issues.
  • Screaming Frog SEO Spider: Allows you to crawl your website and review status codes for all URLs.

Using these tools, you can track HTTP status codes across your site and optimize your pages for better SEO performance.


Common HTTP Status Codes to Watch For

Here are some key HTTP status codes you may encounter and should monitor regularly:

  • 200 OK: The request was successful.
  • 301 Moved Permanently: The resource has been permanently moved to a new URL.
  • 302 Found: The resource is temporarily located at a different URL.
  • 404 Not Found: The requested resource cannot be found, indicating a broken link.
  • 500 Internal Server Error: The server encountered an unexpected condition.
  • 503 Service Unavailable: The server is currently unavailable, often due to maintenance or overload.

Conclusion

Checking HTTP status codes is essential for maintaining a healthy, user-friendly website. By understanding the significance of status codes, you can diagnose and resolve issues before they impact user experience and SEO rankings. From browser developer tools and online checkers to command-line utilities and WordPress plugins, a variety of methods are available to check HTTP status codes effectively.

SternHost’s scalable and secure hosting plans ensure that your website remains online, even during unexpected issues. Looking for a reliable hosting partner? Try SternHost for superior hosting, domain registration, and WordPress hosting solutions tailored to your needs.


HTTP Status Codes Categories and Their Importance

Whenever you navigate the web, your browser communicates with servers using HTTP (Hypertext Transfer Protocol). During this exchange, servers send HTTP status codes that indicate the outcome of your request, providing insight into whether it succeeded, encountered an issue, or requires further action. This guide breaks down HTTP status codes, their categories, and provides a detailed list to enhance your understanding.

What Are HTTP Status Codes?

HTTP status codes are three-digit responses sent by servers to show the result of a client’s request. These codes play a crucial role in web development, helping diagnose issues, interpret server responses, and refine user experience.

Categories of HTTP Status Codes

HTTP status codes are grouped based on their first digit, each signifying a specific response type:

  1. 1xx (Informational): Indicates that the request was received and is still being processed.
  2. 2xx (Successful): Shows the request was successfully processed and the client’s request was fulfilled.
  3. 3xx (Redirection): Alerts that additional action is required, often involving redirection to a new URL.
  4. 4xx (Client Error): Reflects issues with the client’s request, such as syntax errors or unauthorized access.
  5. 5xx (Server Error): Signals that the server failed to process a valid request, typically due to server-side issues.

Comprehensive List of HTTP Status Codes

1xx: Informational

  • 100 Continue: The server received the headers, and the client may proceed to send the request body.
  • 101 Switching Protocols: The server is changing protocols at the client’s request.

2xx: Successful

  • 200 OK: The request was completed successfully.
  • 201 Created: The request led to a new resource creation.
  • 202 Accepted: The server has accepted the request but hasn’t completed it.
  • 204 No Content: The server successfully processed the request with no content to return.

3xx: Redirection

  • 301 Moved Permanently: The resource has been permanently moved to a new URL.
  • 302 Found: The resource is temporarily located elsewhere.
  • 304 Not Modified: The cached version should be used as the resource hasn’t changed.

4xx: Client Error

  • 400 Bad Request: The server couldn’t process the request due to invalid syntax.
  • 401 Unauthorized: Authentication is required to access the resource.
  • 403 Forbidden: The request is understood but denied authorization.
  • 404 Not Found: The server can’t find the requested resource.
  • 408 Request Timeout: The server timed out while waiting for the client’s request.

5xx: Server Error

  • 500 Internal Server Error: An unexpected error prevented the server from fulfilling the request.
  • 502 Bad Gateway: The server received an invalid response from an upstream server.
  • 503 Service Unavailable: The server is temporarily overloaded or down for maintenance.
  • 504 Gateway Timeout: The upstream server didn’t respond in time.

Conclusion

HTTP status codes are vital for web diagnostics and development, aiding in the identification of issues and refining the user journey. By understanding and categorizing these codes, you can more effectively troubleshoot issues and optimize the performance of your website, resulting in smoother server-client interactions. By choosing SternHost, you’re opting for premium domain registration, secure web hosting, and optimized WordPress hosting solutions designed for high performance and reliability.

Let SternHost handle the backend, so you can focus on delivering a flawless experience to your audience. Get started today and empower your website with SternHost


How to Fix 403 Forbidden Errors on WordPress

A 403 Forbidden error on your WordPress site can be a major roadblock, stopping users from accessing your content. This error occurs when the server understands the request but denies permission, disrupting your site’s accessibility. A 403 Forbidden error indicates that access to the requested resource has been denied by the server. This error can affect various parts of your site, including specific pages, the admin area, or the entire site. The root causes often lie in file permissions, server settings, or security protocols.

Frequent Causes of 403 Forbidden Errors

Identifying the typical causes of a 403 Forbidden error can help narrow down the issue. Here are common triggers for this error on WordPress:

  1. Incorrect File Permissions: The most frequent reason, often due to improper permission settings.
  2. .htaccess File Errors: Corrupt or misconfigured .htaccess files can prevent access.
  3. IP Blockage: Security plugins or server configurations may inadvertently block specific IP addresses.
  4. Plugin Conflicts: Some security or caching plugins may unintentionally restrict access.
  5. Server Configuration Issues: Misconfigured server settings may cause access denial.
  6. Hotlink Protection: Enabling hotlink protection can restrict direct access to certain files.

Step-by-Step Solutions for Fixing 403 Forbidden Errors on WordPress

1. Adjust File Permissions

File permissions define who can access or modify your server’s files. To correct any issues:

  • Use FTP or your hosting provider’s File Manager to connect to your server.
  • Locate your WordPress installation folder.
  • Set permissions as follows:
    • Folders: 755
    • Files: 644
  • If permissions are incorrect, right-click the folder or file, select File Permissions, and adjust accordingly.

2. Rename or Reset the .htaccess File

A corrupted .htaccess file can lead to access issues. Here’s how to reset it:

  • Access your site via FTP or File Manager.
  • In the root WordPress directory, find the .htaccess file.
  • Rename it to .htaccess_old for backup.
  • In your WordPress dashboard, go to Settings > Permalinks.
  • Click “Save Changes” to create a new .htaccess file.
  • Revisit your site to check if the error is resolved.

3. Temporarily Disable Plugins

Some plugins, especially security or caching ones, may mistakenly block access. To identify conflicts:

  • Log into the WordPress dashboard.
  • Navigate to Plugins > Installed Plugins.
  • Deactivate all plugins via bulk actions.
  • If the error resolves, reactivate plugins one by one to pinpoint the conflicting plugin.

4. Review Security Plugin Settings

If using a security plugin (e.g., Wordfence, Sucuri), ensure that your IP address isn’t blocked. You can also disable the plugin temporarily to see if the error clears up.

5. Clear Browser Cache

Sometimes, cached versions of your site can cause issues. Clear your browser cache, or open the site in an incognito window to rule out cache-related problems.

6. Verify IP Blockage

Hotlink protection or firewall settings might restrict your IP. You can verify this by contacting your hosting provider or reviewing your security plugin’s settings.

7. Reach Out to Your Hosting Provider

If these solutions don’t work, the issue might stem from server restrictions. Contact your hosting provider’s support team for further investigation into server configurations or access limitations.

Conclusion

While a 403 Forbidden error on WordPress can be challenging, following these troubleshooting steps can help you restore access. By adjusting file permissions, resetting the .htaccess file, and verifying security settings, you’ll have your site up and running in no time.

SternHost’s scalable and secure hosting plans ensure that your website remains online, even during unexpected issues. Looking for a reliable hosting partner? Try SternHost for superior hosting, domain registration, and WordPress hosting solutions tailored to your needs.

How to Fix “Unable to Upload Images” Errors on WordPress

This error usually surfaces when trying to upload images, blocking their addition to your WordPress library. Factors like file permissions, memory limits, or server restrictions often trigger this problem. Here’s a closer look at some typical causes:

  1. File Permission Conflicts: Incorrect server permissions may block WordPress from accessing your uploads folder.
  2. Upload Size Limits: Image file sizes exceeding the host’s upload limit can trigger upload issues.
  3. PHP Memory Exhaustion: A full memory allocation can prevent the site from processing new uploads.
  4. Corrupt .htaccess File: Errors within this file can cause various disruptions, including upload errors.
  5. Plugin Compatibility Issues: Certain plugins may interfere with media upload processes.
  6. Outdated WordPress Version: Compatibility issues can arise when WordPress isn’t updated.

Step-by-Step Solutions for Fixing the Error

Now that we understand the potential causes, here’s how to resolve the issue:

1. Adjust File Permissions
File permissions on your server determine access rights. Incorrect settings in the uploads folder may prevent image uploads. To correct permissions:

    • Access your site using FTP or File Manager.
    • Go to /wp-content/uploads/.
    • Set folder permissions to 755 and files to 644.
    • Modify settings if needed by right-clicking, selecting File Permissions, and saving changes.

2. Increase Maximum Upload Size
If image files exceed your upload limit, increase it by editing .htaccess or php.ini:

  1.  For .htaccess:
    • Open .htaccess in WordPress’s root directory.
php_value upload_max_filesize 64M

php_value post_max_size 64M

php_value memory_limit 256M
  • Save changes and attempt your upload again.

b. For php.ini:

  •  Open php.ini and adjust:
upload_max_filesize = 64M

post_max_size = 64M

memory_limit = 256M
  • Save and restart your web server if necessary.

3. Increase PHP Memory Limit
        If memory limits are preventing uploads, increase the PHP memory allocation:

    • Edit wp-config.php.

        Add just before /* That’s all, stop editing! Happy blogging. */:

define('WP_MEMORY_LIMIT', '256M');
  • Save and test uploads again.

4. Regenerate the .htaccess File
A corrupted .htaccess file can trigger upload issues. To regenerate it:

    • Access your server with FTP or File Manager.
    • Rename .htaccess to .htaccess_old to back it up.
    • In your WordPress dashboard, go to Settings > Permalinks and click Save Changes to create a new .htaccess file.

5. Disable All Plugins
Plugin conflicts can cause upload errors. To identify the culprit:

    • Navigate to Plugins > Installed Plugins and deactivate all.
    • Test an upload. If successful, reactivate plugins one by one to locate the conflict.

6. Switch to a Default Theme
If plugins aren’t the issue, your theme might be. To test:

    • Go to Appearance > Themes and activate a default theme like Twenty Twenty-One.
    • Test uploading images again.

7. Update WordPress, Themes, and Plugins
Ensure compatibility by updating WordPress, themes, and plugins:

    • Check for updates under Dashboard > Updates and install any available ones.
    • After updates, attempt another image upload.

8. Review Server Configuration
If errors persist, consult your hosting provider. Possible server issues include:

    • PHP settings prevent uploads.
    • Firewall configurations blocking uploads.
    • Other server restrictions.

Conclusion

Fixing the “Unable to Upload Images” error on WordPress is typically straightforward with these steps. By reviewing file permissions, adjusting upload limits, disabling plugins, and keeping WordPress updated, you can quickly resolve this error and restore image uploading capability.

How to Add DNS Records in cPanel

The Domain Name System (DNS) helps translate domain names into server addresses. Different DNS records such as A, TXT, MX, CNAME, etc., each serve a unique function. For example, the A record links a domain to its IP address, while the MX record configures the domain’s mail server. If you need to add, edit, or delete DNS records in cPanel, follow these simple steps.

Adding DNS Records in cPanel:

1. Access your cPanel account using your login credentials (https://yourdomain.com/cpanel).

2. Go to the Domains section and click on Zone Editor.


3. Find the domain you want to manage, then click on Manage.


4. Select + Add Record to create a new DNS record.


5. Fill in the required fields:

    • Zone Name: Enter the correct zone name.
    • TTL (Time to Live): Set the time for DNS caching.
    • Record Type: Choose from options like A, TXT, MX, CNAME, etc.

6. Once completed, click on Save Record to apply the changes.

Editing DNS Records:

1. Log into cPanel with your username and password ( https://yourdomain.com/cpanel).

2. Head to DomainsZone Editor.


3. Choose the domain and click on Manage.


4. To modify a record, click the Edit button next to the corresponding DNS entry.


Removing DNS Records:

1. Log into cPanel (https://yourdomain.com/cpanel).

2. Navigate to DomainsZone Editor.

3. Select the domain you want to manage and click Manage.

4. Delete an existing DNS record by clicking the Delete button beside it.


Conclusion:

By following this guide, you should now be able to manage DNS records within cPanel, whether you’re adding, editing, or removing entries.

At SternHost, we offer 24/7 technical support to ensure your hosting experience is seamless. If you’re not yet using SternHost, our  team is ready to help you explore how we can enhance your web hosting experience.

How to Make Your WordPress Site Load Faster

Experiencing a slow WordPress site can be frustrating for both you and your visitors. Beyond just the inconvenience, a sluggish website can negatively impact your search engine rankings and reduce your conversion rates. Site speed plays a crucial role in SEO, and users are likely to leave if a page loads too slowly, resulting in a loss of traffic and potential revenue. In this article, we’ll examine the causes of a slow WordPress site and provide effective solutions to enhance your site’s speed.

Reasons Your WordPress Site Might Be Slow

There are multiple factors that could be contributing to your WordPress site’s slow performance. Here are some common culprits:

  1. Subpar Web Hosting: If you’re using low quality web hosting, your site may suffer from poor load times. Shared hosting, although affordable, can slow your site during peak traffic times due to limited resources (CPU, RAM, or bandwidth) provided by your hosting service.
  2. Unoptimized Images: Large, uncompressed images can drastically slow down your site. If images aren’t optimized for web use, they can increase your page’s load time, particularly on websites with heavy image usage like portfolios or e-commerce stores.
  3. Excessive Plugins: Having too many plugins installed especially poorly coded or outdated ones can slow down your site. Certain plugins may use up server resources, causing performance issues. Plugin conflicts can also exacerbate the problem.
  4. Bulky Themes: Not all themes are created with speed in mind. Some WordPress themes contain unnecessary features or scripts that bloat your site, leading to slower load times. Themes with excessive visual effects or animations often contribute to the problem.
  5. Lack of Caching: Without caching, your website must process every request from scratch, slowing down the response time. Caching reduces server load by storing static versions of your pages, allowing them to be delivered more quickly.
  6. Too Many HTTP Requests: Each visitor’s browser sends multiple HTTP requests to load files like images, scripts, and stylesheets. If your site makes too many of these requests, it can slow down the overall load time.
  7. External Scripts Overload: External scripts, such as ads, social sharing buttons, or embedded videos, can add to your site’s load time. Each additional script requires extra time to process, particularly if the external service is slow.
  8. Database Bloat: Over time, your WordPress database accumulates unnecessary data such as post revisions or spam comments that can slow down your site by making database queries take longer.

Steps to Speed Up Your WordPress Site

Once you’ve identified potential causes, it’s time to implement solutions. Below are actionable steps to improve your site’s speed:

  1. Choose a Quality Hosting Provider: Your hosting provider plays a pivotal role in your website’s performance. If you’re using shared hosting, consider upgrading to managed WordPress hosting or a VPS (Virtual Private Server) for enhanced resources and speed optimization. SternHost offers scalable hosting solutions tailored to your needs. Whether you choose Managed WordPress Hosting, VPS, or Cloud Hosting, you’ll enjoy unparalleled speed, security, and support.
  2. Optimize Images: Uncompressed images can bog down your site. Use image compression tools to reduce the file size without compromising quality. Plugins like Smush or ShortPixel can automatically optimize images as you upload them.
  3. Enable Caching: Using a caching plugin will significantly boost your site’s performance by storing static versions of your pages. Popular caching plugins include W3 Total Cache, WP Super Cache, and WP Rocket.
  4. Minify CSS and JavaScript: Minifying your CSS, JavaScript, and HTML files removes unnecessary characters and spaces from the code, reducing file sizes and speeding up load times. Plugins like Autoptimize and WP Rocket handle this automatically.
  5. Limit Plugin Usage: Deactivate and remove any unnecessary or outdated plugins. Stick to lightweight, well-maintained plugins that don’t drain your server’s resources.
  6. Switch to a Lightweight Theme: Choose a theme optimized for speed and avoid those with excessive features and animations. Lightweight themes like Astra, GeneratePress, or Neve are built for performance.
  7. Use a CDN (Content Delivery Network): A CDN helps distribute your site’s content across multiple servers worldwide. This reduces the time it takes to load your site for users in different geographic locations. Popular CDN providers include Cloudflare and KeyCDN.
  8. Clean Up Your Database: Use a plugin like WP-Optimize or Advanced Database Cleaner to remove unnecessary data from your WordPress database, such as spam comments, post revisions, and transients, improving overall performance.
  9. Limit External Scripts: Reduce the use of external scripts or configure them to load asynchronously so they don’t slow down the rest of your site’s content.
  10. Enable GZIP Compression: GZIP compression helps reduce the size of files sent from your server, leading to faster load times. This can be enabled through your hosting provider or caching plugins like W3 Total Cache or WP Rocket.

Conclusion

A slow WordPress site can negatively impact your user experience, search engine rankings, and ultimately, your business. But with the right hosting partner, speeding up your website is simple. SternHost’s powerful, optimized hosting solutions ensure your site runs fast and smoothly so you can focus on what really matters: growing your busin

How to Fix the White Screen of Death on WordPress

Understanding the White Screen of Death

The White Screen of Death refers to a scenario where your WordPress site shows an entirely blank white page. This issue may affect the whole site or only specific areas, such as the admin panel, making it impossible for you to log in. Unlike other errors, the WSOD does not display any visible error messages, complicating the identification of the underlying problem.

What Triggers the White Screen of Death?

The WSOD often arises when a script on your site exceeds the allocated memory limit, leading WordPress to malfunction. Other common causes include:

  • Plugin or Theme Conflicts: Incompatible or poorly coded themes or plugins can lead to the WSOD.
  • PHP Errors: Errors in your PHP code, including syntax mistakes, may trigger the white screen.
  • Memory Limit Exceeded: Insufficient memory for your WordPress installation can cause this issue.
  • Database Problems: A corrupted database can also result in a blank screen.

Steps to Resolve the White Screen of Death on your WordPress Site.

1. Deactivate Plugins

A plugin conflict is one of the most frequent reasons for the WSOD. To check if a plugin is at fault, try deactivating all of them:

  • Access your site files using FTP or your hosting provider’s File Manager.
  • Navigate to the wp-content folder and find the plugins directory.
  • Rename the plugins folder to something like “plugins_old”. This action will deactivate all plugins simultaneously.
  • Verify whether your site loads. If it does, one of your plugins is likely causing the issue.

To pinpoint the problematic plugin:

  • Rename the folder back to plugins.
  • Reactivate each plugin one at a time by renaming each plugin’s folder and testing your site after each reactivation.
  • Once you identify the faulty plugin, you can either delete it or reach out to the developer for help.

2. Switch to a Default WordPress Theme

If plugins aren’t the issue, your active theme may be responsible for the White Screen of Death. Changing to a default WordPress theme, like Twenty Twenty-One, can help determine if your theme is the problem:

  • Access your site files via FTP or the File Manager.
  • Go to wp-content/themes and rename your current theme folder to something like “theme_old”.
  • WordPress will revert to a default theme automatically.
  • Check if your site operates normally. If it does, your theme likely caused the WSOD. Update or replace it with a theme compatible with your WordPress version.

3. Increase PHP Memory Limit

Exceeding the memory limit on your site can lead to the White Screen of Death. Increasing the PHP memory limit may help fix this issue:

  • Open the wp-config.php file using FTP or File Manager.

Insert the following line of code just above the line that reads  /* That’s all, stop editing! Happy publishing. */:

define('WP_MEMORY_LIMIT', '256M');
  • Save the changes and refresh your website. If the white screen is gone, it was likely due to insufficient memory.

If your hosting provider imposes memory limits, you might need to contact them for an increase.

4. Enable Debugging Mode

Since the White Screen of Death often lacks error messages, activating WordPress Debugging Mode can assist in uncovering the issue:

  • Access your wp-config.php file.

Find this line:


define('WP_DEBUG', false); 

Change it to:


define('WP_DEBUG', true);
define('WP_DEBUG_LOG', true);
define('WP_DEBUG_DISPLAY', false);

Save the file. WordPress will create a debug.log file in the wp-content folder. Open this file to view any PHP errors that may be contributing to the issue.

Once you identify the problem, resolve the error, disable debug mode by reversing the changes, and refresh your site.

5. Clear Browser Cache or CDN Cache

Sometimes, the WSOD might appear due to cached data. Clearing your browser cache or your CDN cache (if using a service like Cloudflare) may resolve the problem:

  • Clear your browser cache through your browser settings by selecting the option to remove cached files.
  • If you use a CDN, log into your CDN provider’s dashboard and clear the cache from there.

6. Inspect for Syntax Errors in Your Code

If you’ve recently modified your theme’s functions.php file or installed a custom plugin, there could be a syntax error causing the WSOD.

  • Use an FTP client to navigate to your wp-content/themes/ directory.
  • If you altered the functions.php file recently, revert the changes or check for syntax errors such as missing semicolons or brackets.
  • For any added custom plugins or code snippets, review them for potential coding mistakes that might be causing the white screen.

7. Restore from a Backup

If none of the previous solutions work, restoring a backup of your site may resolve the White Screen of Death. Most hosting providers offer regular backups, or you can use a backup plugin if you have one installed.

  • Access your backups through your hosting provider’s control panel.
  • Select a backup version from before the WSOD incident and restore it.
  • Check if the issue is resolved.

8. Contact Your Hosting Provider

If you’re still experiencing the White Screen of Death after trying all the above methods, the problem could be related to your hosting environment. Reach out to your hosting provider’s support team for assistance. At SternHost, we pride ourselves on offering 24/7 customer support to help you troubleshoot any issues you may face.

Conclusion

The White Screen of Death on WordPress can be frustrating, but it’s often fixable with a bit of troubleshooting. From disabling plugins to increasing memory limits and enabling debugging, these steps can help you quickly identify and resolve the issue. Regularly backing up your website and keeping themes and plugins up to date can also help prevent future occurrences of the WSOD.

By choosing SternHost for your web hosting and domain registration needs, you can ensure your WordPress site remains online and performs at its best. Ready to get your website back on track? Explore our hosting solutions today and enjoy seamless performance and exceptional support!


9 Smart Tips for Choosing the Perfect Domain Name

What is a Domain Name?

A domain name is the web address that users type in to reach your site, like www.yourbrand.com. It’s how customers find you online, and it represents your brand in the digital space. Domains consist of a name (e.g., “yourbrand”) and an extension (e.g., “.com”). SternHost makes it simple to search for available domain names, and when you find the right one, you can secure it instantly—complete with hosting to get your site live in no time.

Why Your Domain Name Matters

Your domain name is critical for creating a strong first impression. It affects how easily people can find your site, how memorable your brand is, and even your SEO rankings. A great domain name can:

  • Build Trust and Credibility: A memorable, professional domain boosts your brand’s credibility. With SternHost, registering a domain and hosting your site on fast, secure servers guarantees a smooth user experience.
  • Improve SEO Performance: Domains that include relevant keywords can improve search engine rankings. SternHost’s domain search tools allow you to check availability based on SEO-friendly terms, making it easy to find a name that aligns with your business goals.

Tips To Help You Choose The Perfect Domain Name.

1. Keep It Short and Simple

The most effective domain names are easy to remember and spell. Aim for fewer than 15 characters to ensure easy recall and reduce the risk of typos. Once you’ve found the right short and simple name, register it quickly to avoid losing it to someone else.

2. Use Relevant Keywords

Incorporating relevant keywords in your domain can boost your search engine rankings. For instance, if you sell handcrafted jewelry, having keywords like “jewelry” or “handcrafted” in your domain helps search engines understand your site.

3. Ensure It’s Easy to Pronounce and Spell

An intuitive domain name is easier for visitors to remember and share. When you choose a name that’s easy to say and spell, it’s more likely to stick in your audience’s mind.

4. Avoid Numbers and Hyphens

Using numbers or hyphens can create confusion, as people often forget them or mix them up when typing your URL. Stick to clean, easy-to-type names.

5. Choose the Right Domain Extension

While .com is the gold standard for most businesses, other extensions like .net, .org, or country-specific options may work better for your brand. SternHost offers a wide range of domain extensions, allowing you to find the perfect match. Plus, with SternHost’s integrated hosting packages, you can pair your new domain with a reliable hosting solution that matches your business’s needs.

6. Think Long-Term

Choose a domain name that will stand the test of time. Your domain should reflect your business’s future growth, not just current trends. 

7. Make It Brandable

Your domain should be unique and easy to brand. Combining words or using catchy alliteration can make it more memorable. SternHost’s domain suggestion tool can help you find creative, brandable domain names that stand out from the competition.

8. Check Availability on Social Media

Consistency across your online presence is key. Make sure your domain name is available on major social platforms. SternHost not only helps you check domain availability but also provides tips on securing the same name across social media channels, ensuring cohesive branding across the web.

9. Act Fast

Great domain names get snapped up quickly, so once you’ve found the right one, don’t wait—register it immediately with SternHost. Our fast, secure domain registration process lets you lock in your desired name and hosting package with just a few clicks, ensuring you don’t miss out.