Archive

Boosting Website Performance: Caching, CDNs, and Optimization Tips

A fast-loading website not only improves user experience but also boosts your search engine rankings, customer engagement, and conversion rates. At Sternhost, we’re committed to helping you achieve peak website performance. In this guide, we provide actionable advice on optimizing content, implementing caching mechanisms, and leveraging Content Delivery Networks (CDNs) to keep your website lightning-fast.

1. Optimize Your Website Content

Image Optimization

  • Compression:
    Use tools like TinyPNG or ImageOptim to reduce file sizes without sacrificing quality.
  • Proper Formats:
    Convert images to modern formats like WebP, which offer superior compression.
  • Lazy Loading:
    Implement lazy loading so that images only load when they come into view, reducing the initial page load time.

Minify Code

  • HTML, CSS, and JavaScript:
    Remove unnecessary characters (like spaces and comments) using minification tools such as UglifyJS or Minify Code.
  • Combine Files:
    Reduce the number of HTTP requests by combining multiple CSS or JavaScript files into one.

Efficient Database Management

  • Regular Cleanups:
    Clean up your database by removing outdated or unnecessary data.
  • Indexing:
    Optimize queries with proper indexing, which can drastically improve response times.

For more detailed strategies on optimizing content and databases, check our Database Optimization Guide.

2. Implement Caching Strategies

Browser Caching

  • Leverage Browser Caching:
    Instruct web browsers to store static files locally using .htaccess rules or via your CMS caching plugins. This means repeat visitors experience faster load times since their browser doesn’t have to re-download unchanged resources.
  • Set Expiry Headers:
    Configure cache-control headers to specify how long web browsers should cache resources.

Server-Side Caching

  • Use Caching Plugins:
    For WordPress users, plugins like WP Super Cache or W3 Total Cache generate static HTML files from your dynamic content, drastically reducing page load times.
  • Object Caching:
    Employ object caching mechanisms such as Redis or Memcached to cache database queries and reduce server load.

At Sternhost, our hosting environment is optimized to support advanced caching strategies, ensuring your site runs smoothly even during traffic spikes.

3. Leverage Content Delivery Networks (CDNs)

Why Use a CDN?

  • Faster Load Times:
    CDNs distribute your content across multiple servers globally, reducing the distance data must travel to reach your visitor.
  • Reduced Server Load:
    Offload traffic from your main server, which can improve overall performance and reliability.
  • Improved Security:
    Many CDNs offer additional security features, such as DDoS protection and secure token authentication, to keep your website safe.

How to Implement a CDN

  • Choose a Provider:
    Popular options include Cloudflare, Akamai, and Amazon CloudFront. Sternhost also partners with leading CDN providers to ensure seamless integration.
  • Configure DNS Settings:
    Update your DNS records to point to the CDN. This step is often automated if you’re using a hosting plan that includes CDN integration.
  • Test and Monitor:
    After implementing a CDN, use tools like Google PageSpeed Insights to verify performance improvements.

For a more comprehensive walkthrough on setting up a CDN, visit our Sternhost CDN Integration Guide.

4. Monitor, Test, and Refine

Performance Monitoring Tools

  • Google Analytics & PageSpeed Insights:
    Regularly review your site’s performance metrics to identify areas for improvement.
  • Real User Monitoring (RUM):
    Tools like New Relic or Pingdom can provide insights into real-world load times and performance issues.

Continuous Improvement

  • A/B Testing:
    Experiment with different caching configurations and CDN settings to see what works best for your site.
  • Regular Audits:
    Make performance audits part of your routine maintenance to keep up with changing web standards and visitor expectations.

Conclusion

Improving your website’s performance doesn’t have to be overwhelming. By optimizing content, implementing robust caching strategies, leveraging CDNs, and continuously monitoring your site, you can create a faster, more efficient online presence that keeps your visitors engaged. At Sternhost, our state-of-the-art hosting solutions are designed to support these best practices, giving you the tools you need to succeed in today’s digital landscape.

Ready to boost your website’s performance? Visit Sternhost today to explore our hosting plans and expert support services.


Optimize your website, captivate your audience, and let Sternhost power your digital success!

How to Set Up Your Domain Name with Sternhost

How to Set Up Your Domain Name with Sternhost

Establishing a strong online presence starts with your domain name. At Sternhost, we make it easy to register a new domain, transfer an existing one, and configure your DNS settings to ensure your website is accessible to the world. Follow this step-by-step tutorial to set up your domain name with ease and get your website up and running in no time.

Step 1: Register a New Domain

1.1 Visit the Sternhost Domain Registration Page

  • Go to Sternhost:
    Start by visiting our Domain Registration Page to explore available domain options.
  • Search for Your Domain:
    Use the domain search tool to find the perfect domain name that reflects your brand. Our search tool displays availability and suggests alternative names if your preferred choice is taken.

1.2 Complete the Registration Process

  • Select Your Domain:
    Once you’ve chosen your domain, add it to your cart.
  • Fill Out Your Details:
    Provide the necessary contact and billing information. Ensure all details are accurate to avoid issues later on.
  • Finalize Registration:
    Complete your purchase and check your email for a confirmation message. Your new domain is now registered with Sternhost!

Step 2: Transfer an Existing Domain

If you already own a domain and want to transfer it to Sternhost, follow these simple steps:

2.1 Prepare Your Domain for Transfer

  • Unlock Your Domain:
    Log in to your current registrar’s dashboard and unlock your domain. This allows the transfer process to proceed smoothly.
  • Obtain the EPP Code:
    Request the EPP (transfer authorization) code from your current registrar. This code is required to verify your ownership of the domain.

2.2 Initiate the Domain Transfer

  • Start the Transfer:
    Go to the Sternhost Domain Transfer Page and enter your domain name along with the EPP code.
  • Verify Ownership:
    Follow the prompts to verify your identity and confirm the transfer. Sternhost will handle the rest, and you’ll receive an email confirmation once the transfer is complete.
  • Wait for Propagation:
    Domain transfers can take a few days to complete. During this period, your domain may experience a brief downtime, but Sternhost ensures minimal disruption.

Step 3: Configure DNS Settings

Properly configuring DNS settings is crucial to ensuring that visitors can access your website without any issues. Here’s how to set up your DNS settings with Sternhost:

3.1 Access the DNS Management Tool

  • Log in to Your cPanel:
    Once your domain is registered or transferred, log in to your Sternhost cPanel.
  • Navigate to DNS Zone Editor:
    In cPanel, locate the DNS Zone Editor under the Domains section. This tool allows you to manage your DNS records efficiently.

3.2 Add or Modify DNS Records

  • A Records:
    Point your domain to your website’s IP address. Enter the IP provided by Sternhost and assign it to your domain.
  • CNAME Records:
    Use CNAME records for subdomains. For example, if you want blog.yourdomain.com to point to your main website or a separate hosting service, add the appropriate CNAME record.
  • MX Records:
    Configure your email settings by updating your Mail Exchanger (MX) records. Ensure that your email services are routed through the correct server.
  • TXT Records:
    Add TXT records to verify domain ownership or to set up email security protocols like SPF, DKIM, and DMARC.

3.3 Save Your Changes

  • Review and Save:
    After making the necessary changes, review your DNS settings and click Save. It might take a few hours for changes to propagate globally.

Additional Resources

  • Sternhost Knowledgebase:
    For more detailed guides and troubleshooting tips, visit our Knowledgebase.
  • Customer Support:
    If you encounter any issues, our dedicated support team is available 24/7 at Sternhost Support.
  • Domain Management Tips:
    Check out our blog post on Optimizing Your Website’s DNS Settings for advanced strategies to enhance website performance.

Conclusion

Setting up your domain name with Sternhost is a streamlined process that empowers you to build a professional online presence. Whether you’re registering a new domain, transferring an existing one, or configuring DNS settings, Sternhost provides the tools and support you need to get started quickly and efficiently.

Ready to secure your domain and launch your website? Visit Sternhost today and take the first step toward establishing your online identity!


Get online with confidence—let Sternhost handle your domain setup and website management for a seamless digital experience.

Migrating Your Website to Sternhost: A Step-by-Step Guide

Transferring your website to a new host can seem daunting, but with Sternhost, the process is streamlined and efficient. In this guide, we’ll walk you through every step of migrating your website from another host to Sternhost, while providing practical tips to minimize downtime and ensure a smooth transition.

Why Migrate to Sternhost?

Migrating your website to Sternhost offers numerous benefits:

  • Reliable Performance: Enjoy fast loading times and high uptime.
  • Robust Security: Benefit from advanced security features that protect your data.
  • Expert Support: Access our 24/7 support team to assist you throughout the migration process.
  • User-Friendly Tools: Our intuitive cPanel and migration tools simplify the transfer process.

Learn more about our hosting features on the Sternhost homepage.

Step 1: Prepare for Migration

1.1 Backup Your Website Data

Before starting the migration, create a complete backup of your website files and databases. This ensures you have a secure copy of your data in case anything goes wrong.

  • Files Backup: Use FTP or the File Manager in your current host’s control panel.
  • Database Backup: Export your database using tools like phpMyAdmin.

For detailed backup instructions, check out our Backup and Restore Procedures.

1.2 Gather Essential Information

Collect all the necessary details, including:

  • Your current website’s FTP/SFTP credentials.
  • Database access details (host, username, password).
  • Any custom configurations or settings used by your website.

Step 2: Set Up Your Sternhost Account

2.1 Sign Up or Log In to Sternhost

If you haven’t already, sign up for a Sternhost account at Sternhost.com. If you’re an existing customer, simply log in to your control panel.

2.2 Choose the Right Hosting Plan

Select a hosting plan that matches your website’s needs—whether it’s shared hosting, VPS, or dedicated hosting. Sternhost offers flexible solutions to accommodate various sizes and types of websites.

Step 3: Transfer Your Website Files

3.1 Upload Website Files to Sternhost

  • Access Sternhost’s cPanel: Log in and navigate to the File Manager.
  • Upload Files: Transfer your website files to the public_html directory or your designated folder using the File Manager or FTP client.

3.2 Import Your Database

  • Create a New Database: In cPanel, create a new MySQL database and user. Assign the user to the database with full permissions.
  • Import Data: Use phpMyAdmin in cPanel to import your previously backed-up database file.

For a comprehensive guide on managing databases, see our Database Optimization tutorial.

Step 4: Update DNS Settings

4.1 Change Your Domain’s Nameservers

To point your domain to Sternhost:

  • Access Your Domain Registrar: Log in to your domain registrar’s dashboard.
  • Update Nameservers: Replace the old nameservers with Sternhost’s nameservers (e.g., ns1.sternhost.com and ns2.sternhost.com).

4.2 Allow Time for Propagation

DNS changes can take anywhere from a few minutes to 48 hours to propagate globally. During this period, your website might be intermittently accessible.

For more tips on configuring DNS settings, visit our DNS Management Guide.

Step 5: Test Your Website

5.1 Verify Functionality

  • Check Website Pages: Ensure that all pages load correctly.
  • Test Forms and Scripts: Confirm that interactive elements, like contact forms and dynamic scripts, work as expected.

5.2 Monitor Performance

Use tools like Google Analytics and Google PageSpeed Insights to monitor your website’s performance and ensure it meets your expectations on Sternhost.

Tips to Minimize Downtime

  • Plan the Migration During Low-Traffic Periods: Schedule the migration during off-peak hours to reduce the impact on your visitors.
  • Keep the Old Host Active: Maintain your website on the old host until you’ve fully tested the new setup on Sternhost.
  • Inform Your Audience: Notify your users in advance about the migration and potential brief disruptions.
  • Use a Staging Environment: Test the migration on a staging server first, then go live once you’re confident everything works perfectly.

Additional Resources

Conclusion

Migrating your website to Sternhost doesn’t have to be a complex process. By following these step-by-step instructions and utilizing our robust tools, you can transfer your website with minimal downtime and enjoy the benefits of a fast, secure, and reliable hosting environment.

Ready to migrate? Visit Sternhost today and take the first step toward enhancing your online presence!


Empower your website with Sternhost—where seamless migration meets superior performance.

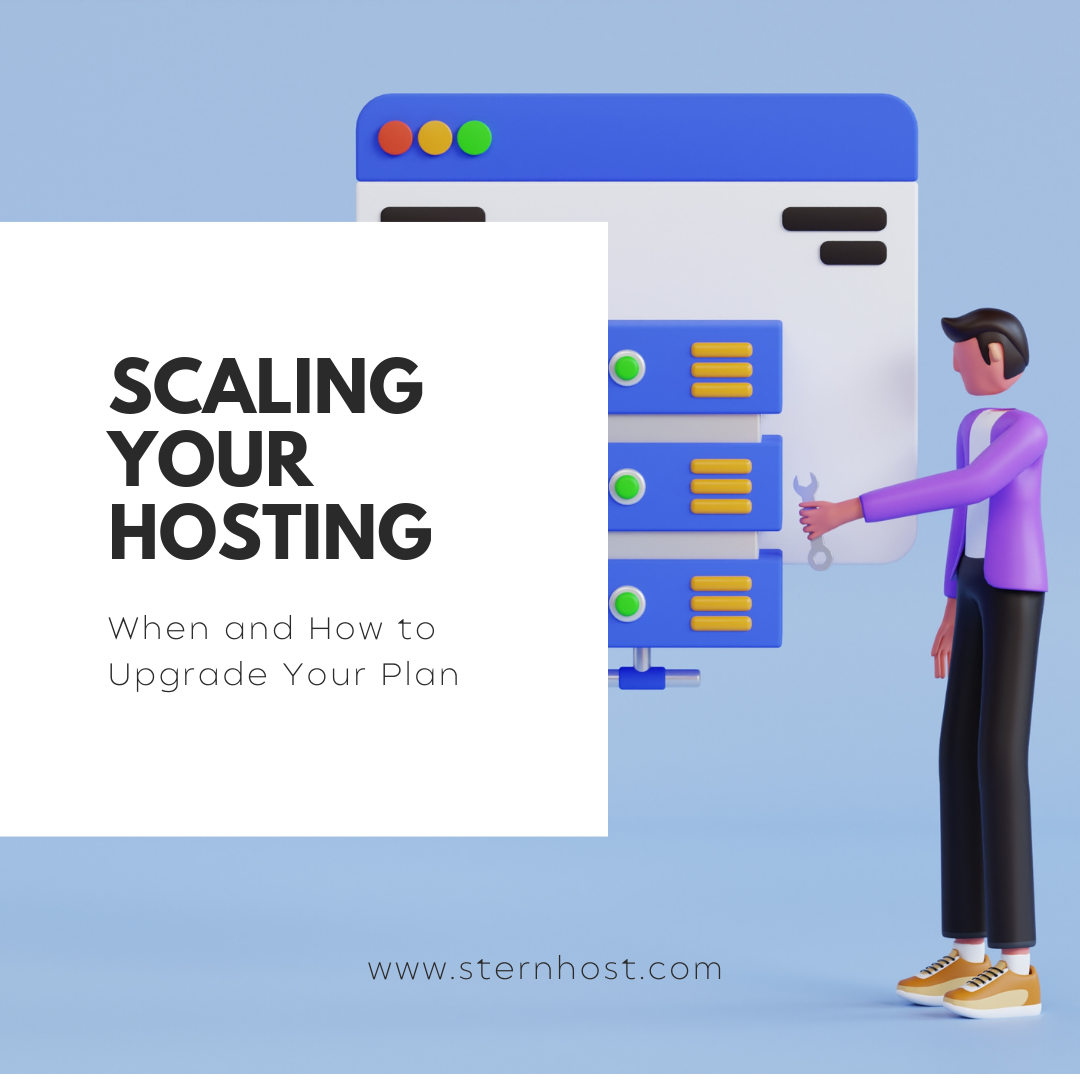
Scaling Your Hosting: When and How to Upgrade Your Plan

As your website grows, so do your hosting needs. At Sternhost, we understand that scaling your hosting environment is crucial for maintaining performance, security, and user experience. In this guide, we’ll discuss the signs that indicate it’s time to upgrade, explain the differences between shared, VPS, and dedicated hosting, and provide tips on how to make a smooth transition.

When Is It Time to Upgrade?

Upgrading your hosting plan can be a game changer for your website. Here are some key signs it’s time to scale:

1. Increased Traffic and Resource Usage

  • Traffic Spikes: If your website experiences consistent traffic increases or seasonal spikes, your current shared hosting might struggle to handle the load.
  • Slow Loading Times: Noticeable lag or slow response times are strong indicators that your hosting plan is being overtaxed.
  • High Resource Consumption: Regular alerts about exceeding bandwidth, CPU, or memory limits suggest it’s time for an upgrade.

2. Website Expansion and New Features

  • E-commerce Growth: Expanding your online store with more products, payment gateways, and enhanced security requires additional resources.
  • Interactive Features: Implementing dynamic features such as real-time data, forums, or live streaming can put extra strain on shared hosting environments.

3. Performance and Security Concerns

  • Downtime Issues: Frequent downtime or instability can result from an overloaded server.
  • Enhanced Security Needs: As your business grows, so does the need for advanced security measures that may not be available on lower-tier plans.

For more on website performance indicators, check out our Website Performance Guide.

Understanding Hosting Options: Shared vs. VPS vs. Dedicated

Choosing the right hosting plan is essential for scaling your website effectively. Here’s a breakdown of the three main hosting options available at Sternhost:

1. Shared Hosting

  • Overview:
    Shared hosting is an economical solution where your website shares server resources with other sites.
  • Ideal For:
    Small websites, blogs, and startups with low to moderate traffic.
  • Pros:
    Cost-effective, easy to manage, and requires minimal technical knowledge.
  • Cons:
    Limited resources, potential for slower performance during traffic spikes, and lower customization options.

2. VPS Hosting (Virtual Private Server)

  • Overview:
    VPS hosting provides a virtualized environment with dedicated resources allocated to your website.
  • Ideal For:
    Growing websites that need more control, better performance, and enhanced security.
  • Pros:
    Greater scalability, improved performance over shared hosting, and more customization.
  • Cons:
    Higher cost than shared hosting and may require basic technical skills to manage.

3. Dedicated Hosting

  • Overview:
    With dedicated hosting, you rent an entire physical server exclusively for your website.
  • Ideal For:
    High-traffic websites, large enterprises, and resource-intensive applications.
  • Pros:
    Maximum control, high performance, and advanced security options.
  • Cons:
    Higher cost and requires advanced technical knowledge or professional management.

Learn more about these hosting options on our Hosting Comparison Page.

How to Make a Smooth Transition

Upgrading your hosting plan doesn’t have to be disruptive. Follow these steps to ensure a seamless transition:

1. Assess Your Current Needs

  • Analyze Traffic and Resource Usage:
    Use monitoring tools like Google Analytics and your cPanel statistics to understand your resource consumption.
  • Plan for Future Growth:
    Estimate future traffic trends and consider upcoming website features that may require additional resources.

2. Choose the Right Upgrade

  • Consult with Experts:
    Contact Sternhost’s support team for personalized recommendations based on your current and future needs.
  • Select the Appropriate Plan:
    Decide whether you need to switch to VPS or dedicated hosting, or simply upgrade within your current category.

3. Backup Your Data

  • Create Comprehensive Backups:
    Before initiating any migration, ensure you have a full backup of your website files and databases.
    Refer to our Backup and Restore Guide for detailed instructions.

4. Migrate Your Website

  • Plan the Migration:
    Schedule the migration during off-peak hours to minimize the impact on your users.
  • Follow Step-by-Step Instructions:
    Use Sternhost’s migration tools or follow our detailed migration guide to transfer your data seamlessly.
  • Test Thoroughly:
    After migration, test your website to ensure that all functionalities work as expected.

5. Monitor Performance Post-Upgrade

  • Track Performance:
    Use performance monitoring tools to evaluate improvements and ensure your website is stable.
  • Seek Support if Needed:
    Don’t hesitate to reach out to Sternhost support if you encounter any issues during or after the transition.

Conclusion

Scaling your hosting is an essential step for growing your online presence. Recognizing the signs of needing an upgrade, understanding the differences between shared, VPS, and dedicated hosting, and following a structured migration process can help you make a smooth transition with minimal downtime. With Sternhost’s reliable hosting solutions and expert support, you can confidently upgrade your hosting plan and continue providing a seamless experience for your visitors.

Ready to scale up? Visit Sternhost today to explore our hosting plans and get personalized guidance on the best solution for your business.


Empower your website with scalable hosting solutions from Sternhost—where performance meets reliability.

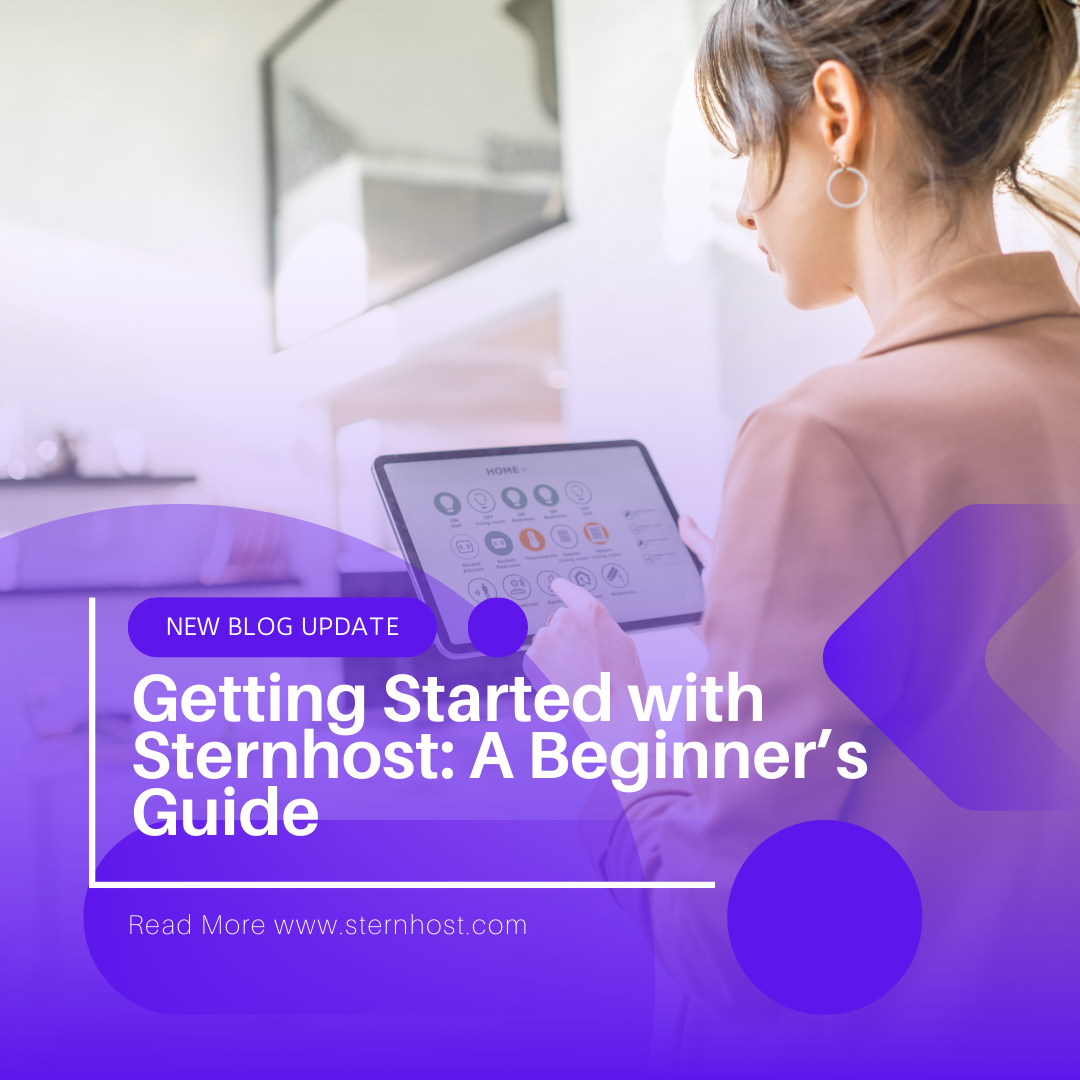
Getting Started with Sternhost: A Beginner’s Guide

Welcome to Sternhost! Whether you’re launching your first website or migrating from another provider, this guide is designed to help you get started quickly and confidently. In this beginner-friendly guide, we’ll walk you through the process of signing up, navigating the cPanel control panel, and understanding the hosting environment so you can harness the full power of Sternhost.

Why Choose Sternhost?

At Sternhost, we believe in making web hosting simple, secure, and scalable. Here’s why our platform is the perfect choice for beginners:

  • User-Friendly Interface: Our intuitive cPanel allows you to manage your website with ease.
  • Reliable Performance: Enjoy fast loading speeds, high uptime, and robust security features.
  • 24/7 Expert Support: Our dedicated support team is always available to help you overcome any challenges.

Discover more about our hosting plans on our Sternhost homepage.

Step 1: Signing Up with Sternhost

Getting started is as easy as 1-2-3. Follow these simple steps to create your Sternhost account:

  1. Visit Our Website:
    Go to Sternhost.com and click on the “Sign Up” or “Get Started” button.
  2. Choose Your Hosting Plan:
    Whether you need shared hosting for a small blog, VPS hosting for growing projects, or dedicated hosting for large-scale operations, Sternhost offers a range of plans to suit your needs. Select the plan that fits your business requirements and budget.
  3. Complete the Registration Form:
    Fill in your details, choose a domain name (or transfer an existing one), and set your password. Our straightforward registration process ensures you’re ready to launch your website in no time.
  4. Confirm Your Email:
    After registration, check your inbox for a confirmation email. Follow the provided link to activate your account and gain full access to your hosting dashboard.

Step 2: Navigating the cPanel Control Panel

Once you’re signed up, it’s time to explore your hosting environment. Sternhost’s cPanel is designed for both beginners and advanced users.

Key Features of cPanel:

  • Dashboard Overview:
    The cPanel dashboard provides a snapshot of your hosting account, including resource usage, website statistics, and security alerts.
  • Email Management:
    Easily create and manage professional email accounts. Access tutorials on how to set up email accounts and configure clients within our Email Management Guide.
  • Domain and DNS Settings:
    Manage your domains, subdomains, and DNS records effortlessly. Our intuitive interface allows you to point your domain to your website with just a few clicks.
  • File Manager:
    Upload, edit, and organize your website files directly through the File Manager without needing FTP software.
  • One-Click Installations:
    Get your website up and running quickly with one-click installs for popular content management systems like WordPress, Joomla, and Drupal.

Take a moment to familiarize yourself with these features—each tool is designed to empower you to build and manage your website efficiently.

Step 3: Understanding Your Hosting Environment

Your hosting environment is the backbone of your website’s performance and reliability. Here’s what you need to know:

Types of Hosting Offered by Sternhost:

  • Shared Hosting:
    Ideal for beginners and small websites, shared hosting offers a cost-effective solution with all the essential features you need.
  • VPS Hosting:
    For growing websites that require more control and resources, our VPS hosting provides dedicated resources in a virtualized environment.
  • Dedicated Hosting:
    If your business demands high performance and maximum security, dedicated hosting gives you a full server tailored to your needs.

Key Concepts:

  • Uptime:
    A reliable hosting provider like Sternhost ensures that your website remains online 99.9% of the time. This is critical for both search engine rankings and customer trust.
  • Security:
    With features like automated backups, SSL certificates, and advanced firewalls, your website is safeguarded against threats.
  • Scalability:
    As your website grows, Sternhost makes it easy to upgrade your hosting plan without downtime or disruption.

Learn more about the differences in hosting plans by visiting our Hosting Comparison Guide.

Additional Resources and Next Steps

Now that you’re familiar with signing up, navigating the cPanel, and understanding your hosting environment, you’re well on your way to launching a successful website. Here are a few more resources to help you on your journey:

  • Sternhost Knowledgebase:
    Explore detailed tutorials, troubleshooting guides, and expert tips to maximize your website’s performance.
  • Customer Support:
    If you have any questions or run into issues, our 24/7 support team is here to assist you.
  • Getting Started Webinar:
    Join our free webinars to learn more about web hosting, website optimization, and digital marketing strategies.

Conclusion

Starting your online journey with Sternhost is simple, even if you’re new to web hosting. By following this guide, you’ll quickly learn how to sign up, navigate your control panel, and understand the hosting environment that powers your website. With reliable performance, robust security, and expert support, Sternhost is here to help you succeed every step of the way.

Ready to get started? Visit Sternhost today and take the first step toward building your online presence!

Empower your digital journey with Sternhost—where simplicity meets reliability.

How to Prevent Website Downtime and Keep Your Business Running 24/7

In today’s digital world, website downtime can mean lost revenue, damaged reputation, and frustrated customers. For businesses that rely on an online presence, keeping your website up and running 24/7 is critical. In this post, we’ll explore practical strategies to prevent downtime, ensure reliability, and maintain business continuity—all with the support of Sternhost’s advanced hosting solutions.

The Cost of Downtime

Every minute your website is offline, potential customers are lost. Downtime not only hurts your bottom line but also affects your search engine rankings and overall customer trust. According to Forbes, even a short period of downtime can cost businesses thousands of dollars. By prioritizing uptime, you protect your revenue and reputation.

Strategies to Prevent Website Downtime

1. Choose a Reliable Hosting Provider

Selecting a robust hosting provider is the foundation for preventing downtime. Sternhost offers:

  • High Uptime Guarantees: Benefit from 99.9% uptime with redundant server architecture.
  • 24/7 Monitoring: Continuous server monitoring ensures issues are detected and resolved quickly.
  • Expert Support: Access to a dedicated support team available around the clock.

For more details on our hosting plans, visit the Sternhost website.

2. Utilize a Content Delivery Network (CDN)

A CDN distributes your website’s content across multiple global servers, reducing latency and the risk of server overload. This ensures that even if one server faces issues, your website remains accessible from other locations. Learn more about the benefits of CDNs on Cloudflare’s website.

3. Regular Backups and Redundancy

Automated backups are your safety net. By scheduling regular backups, you ensure that your website can be quickly restored in the event of an outage. Sternhost offers:

  • Automated Daily Backups: Protect your data without manual intervention.
  • Off-Site Storage Options: Keep backups separate from your primary server for extra security.

Explore our backup solutions to learn how we help maintain business continuity.

4. Implement Robust Security Measures

Security breaches can lead to unexpected downtime. Prevent downtime by:

  • Installing an SSL Certificate: Encrypt data and boost customer trust.
  • Using Firewalls and DDoS Protection: Guard against cyberattacks that can overwhelm your site.
  • Regular Security Audits: Identify and resolve vulnerabilities before they cause harm.

For more on website security, visit our Sternhost Knowledgebase.

5. Optimize Website Performance

A slow website can crash during traffic spikes. To keep your website performing at its best:

  • Optimize Images and Code: Compress images and minify CSS/JS to speed up load times.
  • Database Optimization: Regularly clean and optimize your database for efficient data retrieval.
  • Scalable Hosting: Choose hosting solutions that allow you to scale resources as your traffic grows.

Check out Google’s PageSpeed Insights for recommendations on optimizing your website.

6. Monitor Your Website 24/7

Continuous monitoring is essential to detect issues early. Use monitoring tools that:

  • Track Uptime: Receive alerts when your site goes down.
  • Analyze Performance: Identify slow-loading pages or server errors.
  • Provide Real-Time Insights: Act quickly before small issues escalate.

Many monitoring tools integrate seamlessly with hosting platforms, ensuring you’re always in the know.

How Sternhost Helps Keep Your Business Running

At Sternhost, we understand that uptime is critical for your business. Our hosting solutions are engineered to provide:

  • Robust Infrastructure: Designed to handle high traffic and sudden surges.
  • Advanced Security Measures: Keep your website safe from cyber threats.
  • Automated Backups & Monitoring: Ensure your data is secure and your site is continuously monitored.

With Sternhost as your hosting partner, you can focus on growing your business while we take care of keeping your website online and performing at its best.

Conclusion

Preventing website downtime is essential for maintaining customer trust and ensuring that your business operates smoothly around the clock. By choosing a reliable hosting provider like Sternhost, implementing a CDN, optimizing performance, and setting up robust security and backup protocols, you can significantly reduce the risk of downtime.

Ready to ensure your website is always available? Visit Sternhost today to explore our hosting plans and learn how we can help you keep your business running 24/7.

Stay proactive, protect your online presence, and never miss a business opportunity due to downtime.

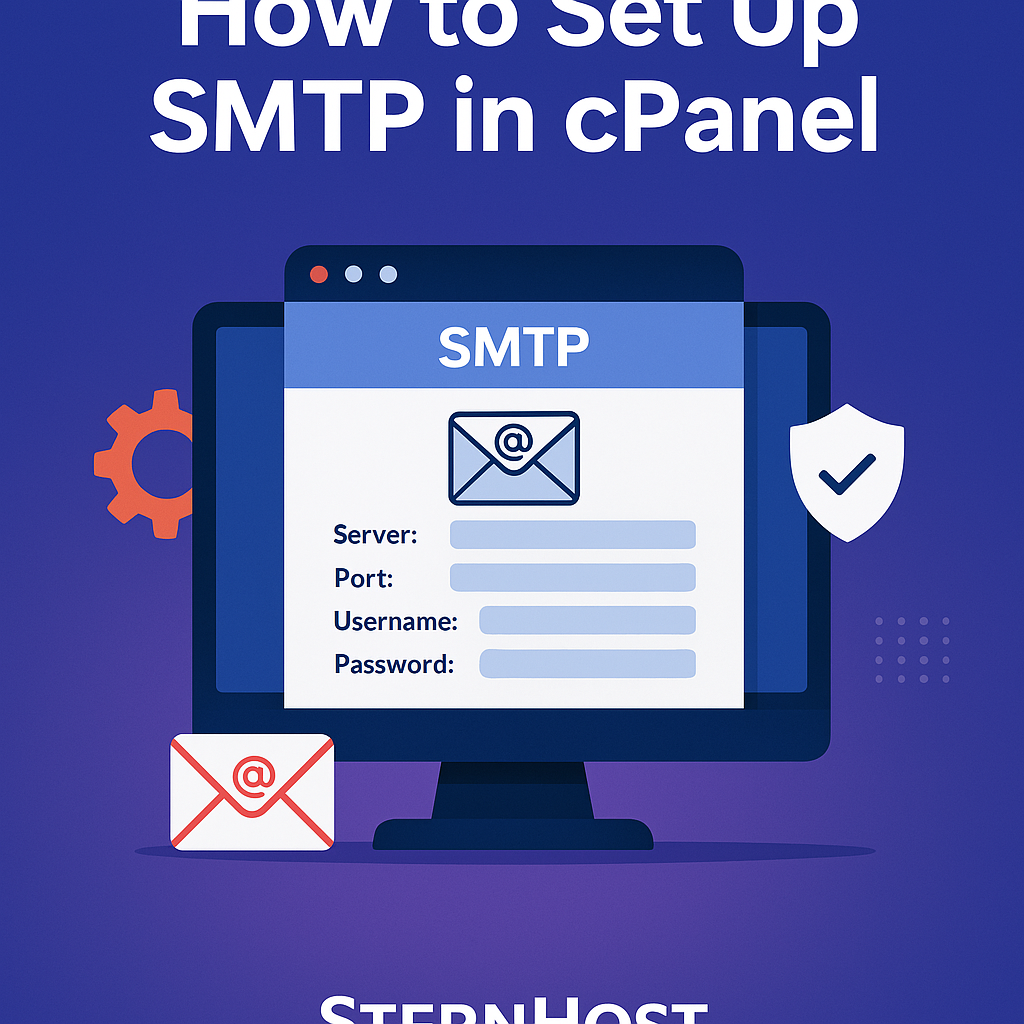
How to Set Up SMTP in cPanel with Sternhost

Ensuring your email communications are reliable and secure is essential for any business. With Sternhost’s robust hosting solutions, setting up SMTP in cPanel is a straightforward process that enhances your email delivery and credibility. This step-by-step guide will walk you through configuring your SMTP settings in cPanel for seamless email transmission, ensuring your messages reach inboxes safely and efficiently.

Why Configure SMTP?

SMTP (Simple Mail Transfer Protocol) is the backbone of email communication. Configuring SMTP in your cPanel account allows you to:

  • Send Emails Securely: Use encryption to protect your email data.
  • Improve Deliverability: Reduce the risk of your emails being marked as spam.
  • Establish Professional Communication: Use custom domain email addresses that boost your brand’s credibility.

By setting up SMTP correctly, you can ensure your business communications remain professional and effective. Learn more about how secure email practices improve your online reputation on the Sternhost Blog.

Step-by-Step Guide to Setting Up SMTP in cPanel

Step 1: Log In to Your Sternhost cPanel Account

  1. Access cPanel:
    Visit sternhost.com and log in to your cPanel account using your credentials.
  2. Navigate to the Email Section:
    Once inside, locate the Email Accounts section to begin the configuration process.

Step 2: Create or Locate Your Email Account

  1. Create an Email Account (if needed):
    • Click on Create and fill in the required fields with your desired email address and password.
    • Choose the appropriate domain if you have multiple domains registered.
  2. Existing Email Accounts:
    If you already have an email account set up, simply select it from the list to proceed with SMTP configuration.

Step 3: Access Email Client Configuration

  1. Find Configuration Settings:
    In the Email Accounts section, click on Connect Devices or Set Up Mail Client next to the email address you wish to configure.
  2. Manual Settings:
    Choose the Manual Settings option to view SMTP server details. Sternhost provides complete settings, including incoming and outgoing server information.

Step 4: Configure Your SMTP Settings

Use the information provided by Sternhost in your cPanel:

  • SMTP Server:
    Typically, this is in the format mail.yourdomain.com.
  • SMTP Port:
    Common ports include 465 for SSL and 587 for TLS. Sternhost recommends using the secure port for enhanced encryption.
  • Username and Password:
    Use your full email address as the username and the corresponding password.

Step 5: Set Up Your Email Client

Configure your preferred email client (e.g., Outlook, Thunderbird, Apple Mail) with the SMTP settings:

  1. Incoming and Outgoing Settings:
    Input the SMTP server details under the outgoing server settings.
  2. Enable Authentication:
    Ensure that the option for “My outgoing server (SMTP) requires authentication” is selected.
  3. Use Secure Connection:
    Choose SSL/TLS for encryption based on the port number provided.

For detailed client-specific instructions, refer to our Sternhost Email Configuration Guide.

Troubleshooting Common SMTP Issues

Even with a streamlined process, you might encounter some common issues. Here are a few troubleshooting tips:

  • Incorrect Port Settings:
    Double-check that you’re using port 465 for SSL or 587 for TLS.
  • Authentication Errors:
    Verify that your username is the full email address and that the password is correct.
  • Firewall or Antivirus Blockage:
    Ensure that your firewall or antivirus software isn’t blocking the SMTP port.

If issues persist, Sternhost’s 24/7 expert support is ready to assist. Contact our support team via Sternhost Support for personalized help.

Conclusion

Setting up SMTP in cPanel with Sternhost is a critical step toward improving your email deliverability and maintaining professional communication with your customers. With clear, secure settings and robust support, Sternhost makes it easy for both beginners and experienced users to configure SMTP correctly.

Ready to enhance your email setup and boost your business communications? Visit Sternhost today to get started and explore our comprehensive hosting solutions.

Optimize your email delivery, enhance your communication, and experience the power of secure hosting with Sternhost.

Why Your Website Is Not Showing on Google (And How to Fix It!)

If your website isn’t appearing on Google, it can feel like you’re invisible online. In today’s digital landscape, being discoverable on Google is essential for business success. In this guide, we’ll explore common reasons why your website might not be showing up in search results and provide step-by-step solutions to help you get indexed and climb the search rankings—all while leveraging Sternhost’s reliable hosting solutions to improve your website’s performance.


Common Reasons Your Website Isn’t Indexed

1. No Sitemap or Incomplete Sitemap

A sitemap is a roadmap of your website that helps search engines find and index your pages. Without a complete, updated sitemap, Google might have trouble understanding your site’s structure.

2. Blocked by Robots.txt

Your website’s robots.txt file tells search engine crawlers which pages to ignore. If misconfigured, it can inadvertently block Google from indexing your site.
Read more about robots.txt on Google’s Search Central.

3. No Google Search Console Submission

Google Search Console is a free tool that helps you monitor and troubleshoot your site’s presence on Google. Without submitting your site, you miss out on valuable insights and indexing requests.

4. Poor Website Content and Structure

Thin or duplicate content, broken links, and poor site architecture can hinder Google’s ability to crawl and index your website effectively.

5. Slow Website Performance

A slow-loading website can negatively impact your search rankings. With Sternhost’s high-performance hosting, your site can load quickly, offering a better user experience and improved SEO.


How to Fix Indexing Issues

1. Submit Your Sitemap to Google Search Console

  • Create or Update Your Sitemap: Ensure your sitemap is comprehensive and current.
  • Submit to Google: Log into Google Search Console and submit your sitemap URL. This helps Google quickly discover your new or updated pages.
  • Internal Link: For more tips on optimizing your website, visit our Sternhost Knowledgebase.

2. Review and Update Your Robots.txt File

  • Check for Errors: Use tools like Google’s Robots Testing Tool to ensure that your robots.txt file isn’t accidentally blocking search engines.
  • Allow Important Pages: Make sure that your essential pages are accessible to crawlers.

3. Improve Website Content and Structure

  • Enhance Content Quality: Create unique, informative, and engaging content that meets your audience’s needs.
  • Fix Broken Links: Regularly audit your site to identify and fix broken or dead links.
  • Optimize Meta Tags: Use proper title tags, meta descriptions, and header tags to clearly communicate your content’s relevance.

4. Boost Website Performance

  • Fast and Secure Hosting: Choose a hosting provider like Sternhost that offers fast loading speeds, reliable uptime, and robust security.
  • Optimize Images and Files: Compress images and streamline code to ensure your site loads efficiently.
  • External Link: Check out Google’s PageSpeed Insights for suggestions on improving site speed.

5. Use Google Search Console Insights

  • Monitor Indexing Status: Regularly review Google Search Console for indexing errors, crawl stats, and performance metrics.
  • Resolve Issues Promptly: Address any issues or warnings provided by Google to ensure that your site remains in good standing.

Why Sternhost Is Your Partner in SEO Success

At Sternhost, we understand the importance of both website performance and SEO. Our hosting solutions are designed to support fast loading times, robust security, and excellent uptime—critical factors that contribute to higher search rankings. With our 24/7 expert support, you can quickly resolve any hosting or performance issues, ensuring your site remains visible and competitive online.

Conclusion

Not showing up on Google can be frustrating, but with the right approach, you can overcome indexing challenges and boost your website’s visibility. By submitting a complete sitemap, reviewing your robots.txt file, improving your content quality, and ensuring your site is fast and secure, you’ll pave the way for better search rankings and more organic traffic.

Ready to enhance your website’s performance and SEO? Visit Sternhost today and discover how our hosting solutions can support your digital success.

Boost your online presence and let your website shine on Google with these simple fixes and Sternhost’s state-of-the-art hosting solutions!